Angular 17 Multiple Image Upload with Preview Example

Hello Artisan,
Today, we're going to talk about uploading multiple images with a preview in Angular 17. Let's explore how to do this using reactive forms. You'll gain insights into the process of uploading multiple images in Angular 17.
I'll provide a straightforward example starting from scratch, demonstrating how to upload multiple images with a reactive form in an Angular 17 application.
To achieve this, we'll create a reactive form using formGroup. When the input file changes, we'll add images to another formGroup element. After clicking the submit button, we'll use a web API to store the images on the server.
I've documented a step-by-step guide on image uploading in an Angular 17 application, and I've also developed web services using PHP.
Step for Multiple Image Upload in Angular 17 Application
- Step 1: Create Angular 17 Project
- Step 2: Create Image Upload Component
- Step 3: Import Component
- Step 4: Use New Component
- Step 5: Create API Endpoint
- Run Angular App
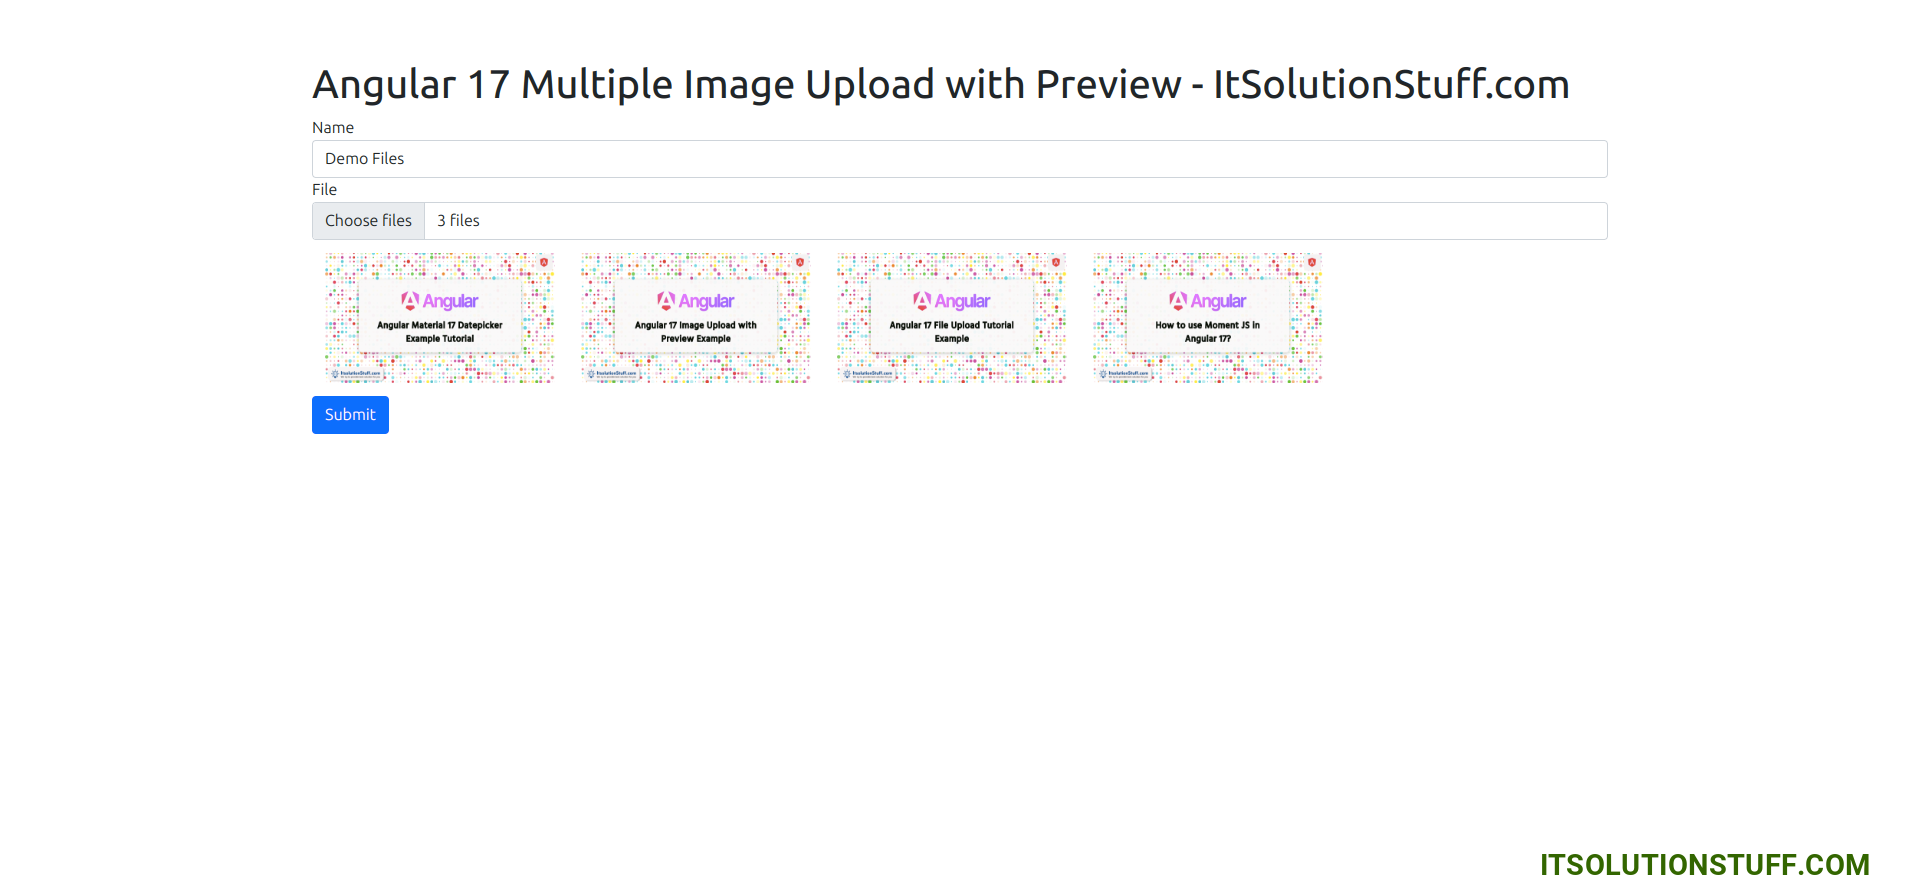
so let's follow the bellowing steps and get a preview as below:
Step 1: Create Angular 17 Project
You can easily create your angular app using below command:
ng new my-new-app
Step 2: Create Image Upload Component
Here, we need to create new image upload component using following command:
ng g c ImageUpload
Now, we need to update component ts file and HTML file as following way.
Now we need to update our component.ts file with formGroup and formControl element.
i used my local api file url http://localhost:8001/upload.php, you can use your api there.
so, let's update as like bellow:
src/app/image-upload/image-upload.component.ts
import { Component } from '@angular/core';
import { CommonModule } from '@angular/common';
import { FormsModule, ReactiveFormsModule } from '@angular/forms';
import { FormGroup, FormControl, Validators } from '@angular/forms';
import { HttpClientModule, HttpClient } from '@angular/common/http';
@Component({
selector: 'app-image-upload',
standalone: true,
imports: [CommonModule, FormsModule, ReactiveFormsModule, HttpClientModule],
templateUrl: './image-upload.component.html',
styleUrl: './image-upload.component.css'
})
export class ImageUploadComponent {
images : any = [];
/*------------------------------------------
--------------------------------------------
Declare Form
--------------------------------------------
--------------------------------------------*/
myForm = new FormGroup({
name: new FormControl('', [Validators.required, Validators.minLength(3)]),
file: new FormControl('', [Validators.required]),
fileSource: new FormControl('', [Validators.required])
});
/*------------------------------------------
--------------------------------------------
Created constructor
--------------------------------------------
--------------------------------------------*/
constructor(private http: HttpClient) { }
/**
* Write code on Method
*
* @return response()
*/
get f(){
return this.myForm.controls;
}
/**
* Write code on Method
*
* @return response()
*/
onFileChange(event:any) {
if (event.target.files && event.target.files[0]) {
var filesAmount = event.target.files.length;
for (let i = 0; i < filesAmount; i++) {
var reader = new FileReader();
reader.onload = (event:any) => {
console.log(event.target.result);
this.images.push(event.target.result);
this.myForm.patchValue({
fileSource: this.images
});
}
reader.readAsDataURL(event.target.files[i]);
}
}
}
/**
* Write code on Method
*
* @return response()
*/
submit(){
console.log(this.myForm.value);
this.http.post('http://localhost:8001/upload.php', this.myForm.value)
.subscribe(res => {
console.log(res);
alert('Uploaded Successfully.');
})
}
}
Now here, we will update our HTML file. we will create a simple reactive form with an input file element and image tag for preview.
In this file I used bootstrap 5 class, if you want to use bootstrap then you can follow this link: Install Bootstrap 5 in Angular 17
so let's put bellow code:
src/app/image-upload/image-upload.component.html
<h1>Angular 17 Multiple Image Upload with Preview - ItSolutionStuff.com</h1>
<form [formGroup]="myForm" (ngSubmit)="submit()">
<div class="form-group">
<label for="name">Name</label>
<input
formControlName="name"
id="name"
type="text"
class="form-control">
<div *ngIf="f['name'].touched && f['name'].invalid" class="alert alert-danger">
<div *ngIf="f['name'].errors && f['name'].errors['required']">Name is required.</div>
<div *ngIf="f['name'].errors && f['name'].errors['minlength']">Name should be 3 character.</div>
</div>
</div>
<div class="form-group">
<label for="file">File</label>
<input
formControlName="file"
id="file"
type="file"
class="form-control"
multiple=""
(change)="onFileChange($event)">
<div *ngIf="f['file'].touched && f['file'].invalid" class="alert alert-danger">
<div *ngIf="f['file'].errors && f['file'].errors['required']">File is required.</div>
</div>
</div>
<img *ngFor='let url of images' [src]="url" height="150" width="200px" style="margin: 3px;"> <br/>
<button class="btn btn-primary" [disabled]="myForm.invalid" type="submit">Submit</button>
</form>
Step 3: Import Component
In this step, we need to import ImageUploadComponent to app.component.ts file. so let's import it as like below:
src/app/app.component.ts
import { Component } from '@angular/core';
import { CommonModule } from '@angular/common';
import { RouterOutlet } from '@angular/router';
import { ImageUploadComponent } from './image-upload/image-upload.component';
@Component({
selector: 'app-root',
standalone: true,
imports: [CommonModule, RouterOutlet, ImageUploadComponent],
templateUrl: './app.component.html',
styleUrls: ['./app.component.css']
})
export class AppComponent {
title = 'image-app';
}
Step 4: Use New Component
now, we will use new component on following html file.
src/app/app.component.html
<app-image-upload></app-image-upload>
Step 5: Create API Endpoint
Now we are ready to run our example, we will create an API file using PHP. so you can create update.php file with "upload" folder and run with different port and call it. so let's create an upload.php file as like bellow:
upload.php
<?php
header("Access-Control-Allow-Origin: *");
header("Access-Control-Allow-Methods: PUT, GET, POST");
header("Access-Control-Allow-Headers: Origin, X-Requested-With, Content-Type, Accept");
$folderPath = "upload/";
$postdata = file_get_contents("php://input");
$request = json_decode($postdata);
foreach ($request->fileSource as $key => $value) {
$image_parts = explode(";base64,", $value);
$image_type_aux = explode("image/", $image_parts[0]);
$image_type = $image_type_aux[1];
$image_base64 = base64_decode($image_parts[1]);
$file = $folderPath . uniqid() . '.'.$image_type;
file_put_contents($file, $image_base64);
}
Run PHP API:
php -S localhost:8001
Run PHP & Angular App:
All the required steps have been done, now you have to type the given below command and hit enter to run the Angular app:
Run Angular App:
ng serve
Now, Go to your web browser, type the given URL and view the app output:
http://localhost:4200
Now you can run and check it.
Output:

I hope it can help you...

