Angular 17 Template Driven Form with Validation Example

Hey everyone,
In this easy-to-follow guide, we'll explore template-driven forms in Angular 17. I'll break down the process of validating template-driven forms in a straightforward, step-by-step manner. Let's dive into working with Angular 17's template-driven forms, and I'll demonstrate how to validate a form upon submission.
Angular 17 comes with forms that allow us to manage user input using ngModel and ngSubmit. With Template-driven forms in Angular 17, you can create uncomplicated and fundamental forms.
If your Angular 17 application involves a basic form, I recommend using Template-driven Forms. Below, I've provided a simple example of Template-driven Forms with validation in Angular 17.
You need to follow the below step to create template driven form in angular 17.
Step for Template Driven Form in Angular 17
- Step 1: Create Angular 17 Project
- Step 2: Update Component ts File
- Step 3: Form with ngModel
- Run Angular App
You need to follow the below steps to create template-driven forms in angular 17.
Step 1: Create Angular 17 Project
To begin, create a new Angular app for this demonstration. If you've already created one, there's no need to initiate a new Angular 17 app.
ng new my-new-app
Step 2: Update Component ts File
Import the necessary modules, including FormsModule and ReactiveFormsModule from the '@angular/forms' library, in the app.component.ts file.
src/app/app.component.ts
import { Component } from '@angular/core';
import { CommonModule } from '@angular/common';
import { RouterOutlet } from '@angular/router';
import { FormsModule } from '@angular/forms';
@Component({
selector: 'app-root',
standalone: true,
imports: [CommonModule, RouterOutlet, FormsModule],
templateUrl: './app.component.html',
styleUrls: ['./app.component.css']
})
export class AppComponent {
title = 'firstApp';
submit(form:any){
var firstName = form.firstName;
console.log(firstName);
var lastName = form.lastName;
console.log(lastName);
var comment = form.comment;
console.log(comment);
}
}
Step 3: Form with ngModel
Implement the HTML form with ngModel. Bootstrap classes have been applied for styling.
I used bootstrap class on this form. if you want to add than then follow this link too: Install Bootstrap 5 to Angular 17.
src/app/app.component.html
<h1>Template Driven Forms Validation in Angular 17 Example - ItSolutionStuff.com</h1>
<form #contactForm="ngForm" (ngSubmit)="submit(contactForm.value)">
<div class="form-group">
<label for="firstName">First Name</label>
<input required minlength="3" maxlength="10" ngModel name="firstName" type="text" #firstName="ngModel" class="form-control" id="firstName">
<div class="alert alert-danger" *ngIf="firstName.touched && !firstName.valid">
<div *ngIf="firstName.errors && firstName.errors['required']">First Name is required.</div>
<div *ngIf="firstName.errors && firstName.errors['minlength']">First Name is minimum {{ firstName.errors && firstName.errors['minlength'].requiredLength }} character.</div>
<div *ngIf="firstName.errors && firstName.errors['maxlength']">First Name is maximum 10 character.</div>
</div>
</div>
<div class="form-group">
<label for="lastName">Last Name</label>
<input required ngModel name="lastName" type="text" #lastName="ngModel" class="form-control" id="lastName">
<div class="alert alert-danger" *ngIf="lastName.touched && !lastName.valid">
Last Name is required.
</div>
</div>
<div class="form-group">
<label for="comment">Comment</label>
<textarea required ngModel #comment="ngModel" name="comment" id="comment" cols="30" rows="10" class="form-control"></textarea>
<div class="alert alert-danger" *ngIf="comment.touched && !comment.valid">
Comment is required.
</div>
</div>
<button class="btn btn-primary" type="submit" [class.disabled]="!contactForm.valid">Submit</button>
</form>
Run Angular App:
All the required steps have been done, now you have to type the given below command and hit enter to run the Angular app:
ng serve
Now, Go to your web browser, type the given URL and view the app output:
http://localhost:4200
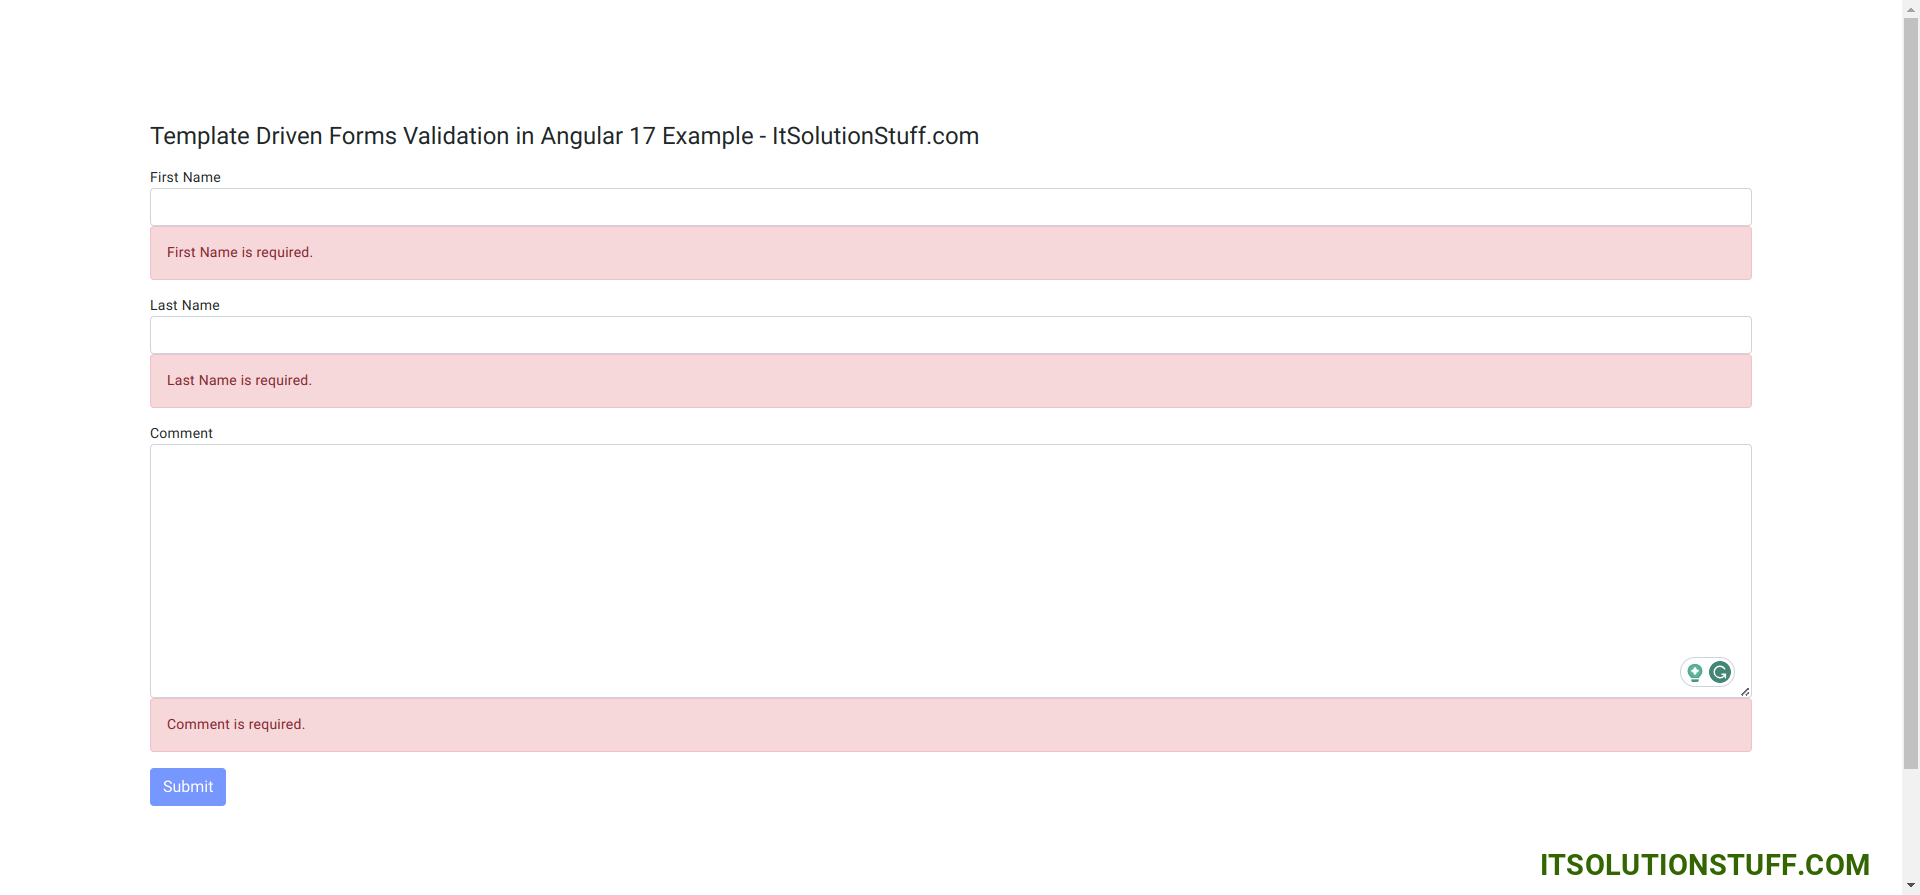
Output:
Now you can see layout as like bellow screen shot:
I hope it can help you...

