How to Install and Use CKEditor in Angular?
Hi Dev,
This article will provide some of the most important example how to use ckeditor in angular. Here you will learn how to install ckeditor in angular. In this article, we will implement a angular 9 ckeditor example. this example will help you angular ckeditor 4 example.
Sometime we need to use rich textbox in our application. so when you need to use rich textrea then i will always suggest ckeditor to use. ckeditor provide almost html element that you can user it like list, heading, form element, link, italic, old etc. so if you also want to install ckeditor in your anguar app then i will help you in this article.
Here, we will look step by step example how to use ckeditor in angular 6, angular 7, angular 8, angular 9, angular 10, angular 11, angular 12, angular 13, angular 14, angular 15, angular 16 and angular 17 application.
So, let's see very simple step and get it very simple example here:
Step 1: Create New App
You can easily create your angular application using bellow command:
ng new myApp
Step 2: Install Npm Packages
In this step, we will install ckeditor4-angular npm package for use ckeditr rich textarea in angular 8/9. so let's run bellow command:
npm install ckeditor4-angular
Step 3: Import CKEditorModule
Now, here we will import CKEditorModule from ckeditor4-angular and then we add on declarations part. so let's update app.module.ts file as like bellow:
src/app/app.module.ts
import { NgModule } from '@angular/core';
import { BrowserModule } from '@angular/platform-browser';
import { FormsModule } from '@angular/forms';
import { AppComponent } from './app.component';
import { CKEditorModule } from 'ckeditor4-angular';
@NgModule({
imports: [ BrowserModule, FormsModule, CKEditorModule ],
declarations: [ AppComponent ],
bootstrap: [ AppComponent ]
})
export class AppModule { }
Step 4: Update Ts File
Here, we will update app.component.ts file here, in this file we will set model default values and add onSubmit() function for getting textarea value.
You can update as bellow app.component.ts file.
src/app/app.component.ts
import { Component } from '@angular/core';
import {NgForm} from '@angular/forms';
@Component({
selector: 'my-app',
templateUrl: './app.component.html',
styleUrls: [ './app.component.css' ]
})
export class AppComponent {
name = 'Angular';
public model = {
name: 'Hardik',
description: '<p>This is a sample form using CKEditor 4.</p>'
};
onSubmit() {
console.log( `Form submit, model: ${ JSON.stringify( this.model ) }` );
}
}
Step 5: Update Layout File
Here, we will update html file as like bellow, so update it as like bellow:
src/app/app.component.html
<form (ngSubmit)="onSubmit()">
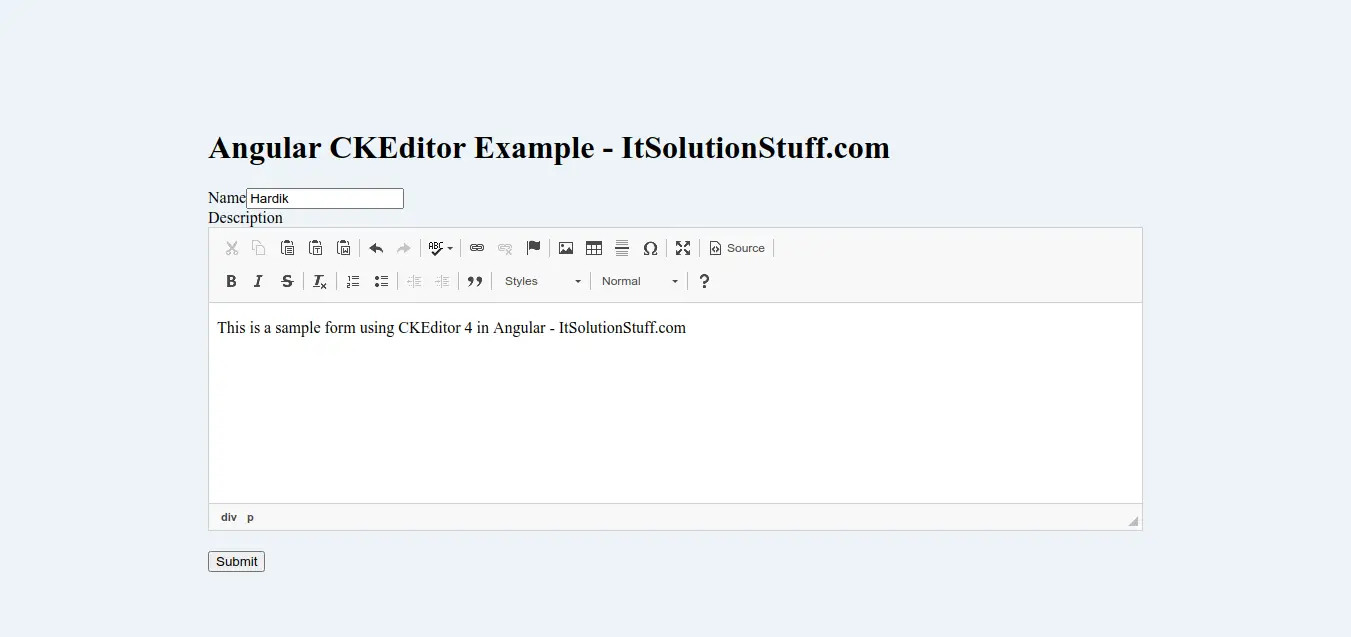
<h1>Angular CKEditor Example - ItSolutionStuff.com</h1>
<div>
<label for="name">Name</label>
<input [(ngModel)]="model.name" type="text" name="name" id="name">
</div>
<label for="description">Description</label>
<ckeditor
#editor
[(ngModel)]="model.description"
id="description"
name="description"
type="divarea">
</ckeditor>
<button type="submit">Submit</button>
</form>
Now you can run angular app:
Run Angular App:
ng serve
when you click on submit button then you will get output as like bellow:
Output:
Form submit, model: {"name":"Hardik","description":"<p>This is a sample form using CKEditor 4. sss</p>\n"}
I hope it can help you...

