Laravel Broadcast Redis Socket IO Tutorial
Today, out leading topic is event broadcasting with redis and socket.io in laravel application. i want to give you very simple example of laravel broadcast using rest and socket io in laravel application. you can send real time chat message using rest socket io and event broadcasting with laravel 6, laravel 7, laravel 8, laravel 9, laravel 10 and laravel 11 application.
Laravel provide event broadcasting topic. event broadcast is a very interesting and it's also difficult to implement with redis and socket.io as specially. but i will give you step by step instruction of how to send real time message with rest and socket io in laravel 6 application.
You need to just follow few step to done this following thing. so let's follow bellow steps and done as real time notification with laravel.
Step 1: Install Laravel 6
First of all, we need to get fresh Laravel 6 version application using bellow command because we are going from scratch, So open your terminal OR command prompt and run bellow command:
composer create-project --prefer-dist laravel/laravel blog
Step 2: Install predis
In this step, we need to install predis as bellow command. so let's run following command to install predis in laravel app.
composer require predis/predis
Step 3: Create Event
Here, we need to create event for broadcasting. in event file we need to set channel and send message array with key. so, let's run following command for creating event.
php artisan make:event SendMessage
app/Events/SendMessage.php
<?php
namespace App\Events;
use Illuminate\Broadcasting\Channel;
use Illuminate\Queue\SerializesModels;
use Illuminate\Broadcasting\PrivateChannel;
use Illuminate\Broadcasting\PresenceChannel;
use Illuminate\Foundation\Events\Dispatchable;
use Illuminate\Broadcasting\InteractsWithSockets;
use Illuminate\Contracts\Broadcasting\ShouldBroadcast;
use Illuminate\Contracts\Broadcasting\ShouldBroadcastNow;
class SendMessage implements ShouldBroadcastNow
{
use InteractsWithSockets, SerializesModels;
public $data = ['asas'];
/**
* Create a new event instance.
*
* @return void
*/
public function __construct()
{
}
/**
* Get the channels the event should broadcast on.
*
* @return \Illuminate\Broadcasting\Channel|array
*/
public function broadcastOn()
{
return new Channel('user-channel');
}
/**
* The event's broadcast name.
*
* @return string
*/
public function broadcastAs()
{
return 'UserEvent';
}
/**
* The event's broadcast name.
*
* @return string
*/
public function broadcastWith()
{
return ['title'=>'This notification from ItSolutionStuff.com'];
}
}
Step 4: Update configuration File
In this step, we need to add set configuration on env file and database configuration file. you you need to set env file with BROADCAST_DRIVER as redis and database configuration and also database redis configuration.
Let's updated files:
.env
BROADCAST_DRIVER=redis
DB_DATABASE=blog_chat
DB_USERNAME=root
DB_PASSWORD=root
REDIS_HOST=localhost
REDIS_PASSWORD=null
REDIS_PORT=6379
LARAVEL_ECHO_PORT=6001
config/database.php
....
'redis' => [
'client' => env('REDIS_CLIENT', 'predis'),
'options' => [
'cluster' => env('REDIS_CLUSTER', 'redis'),
'prefix' => env('REDIS_PREFIX', ''),
],
'default' => [
'url' => env('REDIS_URL'),
'host' => env('REDIS_HOST', '127.0.0.1'),
'password' => env('REDIS_PASSWORD', null),
'port' => env('REDIS_PORT', 6379),
'database' => env('REDIS_DB', 0),
],
'cache' => [
'url' => env('REDIS_URL'),
'host' => env('REDIS_HOST', '127.0.0.1'),
'password' => env('REDIS_PASSWORD', null),
'port' => env('REDIS_PORT', 6379),
'database' => env('REDIS_CACHE_DB', 1),
],
],
....
Now we need to run migration also.
So, let's run migration.
php artisan migrate
Step 5: Install Laravel Echo Server
In this step, we need to install laravel-echo-server in your system and in your project. so let's run following command to install laravel-echo-server and init.
Install laravel-echo-server
npm install -g laravel-echo-server
Init laravel-echo-server
laravel-echo-server init
You have to setup your configuration. you can see bellow screenshot:
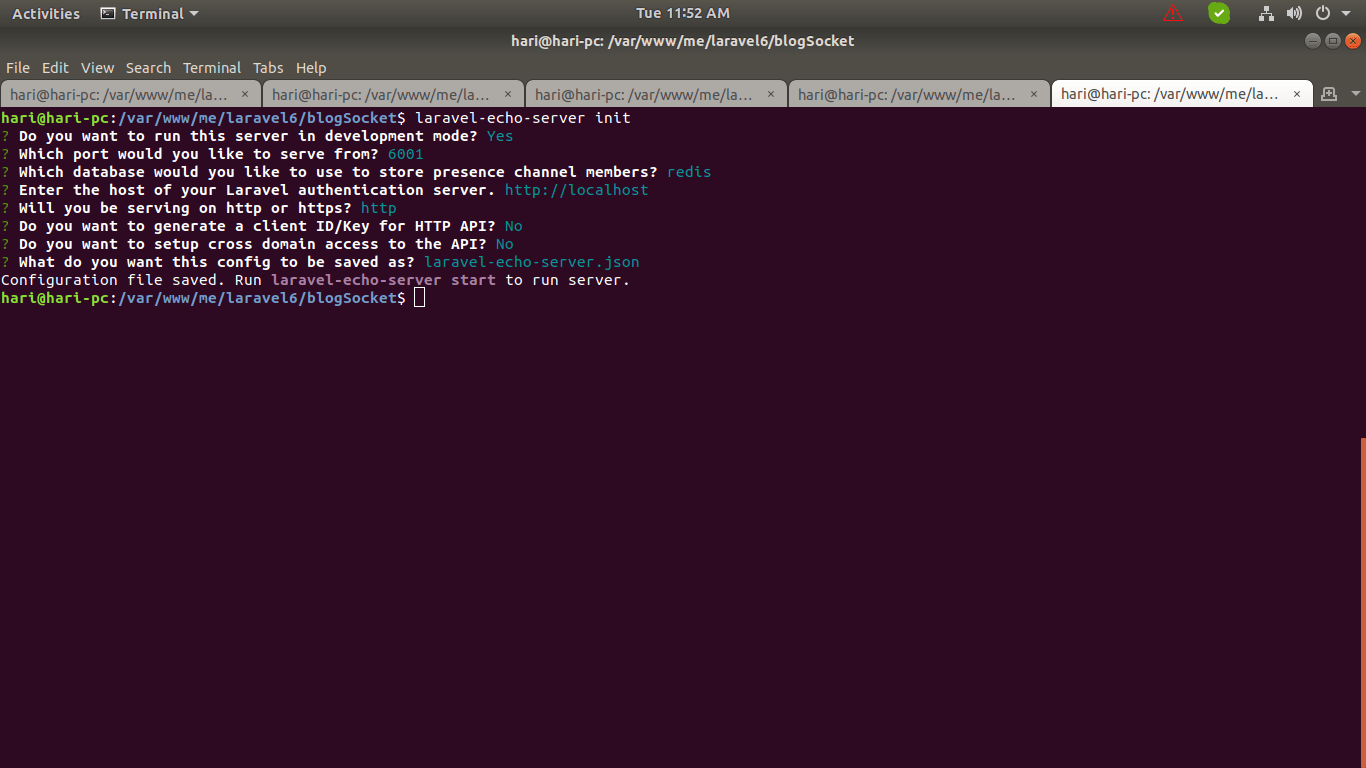
It will create new file laravel-echo-server.json file as like bellow:
laravel-echo-server.json
{
"authHost": "http://localhost",
"authEndpoint": "/broadcasting/auth",
"clients": [],
"database": "redis",
"databaseConfig": {
"redis": {},
"sqlite": {
"databasePath": "/database/laravel-echo-server.sqlite"
}
},
"devMode": true,
"host": null,
"port": "6001",
"protocol": "http",
"socketio": {},
"secureOptions": 67108864,
"sslCertPath": "",
"sslKeyPath": "",
"sslCertChainPath": "",
"sslPassphrase": "",
"subscribers": {
"http": true,
"redis": true
},
"apiOriginAllow": {
"allowCors": false,
"allowOrigin": "",
"allowMethods": "",
"allowHeaders": ""
}
}
Step 6: Install npm, laravel-echo, socket.io-client
Here, we will install npm and also install laravel-echo, socket.io-client. also you need to configuration. so let's run following command:
npm install
npm install laravel-echo
npm install socket.io-client
Now we need to create new file laravel-echo-setup.js file on assets file.
resources/assets/js/laravel-echo-setup.js
import Echo from 'laravel-echo';
window.Echo = new Echo({
broadcaster: 'socket.io',
host: window.location.hostname + ":" + window.laravel_echo_port
});
Now you need to add on mix file as like bellow:
webpack.mix.js
...
mix.js('resources/assets/js/laravel-echo-setup.js', 'public/js');
Now we need to run npm run command:
npm run dev
Step 7: Update View File
Now we need to update our welcome blade file. so you can see our there code as like bellow:
resources/views/welcome.blade.php
<!doctype html>
<html lang="{{ app()->getLocale() }}">
<head>
<meta charset="utf-8">
<meta http-equiv="X-UA-Compatible" content="IE=edge">
<meta name="viewport" content="width=device-width, initial-scale=1">
<meta name="csrf-token" content="{{ csrf_token() }}">
<title>Laravel Broadcast Redis Socket io Tutorial - ItSolutionStuff.com</title>
<link rel="stylesheet" href="https://cdnjs.cloudflare.com/ajax/libs/twitter-bootstrap/4.4.1/css/bootstrap.css" />
<script src="https://cdnjs.cloudflare.com/ajax/libs/jquery/3.4.1/jquery.min.js"></script>
<link href="{{ asset('css/app.css') }}" rel="stylesheet">
</head>
<body>
<div class="container">
<h1>Laravel Broadcast Redis Socket io Tutorial - ItSolutionStuff.com</h1>
<div id="notification"></div>
</div>
</body>
<script>
window.laravel_echo_port='{{env("LARAVEL_ECHO_PORT")}}';
</script>
<script src="//{{ Request::getHost() }}:{{env('LARAVEL_ECHO_PORT')}}/socket.io/socket.io.js"></script>
<script src="{{ url('/js/laravel-echo-setup.js') }}" type="text/javascript"></script>
<script type="text/javascript">
var i = 0;
window.Echo.channel('user-channel')
.listen('.UserEvent', (data) => {
i++;
$("#notification").append('<div class="alert alert-success">'+i+'.'+data.title+'</div>');
});
</script>
</html>
Step 8: Call Event
Here, we will create new testing route for call event. so, let's add add following route as bellow:
routes/web.php
Route::get('/t', function () {
event(new \App\Events\SendMessage());
dd('Event Run Successfully.');
});
Now we are ready to run our example, but make sure following thing to run your project.
You must have to install redis server in your system or server. it not then you can install using following command:
sudo apt install redis-server
After that you can start laravel echo server as like bellow command:
laravel-echo-server start
Now you can run project using following command:
php artisan serve
Now you can open bellow URL on your browser:
http://localhost:8000/
Now you can fire you event by this url:
http://localhost:8000/t
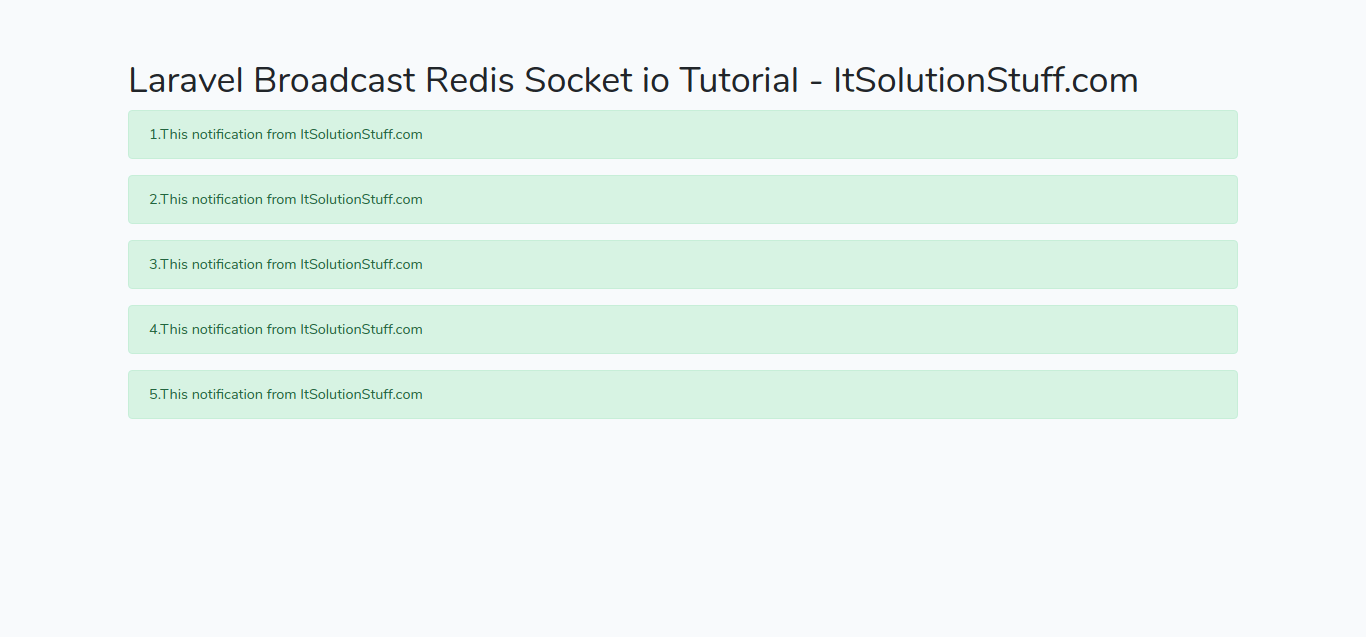
You can see result as like bellow screen shot:
You can download code from git: Download Code from Github
I hope it can help you...

