How to Install Sweetalert2 in Laravel 10 Vite?
Hey Guys,
In this tutorial, we will go over the demonstration of how to install sweetalert2 in laravel. This article goes in detailed on how to add sweetalert2 in laravel. let’s discuss about how to install sweetalert2 in laravel 10. This article will give you a simple example of laravel install sweetalert2 npm.
If you want to install sweetalert2 using vite npm in laravel. Then i will help you to explain step by step install sweetalert2 with npm vite. so, let's follow the below step to use sweetalert2 in laravel 10 application.
I will give you following three ways to install sweetalert2 in your laravel application. let's see one by one examples.
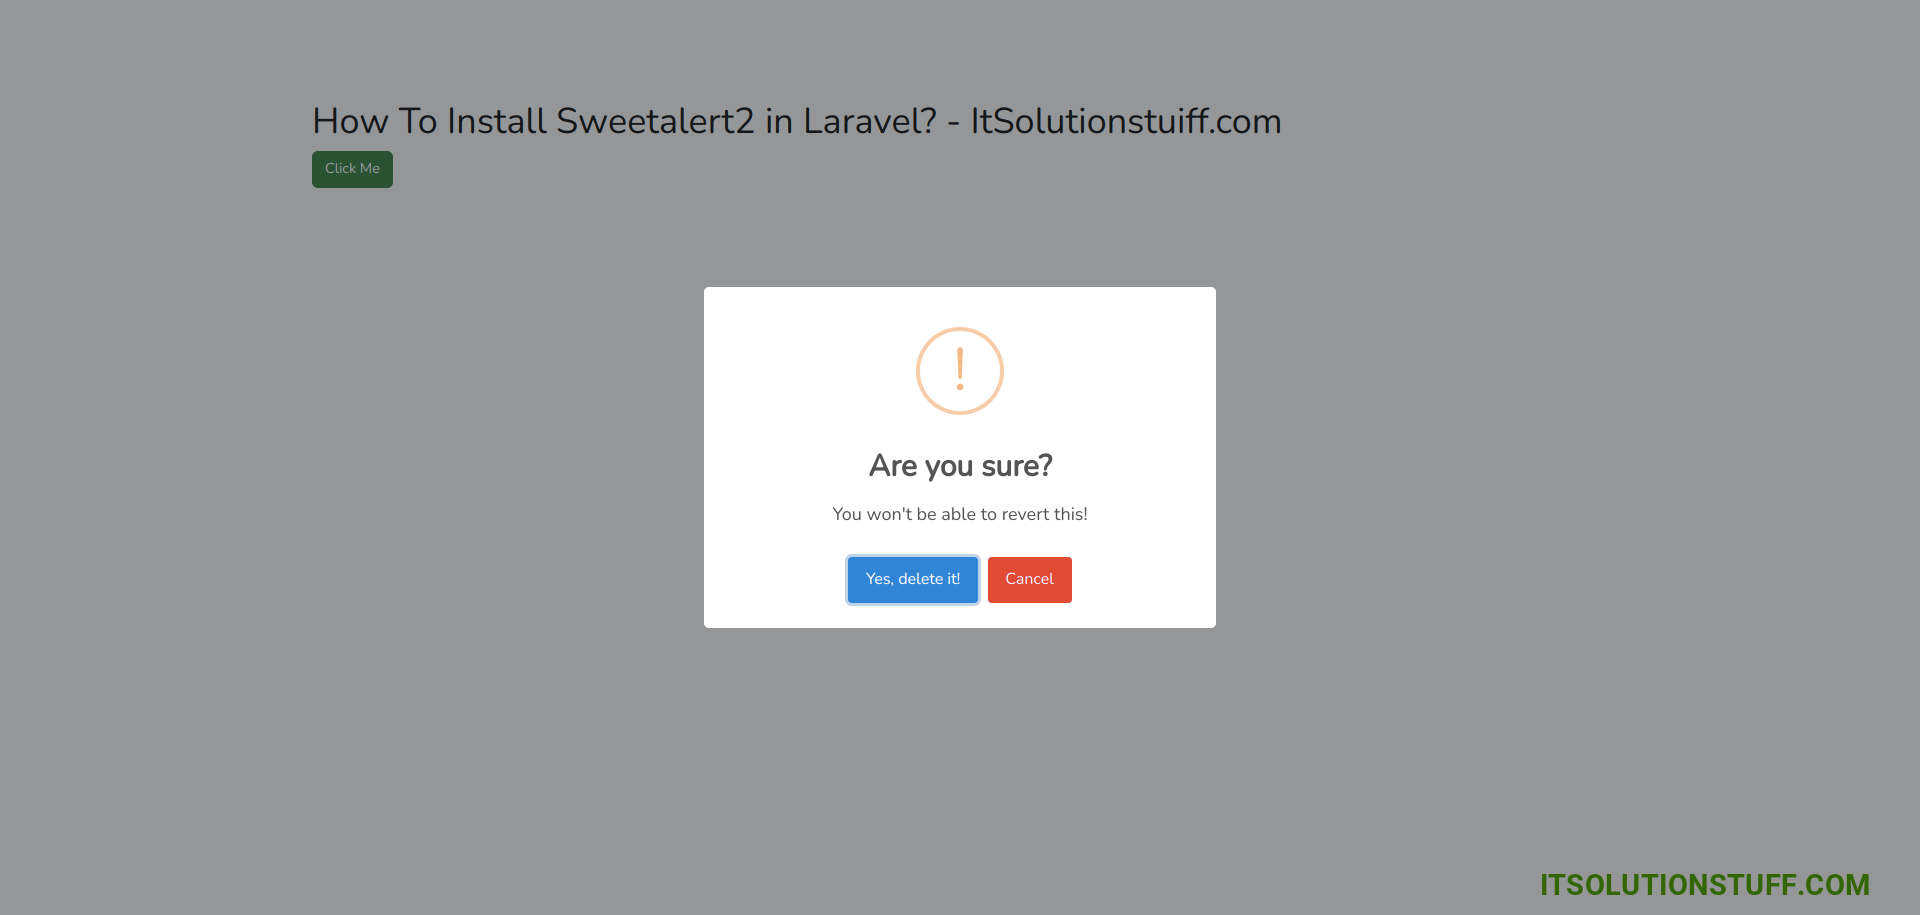
Output:
Example 1: Laravel Add Sweetalert2 using CDN
we can directly use cdn js for sweetalert2 and add script tag on head tag as like the bellow. you can see the simple blade file code. here we don't require to download as well.
resources/views/welcome.blade.php
<!doctype html>
<html lang="{{ str_replace('_', '-', app()->getLocale()) }}">
<head>
<meta charset="utf-8">
<meta name="viewport" content="width=device-width, initial-scale=1">
<!-- CSRF Token -->
<meta name="csrf-token" content="{{ csrf_token() }}">
<title>{{ config('app.name', 'Laravel') }}</title>
<!-- Fonts -->
<link rel="dns-prefetch" href="//fonts.bunny.net">
<link href="https://fonts.bunny.net/css?family=Nunito" rel="stylesheet">
<script src="https://ajax.googleapis.com/ajax/libs/jquery/1.11.3/jquery.min.js"></script>
<link href='https://cdn.jsdelivr.net/npm/sweetalert2@10.10.1/dist/sweetalert2.min.css'>
<script src="https://cdn.jsdelivr.net/npm/sweetalert2@10.16.6/dist/sweetalert2.all.min.js"></script>
<link href="https://cdn.jsdelivr.net/npm/bootstrap@5.0.2/dist/css/bootstrap.min.css">
</head>
<body>
<div id="app">
<main class="container">
<h1> How To Install Sweetalert2 in Laravel? - ItSolutionstuiff.com</h1>
<button class="btn btn-success">Click Me!</button>
</main>
</div>
</body>
<script>
$('button').click(function(){
Swal.fire({
title: 'Are you sure?',
text: "You won't be able to revert this!",
icon: 'warning',
showCancelButton: true,
confirmButtonColor: '#3085d6',
cancelButtonColor: '#d33',
confirmButtonText: 'Yes, delete it!'
}).then((result) => {
if (result.isConfirmed) {
Swal.fire(
'Deleted!',
'Your file has been deleted.',
'success'
)
}
});
});
</script>
</html>
Example 2: Laravel Vite Add Sweetalert2 using NPM
Here, we will add Sweetalert2 using npm command. so, let's run following command:
npm install jquery
npm install sweetalert2
Next, we need to import jquery in app.js. so, let's add following lines on yout app.js file.
resources/js/app.js
import jQuery from 'jquery';
window.$ = jQuery;
import swal from 'sweetalert2';
window.Swal = swal;
Next, we need to add $ in your vite config file. so, let's add it.
vite.config.js
import { defineConfig } from 'vite';
import laravel from 'laravel-vite-plugin';
export default defineConfig({
plugins: [
laravel({
input: [
'resources/sass/app.scss',
'resources/js/app.js',
],
refresh: true,
}),
],
resolve: {
alias: {
'$': 'jQuery'
},
},
});
Next, build npm js and css files using following command:
npm run dev
now, we are ready to use jquery using vite. you can see the simple blade file code.
resources/views/welcome.blade.php
<!doctype html>
<html lang="{{ str_replace('_', '-', app()->getLocale()) }}">
<head>
<meta charset="utf-8">
<meta name="viewport" content="width=device-width, initial-scale=1">
<!-- CSRF Token -->
<meta name="csrf-token" content="{{ csrf_token() }}">
<title>{{ config('app.name', 'Laravel') }}</title>
<!-- Fonts -->
<link rel="dns-prefetch" href="//fonts.bunny.net">
<link href="https://fonts.bunny.net/css?family=Nunito" rel="stylesheet">
<!-- Scripts -->
@vite(['resources/sass/app.scss', 'resources/js/app.js'])
<script type="module">
$('button').click(function(){
Swal.fire({
title: 'Are you sure?',
text: "You won't be able to revert this!",
icon: 'warning',
showCancelButton: true,
confirmButtonColor: '#3085d6',
cancelButtonColor: '#d33',
confirmButtonText: 'Yes, delete it!'
}).then((result) => {
if (result.isConfirmed) {
Swal.fire(
'Deleted!',
'Your file has been deleted.',
'success'
)
}
});
});
</script>
</head>
<body>
<div id="app">
<main class="container">
<h1> How To Install Sweetalert2 in Laravel? - ItSolutionstuiff.com</h1>
<button class="btn btn-success">Click Me</button>
</main>
</div>
</body>
</html>
Run Laravel App:
All the required steps have been done, now you have to type the given below command and hit enter to run the Laravel app:
php artisan serve
Now, Go to your web browser, type the given URL and view the app output:
http://localhost:8000/
I hope it can help you...

