Laravel 9 Generate Sitemap XML File Tutorial Example
Hi Dev,
Today, laravel 9 generate sitemap is our main topic. I’m going to show you about how to create dynamic xml sitemap in laravel 9. you will learn laravel 9 sitemap xml. I would like to share with you laravel 9 sitemap dynamic generate. You just need to some step to done laravel 9 generate sitemap file.
A sitemap is an XML File that has a list of URLs of your website. You can submit a sitemap file to the webmaster tool to inform the search engine. So Sitemap is very important for every website SEO.
In this example, we will create posts table with title, slug and body. Then we will create a factory for dummy posts. Then after we will generate an XML file and list all URLs for posts. It's a very basic example. so let's follow and you will get a sitemap file for your website and submit it to the webmaster's tool.
Let's follow below steps:
Step 1: Install Laravel
This step is not required; however, if you have not created the laravel app, then you may go ahead and execute the below command:
composer create-project laravel/laravel example-app
Step 2: Create Post Migration and Model
In this step, we will create migration and model. So let's run below command to create posts table.
php artisan make:migration create_posts_table
Next, simple update below code to migration file.
database/migrations/create_posts_table.php
<?php
use Illuminate\Database\Migrations\Migration;
use Illuminate\Database\Schema\Blueprint;
use Illuminate\Support\Facades\Schema;
return new class extends Migration
{
/**
* Run the migrations.
*
* @return void
*/
public function up()
{
Schema::create('posts', function (Blueprint $table) {
$table->id();
$table->string('title');
$table->string('slug');
$table->text('body');
$table->timestamps();
});
}
/**
* Reverse the migrations.
*
* @return void
*/
public function down()
{
Schema::dropIfExists('posts');
}
};
Then run created new migration with below command:
php artisan migrate
Now, run below command to create Post model.
php artisan make:model Post
Then update following code to Post model.
app/Models/Post.php
<?php
namespace App\Models;
use Illuminate\Database\Eloquent\Factories\HasFactory;
use Illuminate\Database\Eloquent\Model;
class Post extends Model
{
use HasFactory;
protected $fillable = [
'title', 'slug', 'body'
];
}
Step 3: Create Post Factory
In this step, we will create Post factory class and generate dummy records using tinker command. so let's run below command to create post factory.
php artisan make:factory PostFactory
Next, copy below code and update PostFactory.php file.
database/factories/PostFactory.php
<?php
namespace Database\Factories;
use Illuminate\Database\Eloquent\Factories\Factory;
use App\Models\Post;
use Illuminate\Support\Str;
/**
* @extends \Illuminate\Database\Eloquent\Factories\Factory<\App\Models\Post>
*/
class PostFactory extends Factory
{
/**
* The name of the factory's corresponding model.
*
* @var string
*/
protected $model = Post::class;
/**
* Define the model's default state.
*
* @return array
*/
public function definition()
{
return [
'title' => $this->faker->text(),
'slug' => Str::slug($this->faker->text()),
'body' => $this->faker->paragraph()
];
}
}
Then simply run tinker command and create dummy posts.
php artisan tinker
App\Models\Post::factory()->count(30)->create();
Step 4: Create Route
In this step, we will create one route sitemap.xml. so let's add it.
routes/web.php
<?php
use Illuminate\Support\Facades\Route;
use App\Http\Controllers\SitemapController;
/*
|--------------------------------------------------------------------------
| Web Routes
|--------------------------------------------------------------------------
|
| Here is where you can register web routes for your application. These
| routes are loaded by the RouteServiceProvider within a group which
| contains the "web" middleware group. Now create something great!
|
*/
Route::get('sitemap.xml', [SitemapController::class, 'index']);
Step 5: Create Controller
In this step, we have to create new controller as SitemapController with index(). we will get all posts and pass to blade file. we will return response as xml file. so let's update follow code:
app/Http/Controllers/SitemapController.php
<?php
namespace App\Http\Controllers;
use Illuminate\Http\Request;
use App\Models\Post;
class SitemapController extends Controller
{
/**
* Write code on Method
*
* @return response()
*/
public function index($value='')
{
$posts = Post::latest()->get();
return response()->view('sitemap', [
'posts' => $posts
])->header('Content-Type', 'text/xml');
}
}
Step 6: Create View File
In Last step, let's create sitemap.blade.php for display all posts and put following code:
resources/views/sitemap.blade.php
<?php echo '<?xml version="1.0" encoding="UTF-8"?>'; ?>
<urlset xmlns="http://www.sitemaps.org/schemas/sitemap/0.9">
@foreach ($posts as $post)
<url>
<loc>{{ url('/') }}/post/{{ $post->slug }}</loc>
<lastmod>{{ $post->created_at->tz('UTC')->toAtomString() }}</lastmod>
<changefreq>daily</changefreq>
<priority>0.8</priority>
</url>
@endforeach
</urlset>
Run Laravel App:
All the required steps have been done, now you have to type the given below command and hit enter to run the Laravel app:
php artisan serve
Now, Go to your web browser, type the given URL and view the app output:
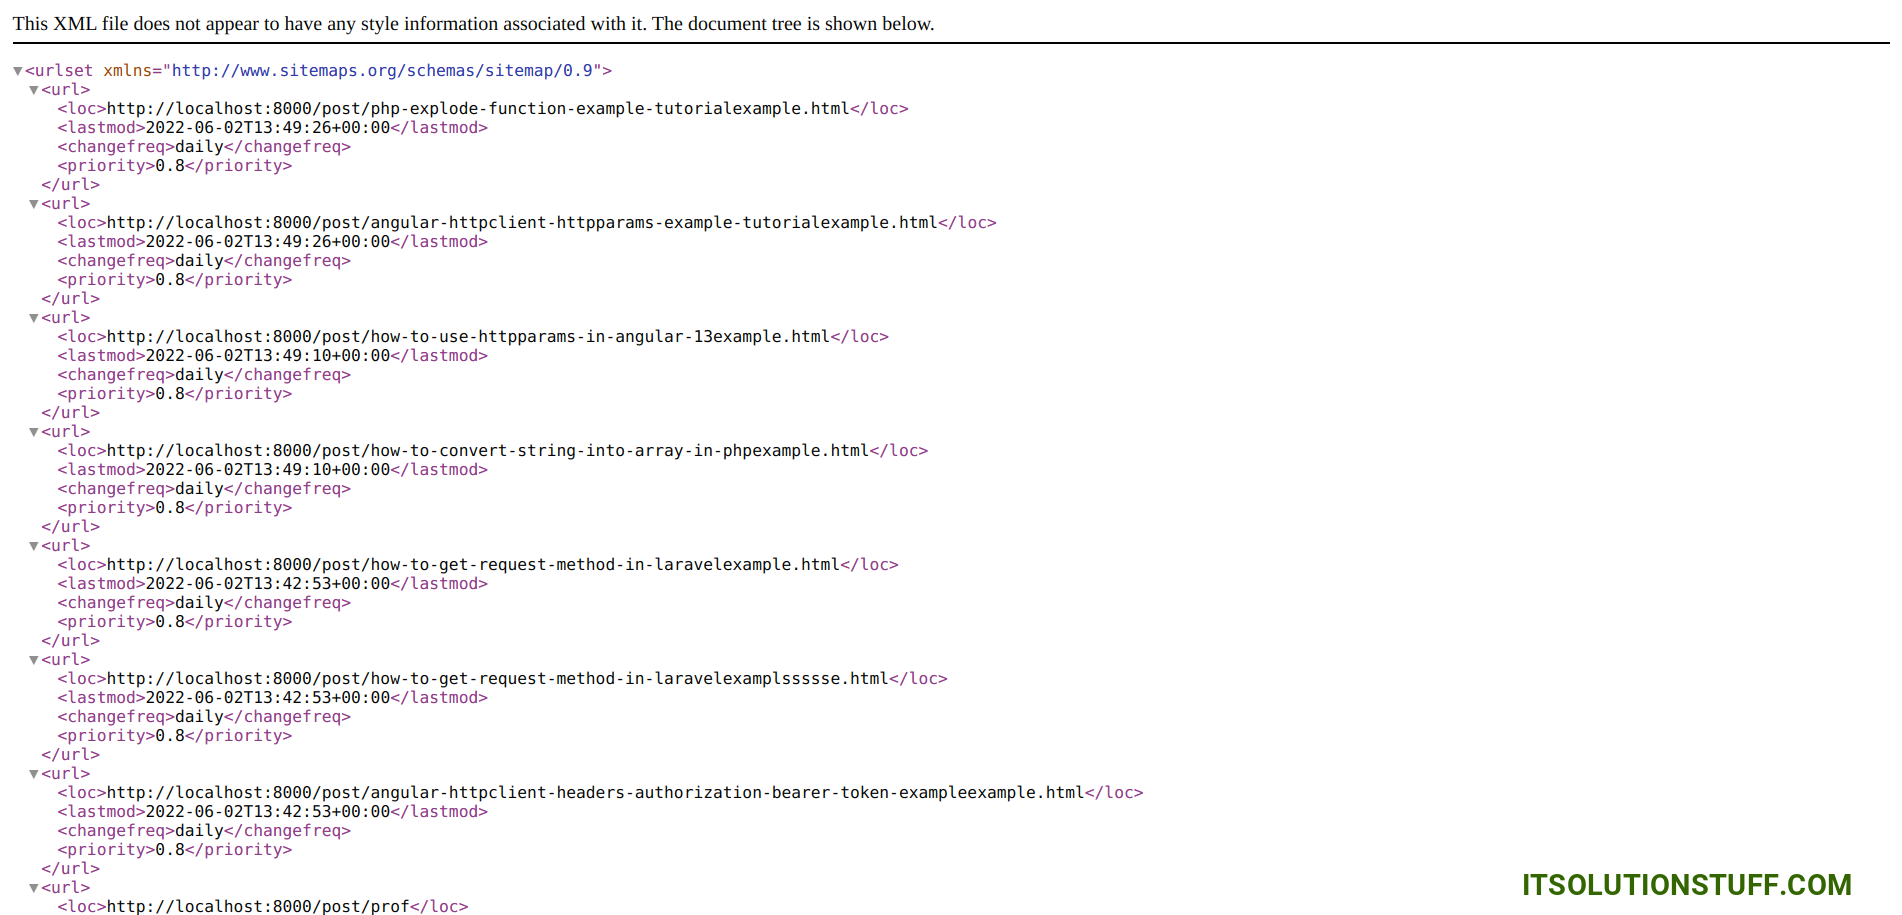
http://localhost:8000/sitemap.xml
Output:
I hope it can help you...

