Laravel 11 Generate and Read Sitemap XML File Tutorial
Discover how to create and use XML sitemaps in Laravel 11 for better SEO results. Learn the basics of generating and reading sitemap files with ease.
What is an XML Sitemap?
An XML sitemap is like a map for your website that search engines, like Google, use to find and understand your site better. Think of it as a table of contents for your website that helps search engines find and list all your web pages. This makes it simpler for people to find your site when they search online.
Why Need Sitemap XML?
Having a XML map for your Laravel website is very important because of some reasons:
1. Improved Visibility: Search engines can find and rank your pages better if you have a sitemap. That means more folks can find your site.
2. Better SEO: It makes your website better for search engines by making sure all the important pages are listed.
3. Faster Updates: When you put new stuff or make changes, a sitemap helps search engines see these updates fast.
In this example, we will create a posts table with a title, slug, and body. Then, we will create a factory for generating dummy posts. Finally, we will generate an XML file and list all the URLs for the posts. This is a very basic example, so let's follow along, and you will have a sitemap file for your website that you can submit to the webmaster's tool.
Step for How to Generate Sitemap in Laravel 11?
- Step 1: Install Laravel 11
- Step 2: Create Post Migration and Model
- Step 3: Create Post Factory
- Step 4: Create Route
- Step 5: Create Controller
- Step 6: Create View File
- Run Laravel App
Step 1: Install Laravel 11
This step is not required; however, if you have not created the Laravel app, then you may go ahead and execute the below command:
composer create-project laravel/laravel example-appStep 2: Create Post Migration and Model
In this step, we will create migration and model. So let's run the below command to create posts table.
php artisan make:migration create_posts_tableNext, simply update the code below to the migration file.
database/migrations/create_posts_table.php
<?php

use Illuminate\Database\Migrations\Migration;
use Illuminate\Database\Schema\Blueprint;
use Illuminate\Support\Facades\Schema;

return new class extends Migration
{
    /**
     * Run the migrations.
     *
     * @return void
     */
    public function up(): void
    {
        Schema::create('posts', function (Blueprint $table) {
            $table->id();
            $table->string('title');
            $table->string('slug');
            $table->text('body');
            $table->timestamps();
        });
    }

    /**
     * Reverse the migrations.
     *
     * @return void
     */
    public function down(): void
    {
        Schema::dropIfExists('posts');
    }
};
Then run created new migration with below command:
php artisan migrateNow, run below command to create Post model.
php artisan make:model PostThen update following code to Post model.
app/Models/Post.php
<?php

namespace App\Models;

use Illuminate\Database\Eloquent\Factories\HasFactory;
use Illuminate\Database\Eloquent\Model;

class Post extends Model
{
    use HasFactory;

    protected $fillable = [
        'title', 'slug', 'body'
    ];
}
Step 3: Create Post Factory
In this step, we will create a PostFactory class and generate dummy records using the Tinker command. So let's run the below command to create the PostFactory.
php artisan make:factory PostFactoryNext, copy below code and update PostFactory.php file.
database/factories/PostFactory.php
<?php

namespace Database\Factories;

use Illuminate\Database\Eloquent\Factories\Factory;
use Illuminate\Support\Str;
use App\Models\Product;

/**
 * @extends \Illuminate\Database\Eloquent\Factories\Factory<\App\Models\Product>
 */
class ProductFactory extends Factory
{

    /**
     * The name of the factory's corresponding model.
     *
     * @var string
     */
    protected $model = Product::class;

    /**
     * Define the model's default state.
     *
     * @return array
     */
    public function definition(): array
    {
        return [
            'name' => $this->faker->name,
            'slug' => Str::slug($this->faker->name),
            'detail' => $this->faker->text,
        ];
    }
}
Then simply run the tinker command and create dummy posts.
php artisan tinker

App\Models\Post::factory()->count(30)->create();
Step 4: Create Route
In this step, we will create one route sitemap.xml, so let's add it.
routes/web.php
<?php

use Illuminate\Support\Facades\Route;

use App\Http\Controllers\SitemapController;

Route::get('sitemap.xml', [SitemapController::class, 'index']);
Step 5: Create Controller
In this step, we have to create a new controller as SitemapController with index(). We will get all posts and pass them to the blade file. We will return the response as an XML file. So let's update the following code:
app/Http/Controllers/SitemapController.php
<?php

namespace App\Http\Controllers;

use Illuminate\Http\Request;
use App\Models\Post;
use Illuminate\Http\Response;

class SitemapController extends Controller
{
    /**
     * Write code on Method
     *
     * @return response()
     */
    public function index(): Response
    {
        $posts = Post::latest()->get();

        return response()->view('sitemap', [
            'posts' => $posts
        ])->header('Content-Type', 'text/xml');
    }
}
Step 6: Create View File
In the last step, let's create sitemap.blade.php to display all posts and add the following code:
resources/views/sitemap.blade.php
<?php echo '<?xml version="1.0" encoding="UTF-8"?>'; ?>
<urlset xmlns="http://www.sitemaps.org/schemas/sitemap/0.9">
    @foreach ($posts as $post)
        <url>
            <loc>{{ url('/') }}/post/{{ $post->slug }}</loc>
            <lastmod>{{ $post->created_at->tz('UTC')->toAtomString() }}</lastmod>
            <changefreq>daily</changefreq>
            <priority>0.8</priority>
        </url>
    @endforeach
</urlset>
Run Laravel App:
All the required steps have been done, now you have to type the given below command and hit enter to run the Laravel app:
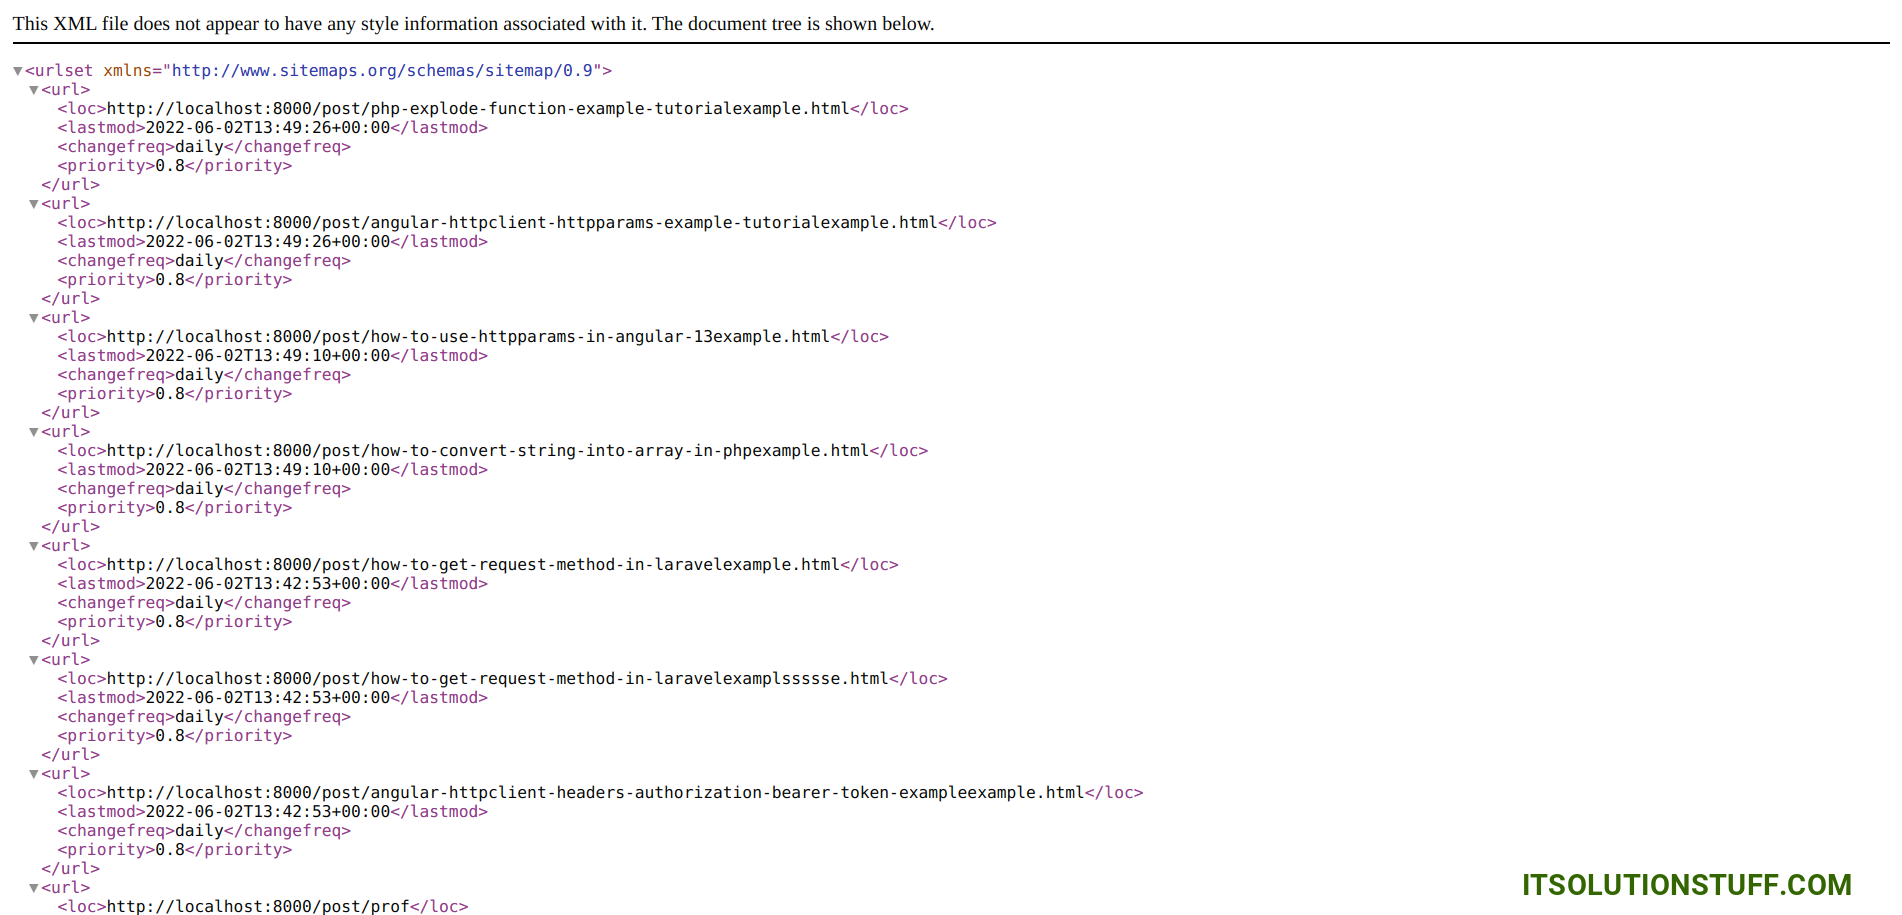
php artisan serveNow, Go to your web browser, type the given URL and view the app output:
http://localhost:8000/sitemap.xmlOutput:
I hope it can help you...

