Laravel 11 Database Seeder Example Tutorial
In this tutorial, I will show you how to create a database seeder in a Laravel 11 application.
You might be wondering, what is a seeder in Laravel 11? How do you use a seeder in Laravel 11? What is the command to create a seeder in Laravel 11? And why do we need to use a seeder in Laravel 11? I'll explain all of these in this Laravel 11 database seed tutorial.
Laravel introduces a seeder for creating testing or default data. If you have a small admin project, you can create an admin user and set default data for tables using seeders.
Imagine you have an admin project without a register page. What would you do? You need to create at least one admin user so they can log in and access the whole admin panel. But if you don't have a register page on the front end, you can only create an admin directly from the database. Is this feasible? Yes, but you'll have to always create a new admin user from the database whenever you set up your project. Instead, I suggest creating an admin seeder so you can create an admin user using Laravel 11 seeders. You just need to run one command to run the seeder in Laravel 11.
Similarly, if you have default setting configurations, you can create a setting seeder and add the default configuration to your database table.
In this tutorial, I will show you how to create a database seeder in Laravel 11 and what the command is to create a seeder and how to run that seeder in Laravel 11. So, you have to just follow a few steps to understand how it's done.
Create Seeder Class:
Laravel provides a command to create a seeder in Laravel. So, you can run the following command to make a seeder in your Laravel application:
Create Seeder Command:
php artisan make:seeder AdminUserSeederAfter running the above command, it will create one file `AdminUserSeeder.php` in the `seeders` folder. All seed classes are stored in the `database/seeders` directory.
Then, you can write the code to create an admin user using a model in Laravel.
database/seeders/AdminUserSeeder.php
<?php

namespace Database\Seeders;

use Illuminate\Database\Console\Seeds\WithoutModelEvents;
use Illuminate\Database\Seeder;
use App\Models\User;

class AdminUserSeeder extends Seeder
{
    /**
     * Run the database seeds.
     */
    public function run(): void
    {
        User::create([
            'name' => 'Hardik',
            'email' => 'admin@gmail.com',
            'password' => bcrypt('123456'),
        ]);
    }
}
As you can see in the code above, I've simply written the process for creating a new user in my users table. Now, you can add your code to create an admin user.
Here are two ways to manually run this seeder in Laravel 11:
Way 1: Run Single Seeder
You need to run the following command to run a single seeder:
php artisan db:seed --class=AdminUserSeederWay 2: Run All Seeders
In this way, you have to declare your seeder in the DatabaseSeeder class file. Then you have to run a single command to run all listed seeder classes.
So it can be listed as below:
database/seeders/DatabaseSeeder.php
<?php

namespace Database\Seeders;

use Illuminate\Database\Seeder;

class DatabaseSeeder extends Seeder
{
    /**
     * Seed the application's database.
     */
    public function run(): void
    {
        $this->call(AdminUserSeeder::class);
    }
}
Now you need to run the following command to execute all the listed seeders:
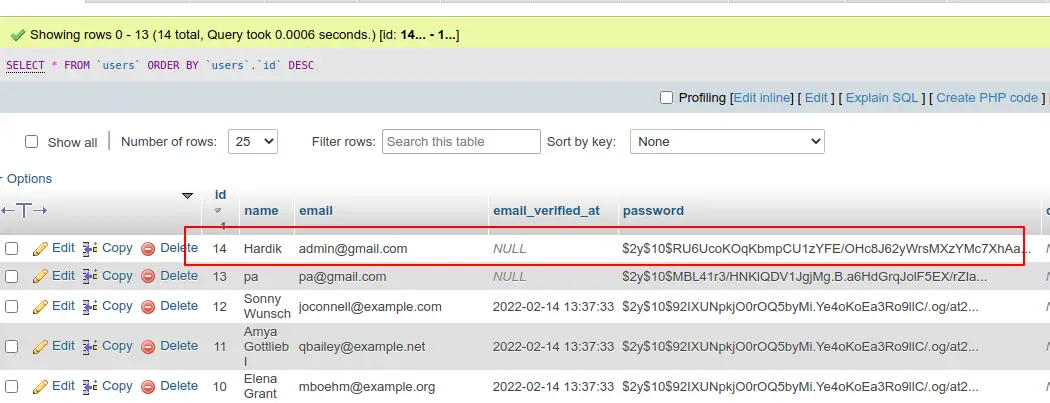
php artisan db:seedYou can see that one database row will be created in the users' table.
Now, I think you will understand how seeding works, and we have to use it in our Laravel app.
I hope it can help you...

