How to Customize Laravel Breeze Authentication?
In this post, i will tell you how to customize laravel breeze register and login page. we will add username field in users table and add it to registeration page. Then we will login with username and password fields with existing laravel breeze setup code.
After laravel breeze Installation, you need to do the following changes in your laravel code.
Add username Field to users Table
First, you need to add username field into users table and add to User model as well.
let's run the following to create migration.
php artisan make:migration add_username_column_in_users_tableYou need to update the following code on that file:
database/migrations/2024_10_15_115318_add_username_in_users_table.php
<?php
use Illuminate\Database\Migrations\Migration;
use Illuminate\Database\Schema\Blueprint;
use Illuminate\Support\Facades\Schema;

return new class extends Migration
{
    /**
     * Run the migrations.
     */
    public function up(): void
    {
        Schema::table('users', function (Blueprint $table) {
            $table->string("username")->unique();
        });
    }

    /**
     * Reverse the migrations.
     */
    public function down(): void
    {
        Schema::table('users', function (Blueprint $table) {
            //
        });
    }
};
Now, run the created migration:
php artisan migrateNext, let's add username field in fillable variable in the User model file.
app/Models/User.php
<?php

namespace App\Models;

// use Illuminate\Contracts\Auth\MustVerifyEmail;
use Illuminate\Database\Eloquent\Factories\HasFactory;
use Illuminate\Foundation\Auth\User as Authenticatable;
use Illuminate\Notifications\Notifiable;

class User extends Authenticatable
{
    /** @use HasFactory<\Database\Factories\UserFactory> */
    use HasFactory, Notifiable;

    /**
     * The attributes that are mass assignable.
     *
     * @var array
     */
    protected $fillable = [
        'name',
        'email',
        'password',
        'username'
    ];

    ...
Update Registration Page:
Now, we will add username field in the register.blade.php file. so, let's update like the following way:
resources/views/auth/register.blade.php
<x-guest-layout>
    <form method="POST" action="{{ route('register') }}">
        @csrf

        <!-- Name -->
        <div>
            <x-input-label for="name" :value="__('Name')" />
            <x-text-input id="name" class="block mt-1 w-full" type="text" name="name" :value="old('name')" required autofocus autocomplete="name" />
            <x-input-error :messages="$errors->get('name')" class="mt-2" />
        </div>

        <!-- Email Address -->
        <div class="mt-4">
            <x-input-label for="email" :value="__('Email')" />
            <x-text-input id="email" class="block mt-1 w-full" type="email" name="email" :value="old('email')" required autocomplete="username" />
            <x-input-error :messages="$errors->get('email')" class="mt-2" />
        </div>

        <!-- Email Address -->
        <div class="mt-4">
            <x-input-label for="username" :value="__('Username')" />
            <x-text-input id="username" class="block mt-1 w-full" type="text" name="username" :value="old('username')" required autocomplete="username" />
            <x-input-error :messages="$errors->get('username')" class="mt-2" />
        </div>

        <!-- Password -->
        <div class="mt-4">
            <x-input-label for="password" :value="__('Password')" />

            <x-text-input id="password" class="block mt-1 w-full"
                            type="password"
                            name="password"
                            required autocomplete="new-password" />

            <x-input-error :messages="$errors->get('password')" class="mt-2" />
        </div>

        <!-- Confirm Password -->
        <div class="mt-4">
            <x-input-label for="password_confirmation" :value="__('Confirm Password')" />

            <x-text-input id="password_confirmation" class="block mt-1 w-full"
                            type="password"
                            name="password_confirmation" required autocomplete="new-password" />

            <x-input-error :messages="$errors->get('password_confirmation')" class="mt-2" />
        </div>

        <div class="flex items-center justify-end mt-4">
            <a class="underline text-sm text-gray-600 dark:text-gray-400 hover:text-gray-900 dark:hover:text-gray-100 rounded-md focus:outline-none focus:ring-2 focus:ring-offset-2 focus:ring-indigo-500 dark:focus:ring-offset-gray-800" href="{{ route('login') }}">
                {{ __('Already registered?') }}
            </a>

            <x-primary-button class="ms-4">
                {{ __('Register') }}
            </x-primary-button>
        </div>
    </form>
</x-guest-layout>
Now, we will update the RegisteredUserController.php with the following code:
app/Http/Controllers/RegisteredUserController.php
<?php

namespace App\Http\Controllers\Auth;

use App\Http\Controllers\Controller;
use App\Models\User;
use Illuminate\Auth\Events\Registered;
use Illuminate\Http\RedirectResponse;
use Illuminate\Http\Request;
use Illuminate\Support\Facades\Auth;
use Illuminate\Support\Facades\Hash;
use Illuminate\Validation\Rules;
use Illuminate\View\View;

class RegisteredUserController extends Controller
{
    /**
     * Display the registration view.
     */
    public function create(): View
    {
        return view('auth.register');
    }

    /**
     * Handle an incoming registration request.
     *
     * @throws \Illuminate\Validation\ValidationException
     */
    public function store(Request $request): RedirectResponse
    {
        $request->validate([
            'name' => ['required', 'string', 'max:255'],
            'username' => ['required', 'string', 'lowercase', 'max:255', 'unique:'.User::class],
            'email' => ['required', 'string', 'lowercase', 'email', 'max:255', 'unique:'.User::class],
            'password' => ['required', 'confirmed', Rules\Password::defaults()],
        ]);

        $user = User::create([
            'name' => $request->name,
            'email' => $request->email,
            'username' => $request->username,
            'password' => Hash::make($request->password),
        ]);

        event(new Registered($user));

        Auth::login($user);

        return redirect(route('dashboard', absolute: false));
    }
}
Update Login Page:
Now, we will add username field in the login.blade.php file. so, let's update like the following way:
resources/views/auth/login.blade.php
<x-guest-layout>
    <!-- Session Status -->
    <x-auth-session-status class="mb-4" :status="session('status')" />

    <form method="POST" action="{{ route('login') }}">
        @csrf

        <!-- Username -->
        <div>
            <x-input-label for="username" :value="__('Username')" />
            <x-text-input id="username" class="block mt-1 w-full" type="text" name="username" :value="old('username')" required autofocus autocomplete="username" />
            <x-input-error :messages="$errors->get('username')" class="mt-2" />
        </div>

        <!-- Password -->
        <div class="mt-4">
            <x-input-label for="password" :value="__('Password')" />

            <x-text-input id="password" class="block mt-1 w-full"
                            type="password"
                            name="password"
                            required autocomplete="current-password" />

            <x-input-error :messages="$errors->get('password')" class="mt-2" />
        </div>

        <!-- Remember Me -->
        <div class="block mt-4">
            <label for="remember_me" class="inline-flex items-center">
                <input id="remember_me" type="checkbox" class="rounded dark:bg-gray-900 border-gray-300 dark:border-gray-700 text-indigo-600 shadow-sm focus:ring-indigo-500 dark:focus:ring-indigo-600 dark:focus:ring-offset-gray-800" name="remember">
                <span class="ms-2 text-sm text-gray-600 dark:text-gray-400">{{ __('Remember me') }}</span>
            </label>
        </div>

        <div class="flex items-center justify-end mt-4">
            @if (Route::has('password.request'))
                <a class="underline text-sm text-gray-600 dark:text-gray-400 hover:text-gray-900 dark:hover:text-gray-100 rounded-md focus:outline-none focus:ring-2 focus:ring-offset-2 focus:ring-indigo-500 dark:focus:ring-offset-gray-800" href="{{ route('password.request') }}">
                    {{ __('Forgot your password?') }}
                </a>
            @endif

            <x-primary-button class="ms-3">
                {{ __('Log in') }}
            </x-primary-button>
        </div>
    </form>
</x-guest-layout>
Now, we will update the LoginRequest.php with the following code:
app/Http/Requests/LoginRequest.php
<?php

namespace App\Http\Requests\Auth;

use Illuminate\Auth\Events\Lockout;
use Illuminate\Foundation\Http\FormRequest;
use Illuminate\Support\Facades\Auth;
use Illuminate\Support\Facades\RateLimiter;
use Illuminate\Support\Str;
use Illuminate\Validation\ValidationException;

class LoginRequest extends FormRequest
{
    /**
     * Determine if the user is authorized to make this request.
     */
    public function authorize(): bool
    {
        return true;
    }

    /**
     * Get the validation rules that apply to the request.
     *
     * @return array
     */
    public function rules(): array
    {
        return [
            'username' => ['required', 'string'],
            'password' => ['required', 'string'],
        ];
    }

    /**
     * Attempt to authenticate the request's credentials.
     *
     * @throws \Illuminate\Validation\ValidationException
     */
    public function authenticate(): void
    {
        $this->ensureIsNotRateLimited();

        if (! Auth::attempt($this->only('username', 'password'), $this->boolean('remember'))) {
            RateLimiter::hit($this->throttleKey());

            throw ValidationException::withMessages([
                'username' => trans('auth.failed'),
            ]);
        }

        RateLimiter::clear($this->throttleKey());
    }

    /**
     * Ensure the login request is not rate limited.
     *
     * @throws \Illuminate\Validation\ValidationException
     */
    public function ensureIsNotRateLimited(): void
    {
        if (! RateLimiter::tooManyAttempts($this->throttleKey(), 5)) {
            return;
        }

        event(new Lockout($this));

        $seconds = RateLimiter::availableIn($this->throttleKey());

        throw ValidationException::withMessages([
            'email' => trans('auth.throttle', [
                'seconds' => $seconds,
                'minutes' => ceil($seconds / 60),
            ]),
        ]);
    }

    /**
     * Get the rate limiting throttle key for the request.
     */
    public function throttleKey(): string
    {
        return Str::transliterate(Str::lower($this->string('username')).'|'.$this->ip());
    }
}
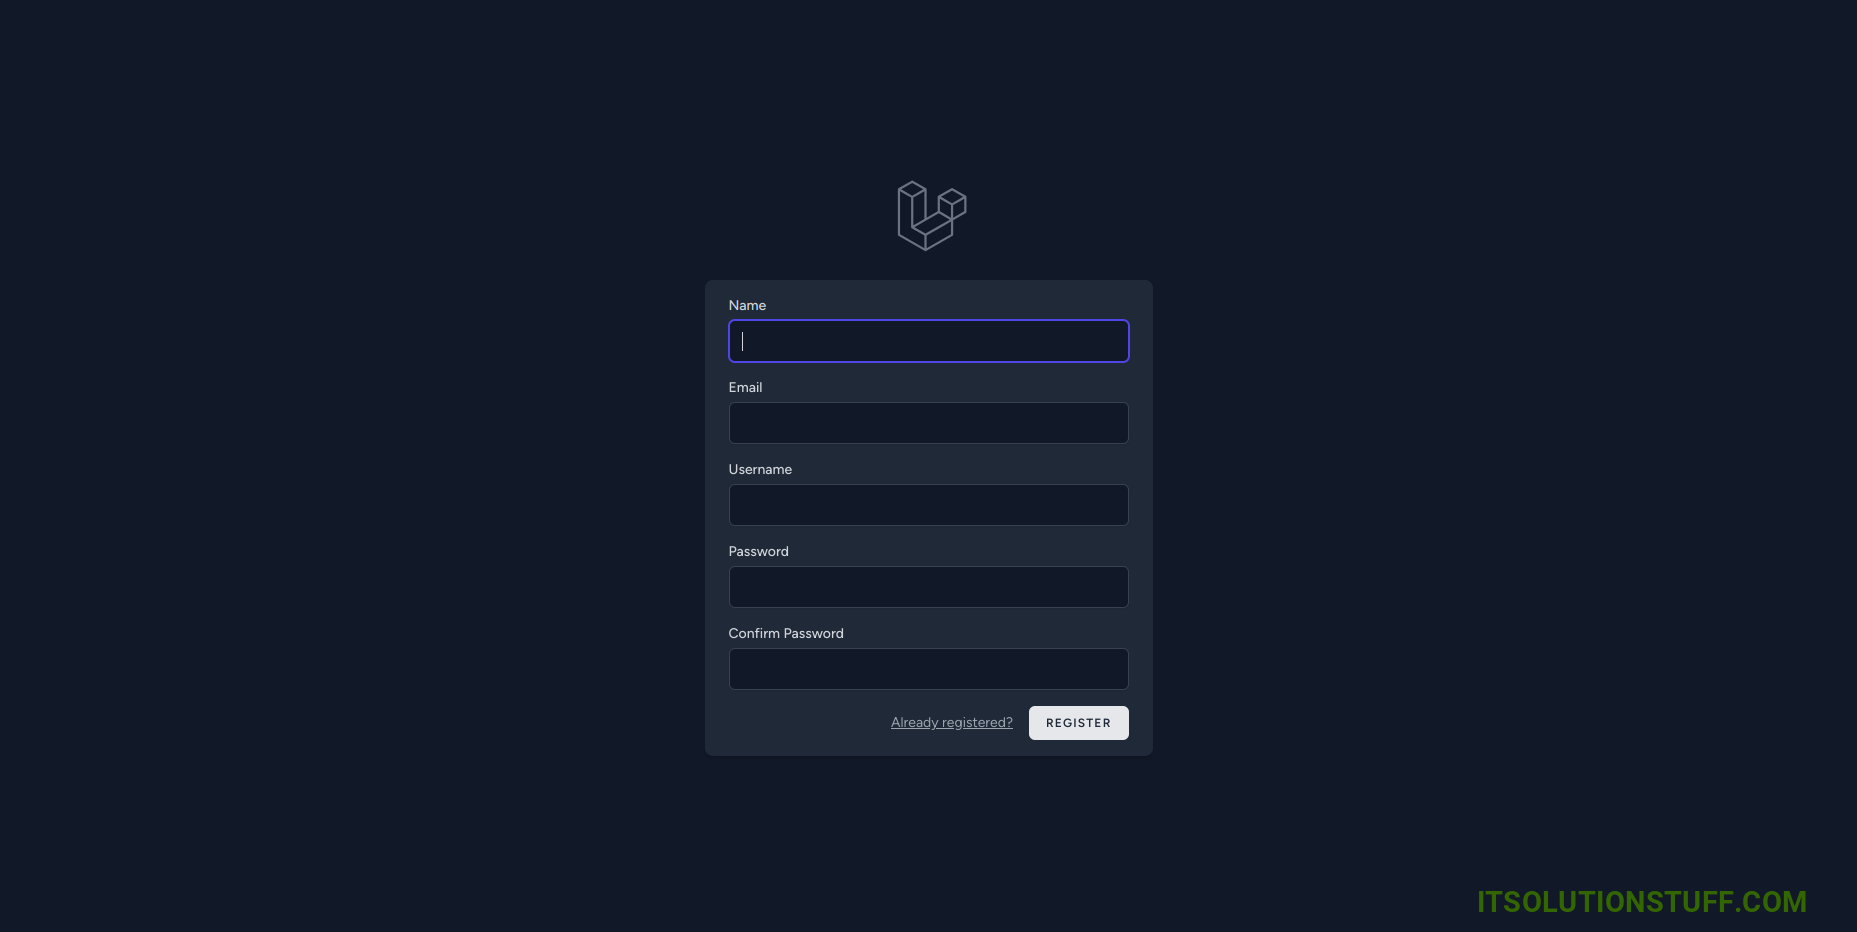
Now, you can run the application and you will see the following output:
i hope it can help you...

