How to Create Custom Validators in Angular 9/8?
Here, i will guide you how to create custom form validator in angular 9/8 application. you will learn to angular 9/8 custom validator example step by step. we can simply write custom validation in angular 9/8 for reactive form.
Custom validation is a most important thing in programming language. most of the cases and most of the project you need to create some custom validation so you can reuse it and also write septate code on file then you can use as like pre define validation.
So if you also need to create custom validator in your angular application then follow bellow step to create basic angular 8 reactive form custom validator.
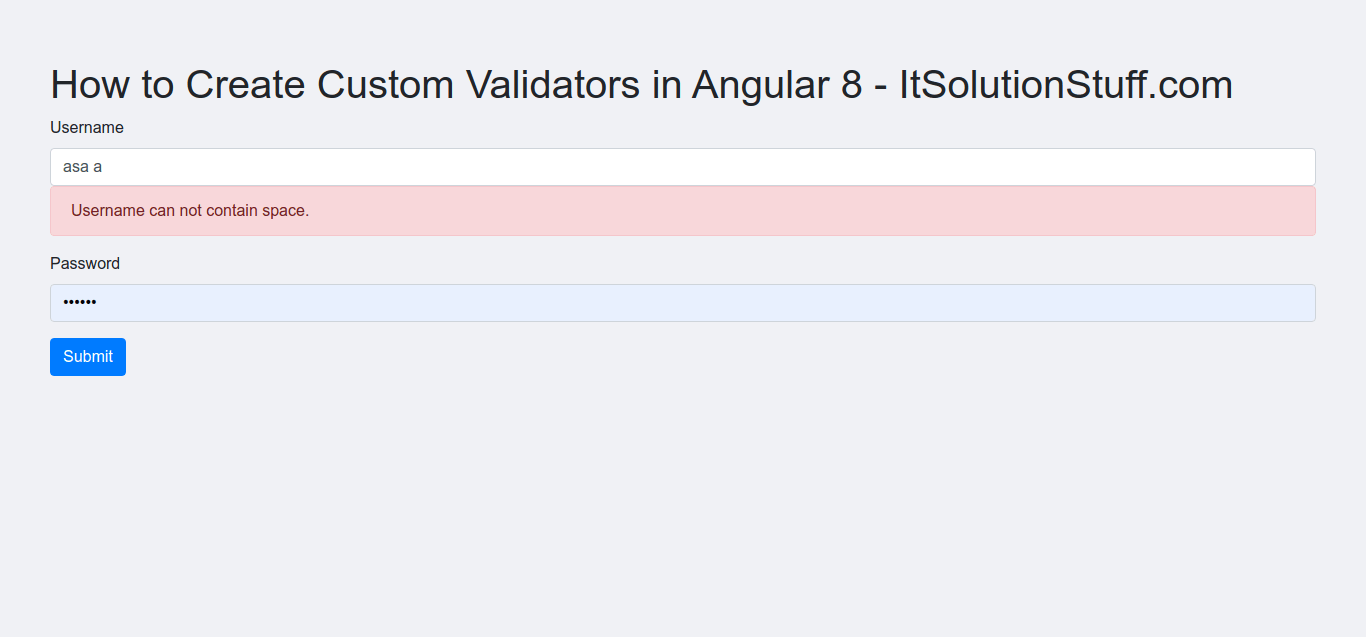
We will create new custom validator for not contain space on input field. we will not allow space on username. so let's see now it works

Step 1: Install Angular App
Here, in this step you need to create new ng app for this demo. if you have already created then don't create new angular 8 app.
ng new my-custom-val-app
Step 2: Import FormsModule
If you want to create form in angular app then you need to import FormsModule from @angular/forms library. so let's add following code to app.module.ts file.
src/app/app.module.ts
import { BrowserModule } from '@angular/platform-browser';
import { NgModule } from '@angular/core';
import { FormsModule, ReactiveFormsModule } from '@angular/forms';
import { AppComponent } from './app.component';
@NgModule({
declarations: [
AppComponent
],
imports: [
BrowserModule,
FormsModule,
ReactiveFormsModule
],
providers: [],
bootstrap: [AppComponent]
})
export class AppModule { }
Step 3: Form with ngModel
In this step, we will write code of html form with ngModel. so add following code to app.component.html file.
I used bootstrap class on this form. if you want to add than then follow this link too: Install Boorstrap 4 to Angular 8.
src/app/app.component.html
<h1>How to Create Custom Validators in Angular 8 - ItSolutionStuff.com</h1>
<form [formGroup]="form" (ngSubmit)="submit()">
<div class="form-group">
<label for="username">Username</label>
<input
formControlName="username"
id="username"
type="text"
class="form-control">
<div *ngIf="f.username.touched && f.username.invalid" class="alert alert-danger">
<div *ngIf="f.username.errors.required">Username is required.</div>
<div *ngIf="f.username.errors.minlength">Username should be 3 character.</div>
<div *ngIf="f.username.errors.cannotContainSpace">Username can not contain space.</div>
</div>
</div>
<div class="form-group">
<label for="password">Password</label>
<input
formControlName="password"
id="password"
type="password"
class="form-control">
<div *ngIf="f.password.touched && f.password.invalid" class="alert alert-danger">
<div *ngIf="f.password.errors.required">Password is required.</div>
</div>
</div>
<button class="btn btn-primary" type="submit">Submit</button>
</form>
Step 4: updated Ts File
In ts file. we will write submit() and get all input fields values. so let's add following code to app.component.ts file.
src/app/app.component.ts
import { Component } from '@angular/core';
import { FormGroup, FormControl, Validators} from '@angular/forms';
import { UsernameValidator } from './username.validator';
@Component({
selector: 'app-root',
templateUrl: './app.component.html',
styleUrls: ['./app.component.css']
})
export class AppComponent {
form = new FormGroup({
username: new FormControl('', [Validators.required, Validators.minLength(3), UsernameValidator.cannotContainSpace]),
password: new FormControl('', Validators.required)
});
get f(){
return this.form.controls;
}
submit(){
console.log(this.form.value);
}
}
Step 5: Create Custom Validation File
You need to create custom 'username.validator.ts' file and write code as bellow:
src/app/username.validator.ts
import { AbstractControl, ValidationErrors } from '@angular/forms';
export class UsernameValidator {
static cannotContainSpace(control: AbstractControl) : ValidationErrors | null {
if((control.value as string).indexOf(' ') >= 0){
return {cannotContainSpace: true}
}
return null;
}
}
Now you can run your application using following command:
ng serve
Now you can see layout as like bellow screen shot:
I hope it can help you...

