Angular Material Checkbox Change Color Example
In this article, we will cover how to implement angular material checkbox change color. I explained simply step by step material checkbox change color angular. you can understand the concept of md-checkbox change color angular. This post will give you a simple example of angular mat-checkbox change color.
You can use this example with angular 8, angular 9, angular 10, angular 11, angular 12, angular 13, angular 14, angular 15, angular 16 and angular 17 versions.
In this post, we will install an angular material theme. Then we will take one angular material checkbox with a change color. we can change color using two ways, first with color attribute and second with custom CSS. let's see both examples with output:
Step 1: Create New App
You can easily create your angular app using the below command:
ng new my-app
Step 2: Add Material Design
Now in this step, we need to just install material design theme in our angular application. so let's add as like bellow:
ng add @angular/material
Cmd like bellow:
Installing packages for tooling via npm.
Installed packages for tooling via npm.
? Choose a prebuilt theme name, or "custom" for a custom theme: Indigo/Pink
[ Preview: https://material.angular.io?theme=indigo-pink ]
? Set up HammerJS for gesture recognition? Yes
? Set up browser animations for Angular Material? Yes
Step 3: Import Module
In third step, we need to import some dependency like MatCheckboxModule and MatButtonModule. so let's add.
src/app/app.module.ts
import { NgModule } from '@angular/core';
import { BrowserModule } from '@angular/platform-browser';
import { AppComponent } from './app.component';
import { BrowserAnimationsModule } from '@angular/platform-browser/animations';
import { FormsModule, ReactiveFormsModule } from '@angular/forms';
import { MatButtonModule } from '@angular/material/button';
import { MatCheckboxModule } from '@angular/material/checkbox';
@NgModule({
declarations: [
AppComponent
],
imports: [
BrowserModule,
BrowserAnimationsModule,
FormsModule,
ReactiveFormsModule,
MatButtonModule,
MatCheckboxModule
],
providers: [],
bootstrap: [AppComponent]
})
export class AppModule { }
Step 4: Updated ts file
Now in ts file, add bellow code:
src/app/app.component.html
import { Component } from '@angular/core';
import { FormBuilder, FormGroup, Validators} from '@angular/forms';
@Component({
selector: 'app-root',
templateUrl: './app.component.html',
styleUrls: ['./app.component.css']
})
export class AppComponent {
title = 'app-material2';
form: FormGroup = new FormGroup({});
/*------------------------------------------
--------------------------------------------
Defined constructor
--------------------------------------------
--------------------------------------------*/
constructor(private fb: FormBuilder) {
this.form = fb.group({
i_agree: ['', [Validators.required]],
i_agree_terms: ['', [Validators.required]],
})
}
/*------------------------------------------
--------------------------------------------
Define f()
--------------------------------------------
--------------------------------------------*/
get f(){
return this.form.controls;
}
/*------------------------------------------
--------------------------------------------
Defined submit()
--------------------------------------------
--------------------------------------------*/
submit(){
console.log(this.form.value);
}
/*------------------------------------------
--------------------------------------------
Defined change event
--------------------------------------------
--------------------------------------------*/
onChangeEvent(event: any){
console.log(event.checked);
}
}
Step 5: Update html file
Now in view file, we will write code of input element with checkbox.
You can change color with two ways:
First, you can change color using color attribute.
Second, you can change color using css.
Let's see both ways here:
src/app/app.component.html
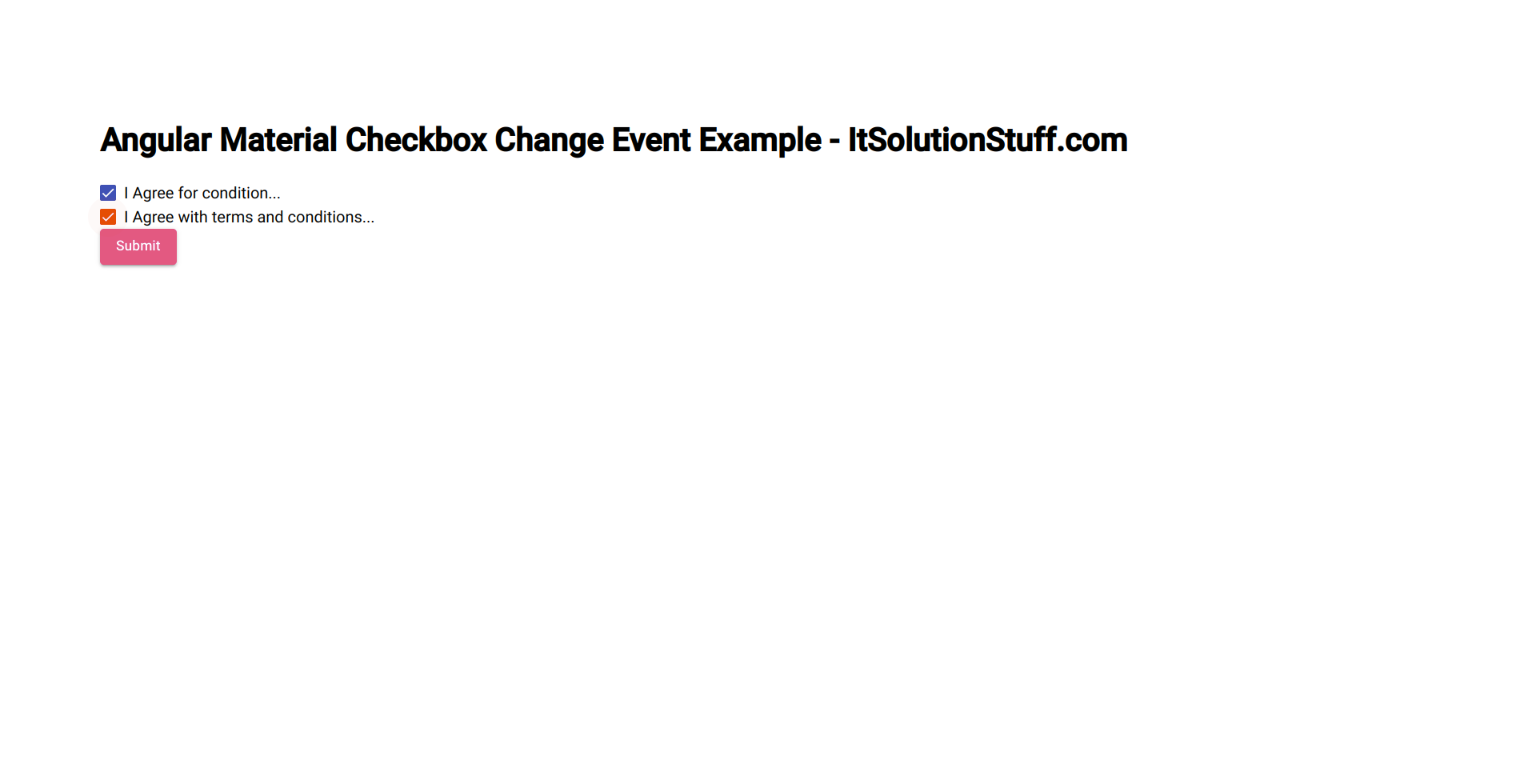
<h1>Angular Material Checkbox Change Event Example - ItSolutionStuff.com</h1>
<form [formGroup]="form" (ngSubmit)="submit()">
<mat-checkbox
color="primary"
formControlName="i_agree"
(change)="onChangeEvent($event)">
I Agree for condition...</mat-checkbox>
<br/>
<mat-checkbox
formControlName="i_agree_terms"
(change)="onChangeEvent($event)">
I Agree with terms and conditions...</mat-checkbox>
<br/>
<button mat-raised-button color="accent">Submit</button>
</form>
Step 6: Update css file
you can change color using css file as well.
src/app/app.component.css
::ng-deep .mat-checkbox-checked.mat-accent .mat-checkbox-ripple .mat-ripple-element {
opacity: 0.03 !important;
background-color: red !important;
}
::ng-deep .mat-checkbox-checked.mat-accent .mat-checkbox-background,.mat-checkbox-indeterminate.mat-accent .mat-checkbox-background {
background-color: red;
}
Run Angular App:
All the required steps have been done, now you have to type the given below command and hit enter to run the Angular app:
ng serve
Now, Go to your web browser, type the given URL and view the app output:
http://localhost:4200
now you can check it.
Output:
I hope it can help you...

