Laravel Ajax GET Request Example Tutorial
Hello,
Today, laravel ajax get request example is our main topic. We will use ajax get request in laravel example. if you have a question about ajax get request with parameters laravel then I will give a simple example with a solution. if you want to see example of laravel ajax get request with parameter then you are the right place. So, let's follow few step to create an example of laravel ajax get request data.
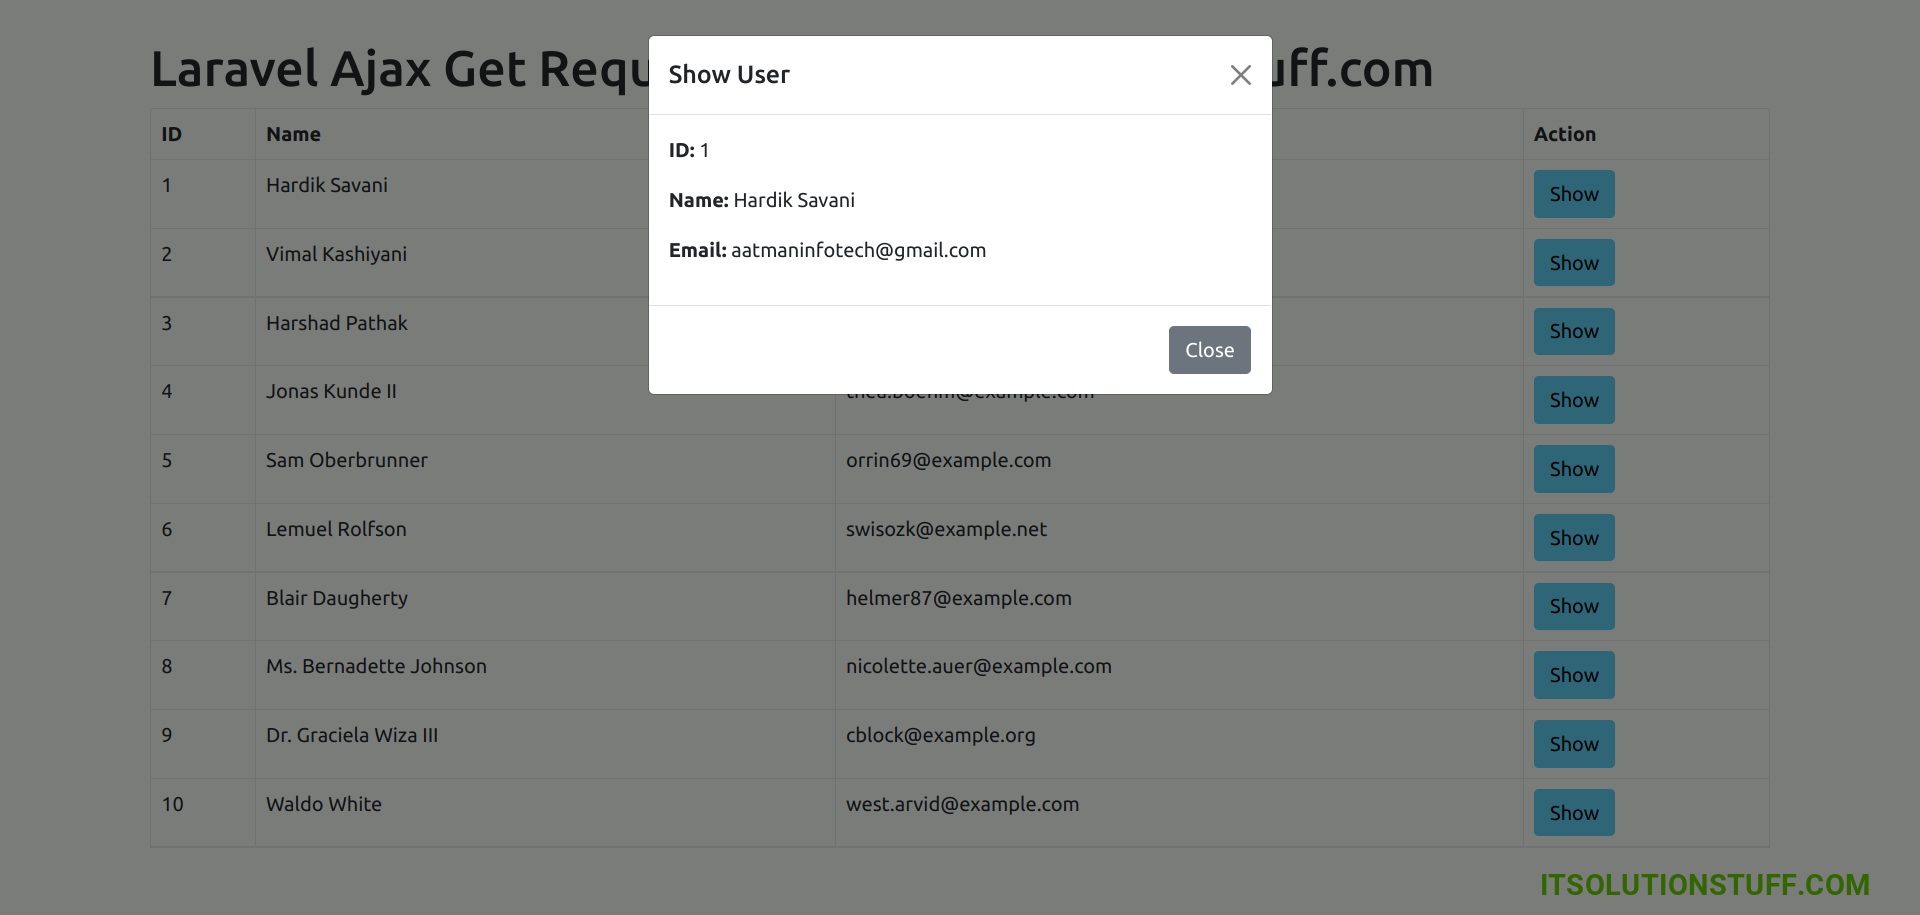
In this example, we will create a list of users with a show button. When you click on the show button then we will open the modal and get data using ajax to display. you can fetch data using jquery ajax get in laravel 6, laravel 7, laravel 8, laravel 9, laravel 10 and laravel 11 version as well.
Let's follow the below steps:
Preview:
Step 1: Install Laravel
This is optional; however, if you have not created the laravel app, then you may go ahead and execute the below command:
composer create-project laravel/laravel example-app
Step 2: Create Dummy Users
Here, we will create some dummy records on users table and import it.
so let's run following commands:
Create Dummy Records:
php artisan tinker
User::factory()->count(20)->create()
Step 3: Create UserController Controller
In this point, now we should create a new controller as UserController. In this controller, we will add index and show method, that will return users with filter.
Let's update following code to your controller file:
app/Http/Controllers/UserController.php
<?php
namespace App\Http\Controllers;
use Illuminate\Http\Request;
use App\Models\User;
class UserController extends Controller
{
/**
* Write code on Method
*
* @return response()
*/
public function index()
{
$users = User::paginate(10);
return view('users', compact('users'));
}
/**
* Display a listing of the resource.
*
* @return \Illuminate\Http\Response
*/
public function show($id)
{
$user = User::find($id);
return response()->json($user);
}
}
Step 4: Add Route
In this is step we need to create route for listing users. so open your "routes/web.php" file and add following route.
routes/web.php
<?php
use Illuminate\Support\Facades\Route;
use App\Http\Controllers\UserController;
/*
|--------------------------------------------------------------------------
| Web Routes
|--------------------------------------------------------------------------
|
| Here is where you can register web routes for your application. These
| routes are loaded by the RouteServiceProvider within a group which
| contains the "web" middleware group. Now create something great!
|
*/
Route::get('users', [UserController::class, 'index']);
Route::get('users/{id}', [UserController::class, 'show'])->name('users.show');
Step 5: Create View
In Last step, let's create users.blade.php(resources/views/users.blade.php) for layout and we will write design code here and put following code:
resources/views/users.blade.php
<!DOCTYPE html>
<html>
<head>
<title>Laravel Pagination Pretty URL Example - ItSolutionStuff.com</title>
<link href="https://cdnjs.cloudflare.com/ajax/libs/twitter-bootstrap/5.0.1/css/bootstrap.min.css" rel="stylesheet">
<script src="https://cdnjs.cloudflare.com/ajax/libs/jquery/3.6.0/jquery.min.js"></script>
<script src="https://cdn.jsdelivr.net/npm/bootstrap@5.0.2/dist/js/bootstrap.bundle.min.js"></script>
</head>
<body>
<div class="container">
<h1>Laravel Ajax Get Request Example - ItSolutionStuff.com</h1>
<table class="table table-bordered data-table">
<thead>
<tr>
<th>ID</th>
<th>Name</th>
<th>Email</th>
<th>Action</th>
</tr>
</thead>
<tbody>
@foreach($users as $user)
<tr>
<td>{{ $user->id }}</td>
<td>{{ $user->name }}</td>
<td>{{ $user->email }}</td>
<td>
<a
href="javascript:void(0)"
id="show-user"
data-url="{{ route('users.show', $user->id) }}"
class="btn btn-info"
>Show</a>
</td>
</tr>
@endforeach
</tbody>
</table>
</div>
<!-- Modal -->
<div class="modal fade" id="userShowModal" tabindex="-1" aria-labelledby="exampleModalLabel" aria-hidden="true">
<div class="modal-dialog">
<div class="modal-content">
<div class="modal-header">
<h5 class="modal-title" id="exampleModalLabel">Show User</h5>
<button type="button" class="btn-close" data-bs-dismiss="modal" aria-label="Close"></button>
</div>
<div class="modal-body">
<p><strong>ID:</strong> <span id="user-id"></span></p>
<p><strong>Name:</strong> <span id="user-name"></span></p>
<p><strong>Email:</strong> <span id="user-email"></span></p>
</div>
<div class="modal-footer">
<button type="button" class="btn btn-secondary" data-bs-dismiss="modal">Close</button>
</div>
</div>
</div>
</div>
</body>
<script type="text/javascript">
$(document).ready(function () {
/*------------------------------------------
--------------------------------------------
When click user on Show Button
--------------------------------------------
--------------------------------------------*/
$('body').on('click', '#show-user', function () {
var userURL = $(this).data('url');
$.ajax({
url: userURL,
type: 'GET',
dataType: 'json',
success: function(data) {
$('#userShowModal').modal('show');
$('#user-id').text(data.id);
$('#user-name').text(data.name);
$('#user-email').text(data.email);
}
});
});
});
</script>
</html>
Run Laravel App:
All the required steps have been done, now you have to type the given below command and hit enter to run the Laravel app:
php artisan serve
Now, Go to your web browser, type the given URL and view the app output:
http://localhost:8000/users
Maybe it can help you.....

