Laravel React JS File Upload Example Tutorial
Hi,
If you need to see example of laravel react js file upload example. I explained simply about laravel react js file upload vite. you can see laravel react js file upload with progress bar example. this example will help you react js file upload laravel.
You can use this example with laravel 6, laravel 7, laravel 8, laravel 9, laravel 10 and laravel 11 version.
In this tutorial, we will use laravel breeze, inertia js, vite and tailwind CSS to create react js file upload with progress bar using laravel API app. we will create "files" table with title and name columns. then we will create one page to create a form and list all uploaded files.
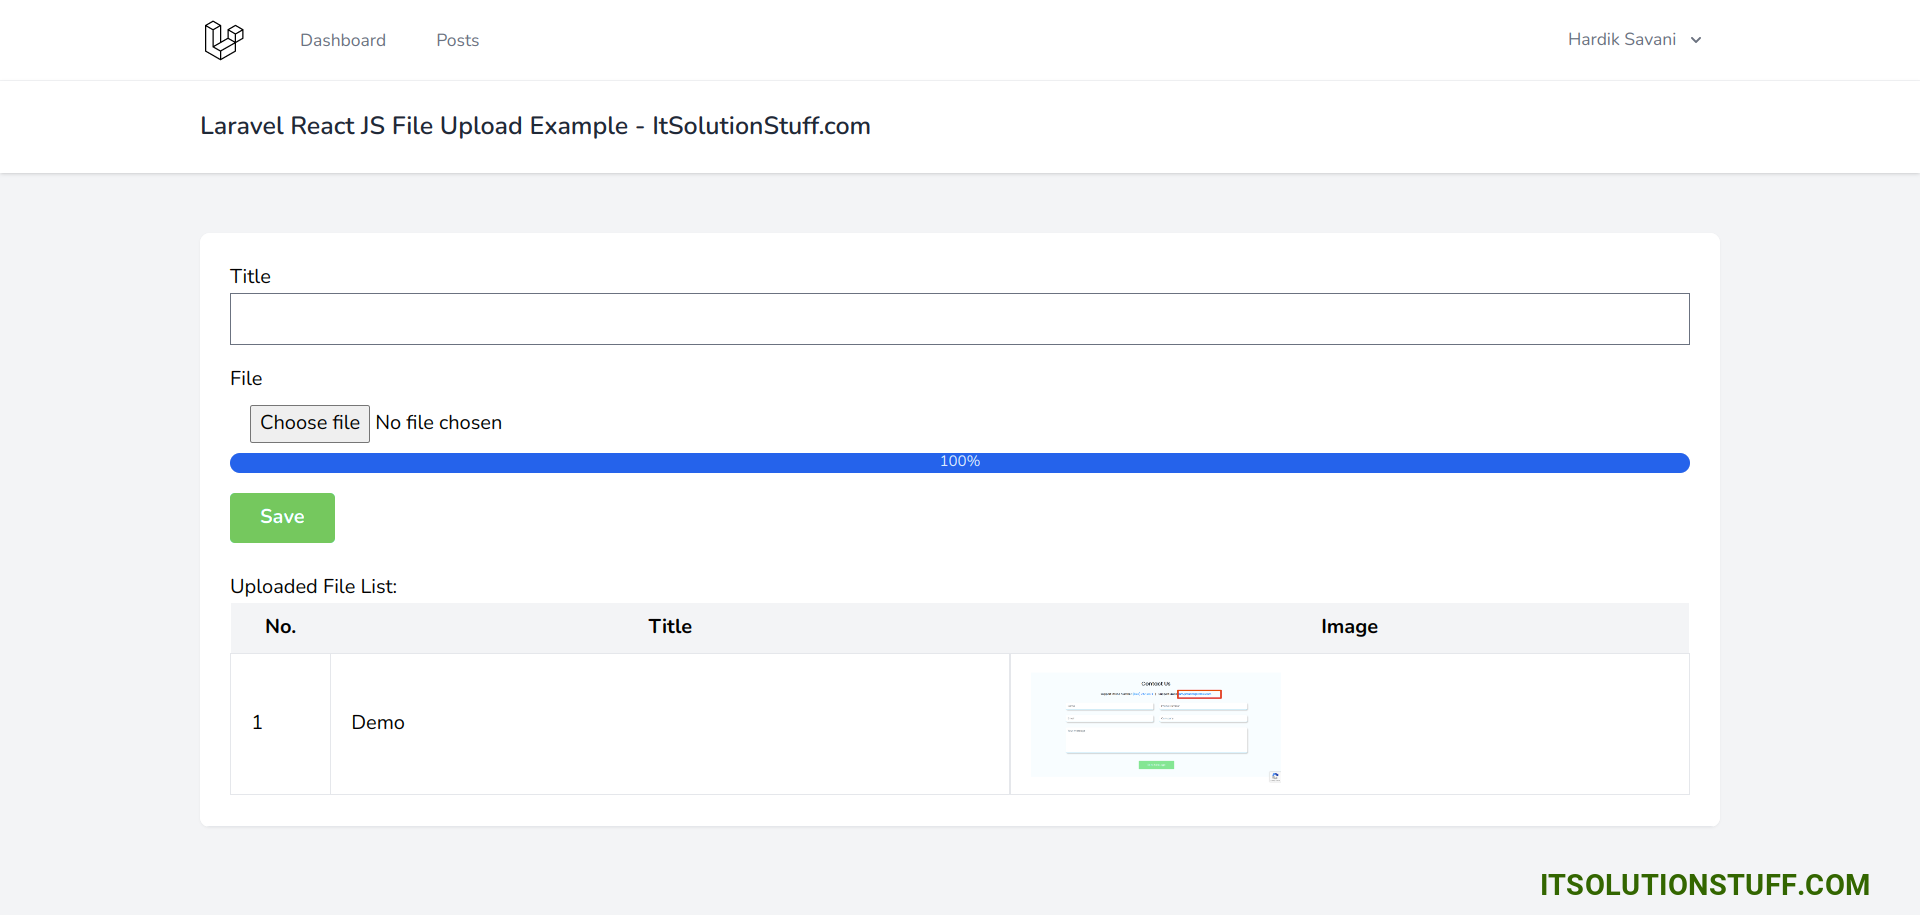
So, let's follow the below step to do react js file upload with laravel vite. you can see below a preview screenshot of the example as well.
Preview:
Step 1: Install Laravel
This is optional; however, if you have not created the laravel app, then you may go ahead and execute the below command:
composer create-project laravel/laravel example-app
Step 2: Create Auth with Breeze
Now, in this step, we need to use composer command to install breeze, so let's run bellow command and install bellow library.
composer require laravel/breeze --dev
now, we need to create authentication using the below command. you can create basic login, register and email verification using react js. if you want to create team management then you have to pass the addition parameter. you can see the below commands:
php artisan breeze:install react
Now, let's node js package:
npm install
let's run vite, you have to keep start this command:
npm run dev
now, we need to run migration command to create database table:
php artisan migrate
Step 3: Create Migration and Model
Here, we need create database migration for files table and also we will create model for files table.
php artisan make:migration create_files_table
Migration:
<?php
use Illuminate\Database\Migrations\Migration;
use Illuminate\Database\Schema\Blueprint;
use Illuminate\Support\Facades\Schema;
return new class extends Migration
{
/**
* Run the migrations.
*
* @return void
*/
public function up()
{
Schema::create('files', function (Blueprint $table) {
$table->id();
$table->string('title');
$table->string('name');
$table->timestamps();
});
}
/**
* Reverse the migrations.
*
* @return void
*/
public function down()
{
Schema::dropIfExists('files');
}
};
php artisan migrate
now we will create File.php model by using following command:
php artisan make:model File
App/Models/File.php
<?php
namespace App\Models;
use Illuminate\Database\Eloquent\Factories\HasFactory;
use Illuminate\Database\Eloquent\Model;
use Illuminate\Database\Eloquent\Casts\Attribute;
class File extends Model
{
use HasFactory;
/**
* The attributes that are mass assignable.
*
* @var array
*/
protected $fillable = [
'title', 'name'
];
/**
* Get the user's first name.
*
* @return \Illuminate\Database\Eloquent\Casts\Attribute
*/
protected function name(): Attribute
{
return Attribute::make(
get: fn ($value) => url('uploads/'.$value),
);
}
}
Step 4: Create Route
In third step, we will create routes for react js image upload example. so create get and post routes here.
routes/web.php
<?php
use Illuminate\Support\Facades\Route;
use App\Http\Controllers\FileController;
/*
|--------------------------------------------------------------------------
| Web Routes
|--------------------------------------------------------------------------
|
| Here is where you can register web routes for your application. These
| routes are loaded by the RouteServiceProvider within a group which
| contains the "web" middleware group. Now create something great!
|
*/
Route::get('file-upload', [FileController::class, 'index'])->name('file.upload');
Route::post('file-upload', [FileController::class, 'store'])->name('file.upload.store');
Step 5: Create Controller
In this step, we will create FileController file and add following code on it.
Files will upload on "uploads" folder in public directory.
app/Http/Controllers/FileController.php
<?php
namespace App\Http\Controllers;
use Illuminate\Http\Request;
use Inertia\Inertia;
use Illuminate\Support\Facades\Validator;
use App\Models\File;
class FileController extends Controller
{
/**
* Show the form for creating a new resource.
*
* @return Response
*/
public function index()
{
$files = File::latest()->get();
return Inertia::render('FileUpload', compact('files'));
}
/**
* Show the form for creating a new resource.
*
* @return Response
*/
public function store(Request $request)
{
Validator::make($request->all(), [
'title' => ['required'],
'file' => ['required'],
])->validate();
$fileName = time().'.'.$request->file->extension();
$request->file->move(public_path('uploads'), $fileName);
File::create([
'title' => $request->title,
'name' => $fileName
]);
return redirect()->route('file.upload');
}
}
Step 6: Create React Pages
Here, in this step we will create react js file for FileUpload.jsx
so, let's create it and add bellow code on it.
resources/js/Pages/FileUpload.jsx
import React from 'react';
import Authenticated from '@/Layouts/Authenticated';
import { Head, useForm, usePage, Link } from '@inertiajs/inertia-react';
export default function Dashboard(props) {
const { files } = usePage().props
const { data, setData, errors, post, progress } = useForm({
title: "",
file: null,
});
function handleSubmit(e) {
e.preventDefault();
post(route("file.upload.store"));
setData("title", "")
setData("file", null)
}
return (
<Authenticated
auth={props.auth}
errors={props.errors}
header={<h2 className="font-semibold text-xl text-gray-800 leading-tight">Laravel React JS File Upload Example - ItSolutionStuff.com</h2>}
>
<Head title="Posts" />
<div className="py-12">
<div className="max-w-7xl mx-auto sm:px-6 lg:px-8">
<div className="bg-white overflow-hidden shadow-sm sm:rounded-lg">
<div className="p-6 bg-white border-b border-gray-200">
<form name="createForm" onSubmit={handleSubmit}>
<div className="flex flex-col">
<div className="mb-4">
<label className="">Title</label>
<input
type="text"
className="w-full px-4 py-2"
label="Title"
name="title"
value={data.title}
onChange={(e) =>
setData("title", e.target.value)
}
/>
<span className="text-red-600">
{errors.title}
</span>
</div>
<div className="mb-0">
<label className="">File</label>
<input
type="file"
className="w-full px-4 py-2"
label="File"
name="file"
onChange={(e) =>
setData("file", e.target.files[0])
}
/>
<span className="text-red-600">
{errors.file}
</span>
</div>
</div>
{progress && (
<div className="w-full bg-gray-200 rounded-full dark:bg-gray-700">
<div className="bg-blue-600 text-xs font-medium text-blue-100 text-center p-0.5 leading-none rounded-full" width={progress.percentage}> {progress.percentage}%</div>
</div>
)}
<div className="mt-4">
<button
type="submit"
className="px-6 py-2 font-bold text-white bg-green-500 rounded"
>
Save
</button>
</div>
</form>
<br/>
<h1>Uploaded File List:</h1>
<table className="table-fixed w-full">
<thead>
<tr className="bg-gray-100">
<th className="px-4 py-2 w-20">No.</th>
<th className="px-4 py-2">Title</th>
<th className="px-4 py-2">Image</th>
</tr>
</thead>
<tbody>
{files.map(({ id, title, name }) => (
<tr>
<td className="border px-4 py-2">{ id }</td>
<td className="border px-4 py-2">{ title }</td>
<td className="border px-4 py-2">
<img src={name} width="200px" />
</td>
</tr>
))}
{files.length === 0 && (
<tr>
<td
className="px-6 py-4 border-t"
colSpan="4"
>
No contacts found.
</td>
</tr>
)}
</tbody>
</table>
</div>
</div>
</div>
</div>
</Authenticated>
);
}
Run Laravel App:
All the required steps have been done, now you have to type the given below command and hit enter to run the Laravel app:
php artisan serve
Also keep run following command for vite:
npm run dev
If you want to build then you can run following command:
npm run build
Now, Go to your web browser, type the given URL and view the app output:
http://localhost:8000
After login you need to go here:
http://localhost:8000/file-upload
now it works...
I hope it can help you...

