How to Create and Use Traits in Laravel 11?
Hello,
In this article, i will show you how to create and use trait in laravel 11 framework.
The release of Laravel 11 is around the corner and it is packed with a lot of new features and improvements. Laravel 11 comes with a slimmer application skeleton. Laravel 11 introduce streamlined application structure, per-second rate limiting, health routing etc.
A Laravel trait is a reusable set of methods that can be included within Laravel classes to add functionality. Traits offer a way to group and reuse code across multiple classes without inheritance limitations. They provide a convenient method for extending Laravel's capabilities while maintaining clean, modular code. By incorporating traits, developers can enhance their application's efficiency and maintainability by promoting code reuse and separation of concerns within the Laravel framework.
Laravel 11 added a new Artisan command to create a custom trait. In this example, we will create a "Sluggable" trait. in trait, we will define the methods for generating slugs and checking their uniqueness. We will use it in the Post model. So let's see the simple example step by step:
You can use the following command to create a new trait in Laravel 11.
php artisan make:trait {traitName}Let's see the simple steps:
Step 1: Install Laravel 11
This is optional; however, if you have not created the Laravel app, then you may go ahead and execute the command below:
composer create-project --prefer-dist laravel/laravel laravel-dev dev-master
Step 2: Create Migration
Here, we need to create a database migration for the "posts" table with title, content, and slug columns. Additionally, we will create a model for the posts table.
php artisan make:migration create_posts_tabledatabase/migrations/2024_03_03_141714_create_posts_table.php
<?php

use Illuminate\Database\Migrations\Migration;
use Illuminate\Database\Schema\Blueprint;
use Illuminate\Support\Facades\Schema;

return new class extends Migration
{
    /**
     * Run the migrations.
     */
    public function up(): void
    {
        Schema::create('posts', function (Blueprint $table) {
            $table->id();
            $table->string('title');
            $table->string('slug');
            $table->text('content');
            $table->timestamps();
        });
    }

    /**
     * Reverse the migrations.
     */
    public function down(): void
    {
        Schema::dropIfExists('posts');
    }
};
Then run the migration command to create the "posts" table.
php artisan migrateStep 3: Create Trait Class
In this step, we will create Sluggable.php class and define the methods for generating slugs and checking their uniqueness. Let's create the model and update the following code:
Run the following class to create a new trait:
php artisan make:trait Traits/Sluggablenow, update the following code:
app/Traits/Sluggable.php
<?php

namespace App\Traits;

trait Sluggable
{
    /**
     * Write code on Method
     *
     * @return response()
     */
    public function generateSlug($string)
    {
        $slug = strtolower(str_replace(' ', '-', $string));
        $count = 1;

        while ($this->slugExists($slug)) {
            $slug = strtolower(str_replace(' ', '-', $string)) . '-' . $count;
            $count++;
        }

        return $slug;
    }

    /**
     * Write code on Method
     *
     * @return response()
     */
    protected function slugExists($slug)
    {
        return static::where('slug', $slug)->exists();
    }
}
Step 4: Create Model
In this step, we will create Post.php model, use the Sluggable trait. Let's create the model and update the following code:
php artisan make:model PostApp/Models/Post.php
<?php

namespace App\Models;

use Illuminate\Database\Eloquent\Model;
use App\Traits\Sluggable;

class Post extends Model
{
    use Sluggable;

    /**
     * Write code on Method
     *
     * @return response()
     */
    protected $fillable = ['title', 'content', 'slug'];

    /**
     * Write code on Method
     *
     * @return response()
     */
    public function setTitleAttribute($value)
    {
        $this->attributes['title'] = $value;
        $this->attributes['slug'] = $this->generateSlug($value);
    }
}
Step 5: Create Route
In this step, we will create one route for testing. So, create one route here.
routes/web.php
<?php

use Illuminate\Support\Facades\Route;
use App\Http\Controllers\PostController;

Route::get('/post', [PostController::class, 'index']);
Step 6: Create Controller
In this step, we will create PostController file and write an index() method to create posts records and debug it.
app/Http/Controllers/PostController.php
<?php
namespace App\Http\Controllers;
use Illuminate\Http\Request;
use App\Models\Post;
class PostController extends Controller
{
/**
* Write code on Method
*
* @return response()
*/
public function index(Request $request) {
$post = Post::create([
"title" => "Example Post",
"content" => "This is an example post.",
]);
$post2 = Post::create([
"title" => "Example Post",
"content" => "This is an example post 2.",
]);
$post3 = Post::create([
"title" => "Example Post",
"content" => "This is an example post 3.",
]);
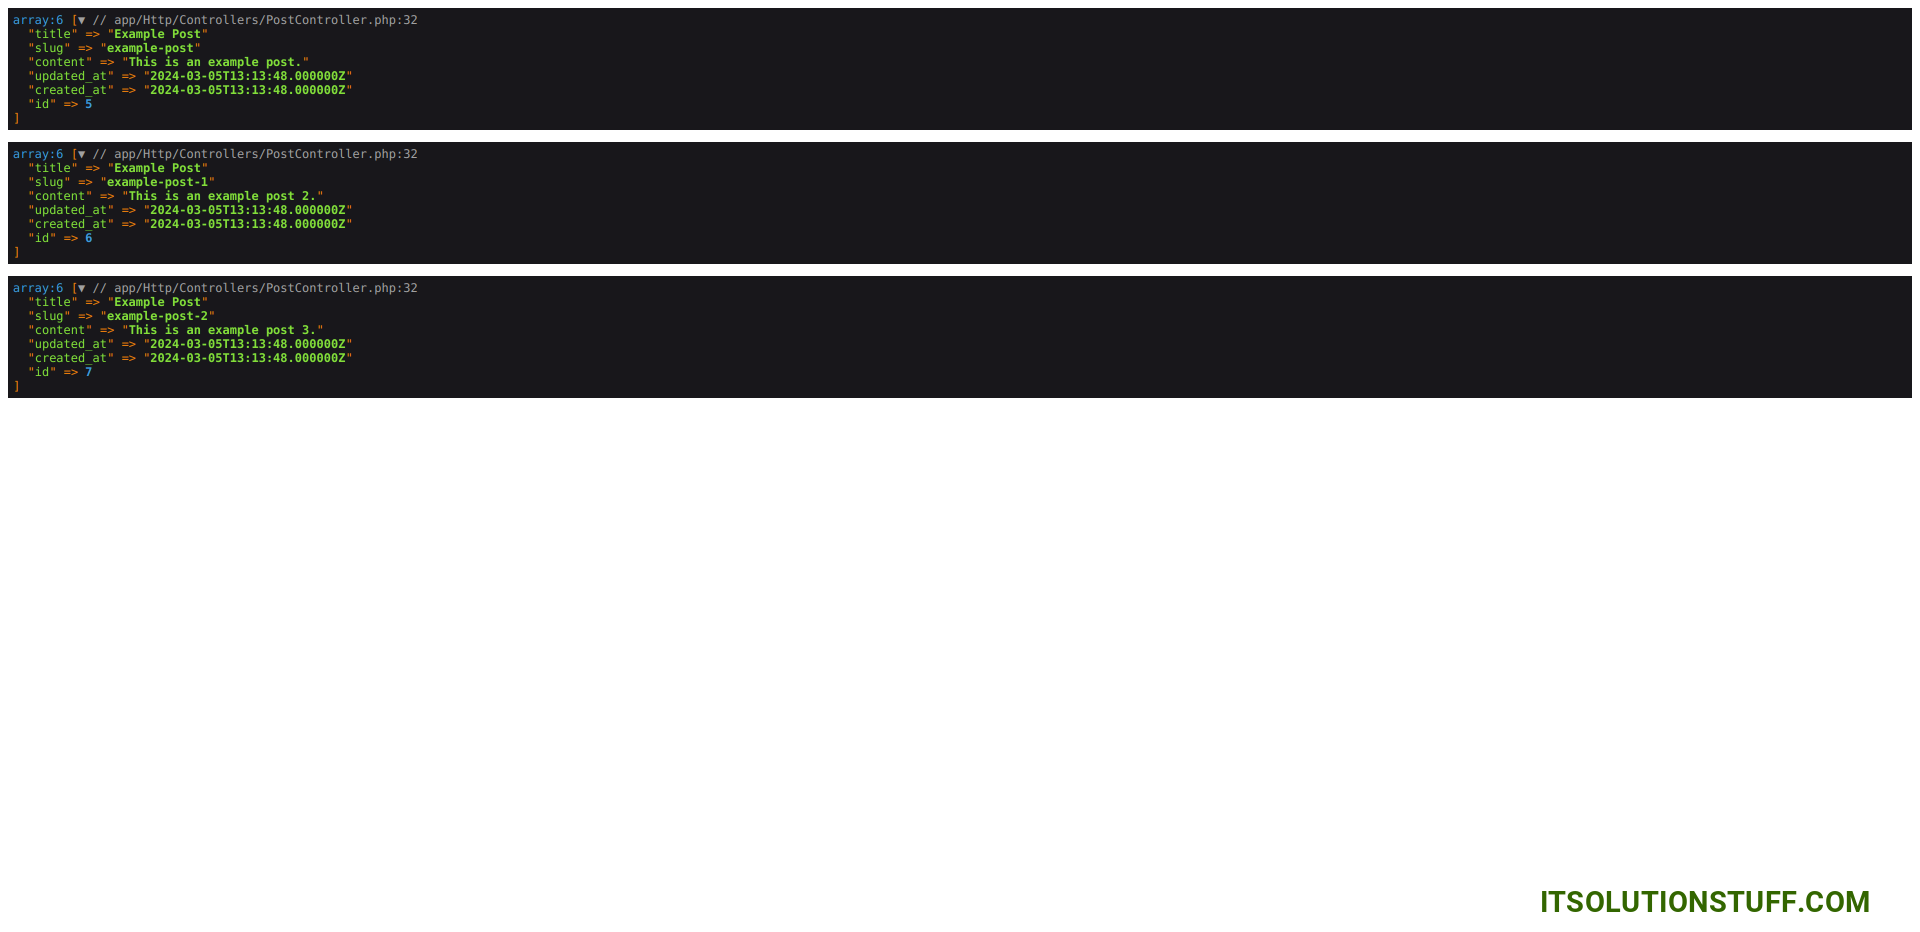
dd($post->toArray(), $post2->toArray(), $post3->toArray());
}
}
Run Laravel App:
All the required steps have been done, now you have to type the given below command and hit enter to run the Laravel app:
php artisan serveNow, Go to your web browser, type the given URL and view the app output:
http://localhost:8000/postOutput:
I hope it can help you...

