CRUD (Create Read Update Delete) Example in Laravel 5.2 from Scratch
In this post i going to give example how to create CRUD (Create Read Update Delete) application in laravel 5 from starting. In this step you have to just follow few step and you can create simple CRUD application. In this CRUD application after follow all output you can listing items, create new item, edit item and also delete item function. I used resource route, validation, listing etc for this crud application example.
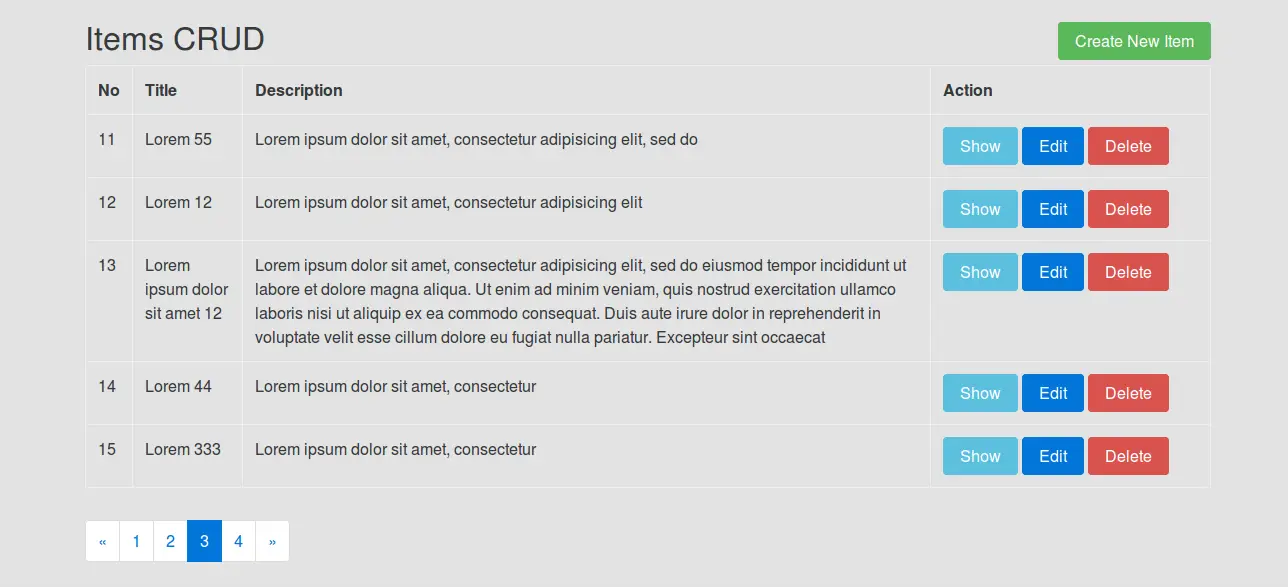
After finish all step successfully, you will find output like as bellow image output.
Preview:
Step 1: Laravel Installation
If you haven't installed laravel in your system then you have to run bellow command and get new Laravel project.
composer create-project --prefer-dist laravel/laravel blog
After clone laravel application, we also require to install laravelcollective/html for Form class, you can install from here : HTML/FORM not found in Laravel 5?.
Step 2: Create items table and model
In this step we have to create migration for items table using Laravel 5 php artisan command, so first fire bellow command:
php artisan make:migration create_items_table
After this command you will find one file in following path database/migrations and you have to put bellow code in your migration file for create items table.
use Illuminate\Database\Schema\Blueprint;
use Illuminate\Database\Migrations\Migration;


class CreateItemsTable extends Migration
{


    public function up()
    {
        Schema::create('items', function (Blueprint $table) {
            $table->increments('id');
            $table->string('title');
            $table->text('description');
            $table->timestamps();
        });
    }


    public function down()
    {
        Schema::drop("items");
    }
}
After craete "items" table you should craete Item model for items, so first create file in this path app/Item.php and put bellow content in item.php file:
app/Item.php
namespace App;


use Illuminate\Database\Eloquent\Model;


class Item extends Model
{


    public $fillable = ['title','description'];


}
Step 3: Add Route and Controller
Now we have to add route for items CRUD, in this example i added resource route for application, if we add resource route then it will add index, create, show, edit and delete route automatically. So add bellow line in your route file.
app/Http/routes.php
Route::resource('itemCRUD','ItemCRUDController');
Ok, now we should create new controller as ItemCRUDController in this path app/Http/Controllers/ItemCRUDController.php. this controller will manage all route method:
app/Http/Controllers/ItemCRUDController.php
namespace App\Http\Controllers;


use Illuminate\Http\Request;
use App\Http\Controllers\Controller;
use App\Item;


class ItemCRUDController extends Controller
{


    /**
     * Display a listing of the resource.
     *
     * @return \Illuminate\Http\Response
     */
    public function index(Request $request)
    {
        $items = Item::orderBy('id','DESC')->paginate(5);
        return view('ItemCRUD.index',compact('items'))
            ->with('i', ($request->input('page', 1) - 1) * 5);
    }


    /**
     * Show the form for creating a new resource.
     *
     * @return \Illuminate\Http\Response
     */
    public function create()
    {
        return view('ItemCRUD.create');
    }


    /**
     * Store a newly created resource in storage.
     *
     * @param  \Illuminate\Http\Request  $request
     * @return \Illuminate\Http\Response
     */
    public function store(Request $request)
    {
        $this->validate($request, [
            'title' => 'required',
            'description' => 'required',
        ]);


        Item::create($request->all());

        return redirect()->route('itemCRUD.index')
                        ->with('success','Item created successfully');
    }


    /**
     * Display the specified resource.
     *
     * @param  int  $id
     * @return \Illuminate\Http\Response
     */
    public function show($id)
    {
        $item = Item::find($id);
        return view('ItemCRUD.show',compact('item'));
    }


    /**
     * Show the form for editing the specified resource.
     *
     * @param  int  $id
     * @return \Illuminate\Http\Response
     */
    public function edit($id)
    {
        $item = Item::find($id);
        return view('ItemCRUD.edit',compact('item'));
    }


    /**
     * Update the specified resource in storage.
     *
     * @param  \Illuminate\Http\Request  $request
     * @param  int  $id
     * @return \Illuminate\Http\Response
     */
    public function update(Request $request, $id)
    {
        $this->validate($request, [
            'title' => 'required',
            'description' => 'required',
        ]);


        Item::find($id)->update($request->all());

        return redirect()->route('itemCRUD.index')
                        ->with('success','Item updated successfully');
    }


    /**
     * Remove the specified resource from storage.
     *
     * @param  int  $id
     * @return \Illuminate\Http\Response
     */
    public function destroy($id)
    {
        Item::find($id)->delete();
        return redirect()->route('itemCRUD.index')
                        ->with('success','Item deleted successfully');
    }
}
Step 4: Create Blade File
In this step we will create blade file for listing, craete, edit and show item and also create default blade file for theme setting. So first we create new layouts directory and create default.blade.php file inside that folder.
resources/views/layouts/default.blade.php
<!DOCTYPE html>
<html lang="en">
<head>
    <meta charset="utf-8">
    <meta http-equiv="X-UA-Compatible" content="IE=edge">
    <meta name="viewport" content="width=device-width, initial-scale=1">


    <title>Laravel CRUD</title>
    <link href="https://cdnjs.cloudflare.com/ajax/libs/twitter-bootstrap/4.0.0-alpha/css/bootstrap.css" rel="stylesheet">


</head>
<body>


<div class="container">
    @yield('content')
</div>


</body>
</html>
Ok, now we will creae layout for items listing, So first we create new ItemCRUD directory and create index.blade.php file inside that folder.
resources/views/ItemCRUD/index.blade.php
@extends('layouts.default')


@section('content')


    <div class="row">
        <div class="col-lg-12 margin-tb">
            <div class="pull-left">
                <h2>Items CRUD</h2>
            </div>
            <div class="pull-right">
                <a class="btn btn-success" href="{{ route('itemCRUD.create') }}"> Create New Item</a>
            </div>
        </div>
    </div>


    @if ($message = Session::get('success'))
        <div class="alert alert-success">
            <p>{{ $message }}</p>
        </div>
    @endif


    <table class="table table-bordered">
        <tr>
            <th>No</th>
            <th>Title</th>
            <th>Description</th>
            <th width="280px">Action</th>
        </tr>
    @foreach ($items as $key => $item)
    <tr>
        <td>{{ ++$i }}</td>
        <td>{{ $item->title }}</td>
        <td>{{ $item->description }}</td>
        <td>
            <a class="btn btn-info" href="{{ route('itemCRUD.show',$item->id) }}">Show</a>
            <a class="btn btn-primary" href="{{ route('itemCRUD.edit',$item->id) }}">Edit</a>
            {!! Form::open(['method' => 'DELETE','route' => ['itemCRUD.destroy', $item->id],'style'=>'display:inline']) !!}
            {!! Form::submit('Delete', ['class' => 'btn btn-danger']) !!}
            {!! Form::close() !!}
        </td>
    </tr>
    @endforeach
    </table>


    {!! $items->render() !!}


@endsection
Now we create new blade file for create new item, it's call create.blade.php file inside "ItemCRUD".
resources/views/ItemCRUD/create.blade.php
@extends('layouts.default')


@section('content')


    <div class="row">
        <div class="col-lg-12 margin-tb">
            <div class="pull-left">
                <h2>Create New Item</h2>
            </div>
            <div class="pull-right">
                <a class="btn btn-primary" href="{{ route('itemCRUD.index') }}"> Back</a>
            </div>
        </div>
    </div>


    @if (count($errors) > 0)
        <div class="alert alert-danger">
            <strong>Whoops!</strong> There were some problems with your input.<br><br>
            <ul>
                @foreach ($errors->all() as $error)
                    <li>{{ $error }}</li>
                @endforeach
            </ul>
        </div>
    @endif


    {!! Form::open(array('route' => 'itemCRUD.store','method'=>'POST')) !!}
    <div class="row">


        <div class="col-xs-12 col-sm-12 col-md-12">
            <div class="form-group">
                <strong>Title:</strong>
                {!! Form::text('title', null, array('placeholder' => 'Title','class' => 'form-control')) !!}
            </div>
        </div>


        <div class="col-xs-12 col-sm-12 col-md-12">
            <div class="form-group">
                <strong>Description:</strong>
                {!! Form::textarea('description', null, array('placeholder' => 'Description','class' => 'form-control','style'=>'height:100px')) !!}
            </div>
        </div>


        <div class="col-xs-12 col-sm-12 col-md-12 text-center">
                <button type="submit" class="btn btn-primary">Submit</button>
        </div>


    </div>
    {!! Form::close() !!}


@endsection
Next, we have to create show.blade.php file for item details page, so again create this file in ItemCRUD folder.
resources/views/ItemCRUD/show.blade.php
@extends('layouts.default')


@section('content')


    <div class="row">
        <div class="col-lg-12 margin-tb">
            <div class="pull-left">
                <h2> Show Item</h2>
            </div>
            <div class="pull-right">
                <a class="btn btn-primary" href="{{ route('itemCRUD.index') }}"> Back</a>
            </div>
        </div>
    </div>


    <div class="row">


        <div class="col-xs-12 col-sm-12 col-md-12">
            <div class="form-group">
                <strong>Title:</strong>
                {{ $item->title }}
            </div>
        </div>


        <div class="col-xs-12 col-sm-12 col-md-12">
            <div class="form-group">
                <strong>Description:</strong>
                {{ $item->description }}
            </div>
        </div>


    </div>


@endsection
At last, we need to create edit.blade.php file for update item, so again create this file in ItemCRUD folder.
resources/views/ItemCRUD/edit.blade.php
@extends('layouts.default')


@section('content')


    <div class="row">
        <div class="col-lg-12 margin-tb">
            <div class="pull-left">
                <h2>Edit New Item</h2>
            </div>
            <div class="pull-right">
                <a class="btn btn-primary" href="{{ route('itemCRUD.index') }}"> Back</a>
            </div>
        </div>
    </div>


    @if (count($errors) > 0)
        <div class="alert alert-danger">
            <strong>Whoops!</strong> There were some problems with your input.<br><br>
            <ul>
                @foreach ($errors->all() as $error)
                    <li>{{ $error }}</li>
                @endforeach
            </ul>
        </div>
    @endif


    {!! Form::model($item, ['method' => 'PATCH','route' => ['itemCRUD.update', $item->id]]) !!}
    <div class="row">


        <div class="col-xs-12 col-sm-12 col-md-12">
            <div class="form-group">
                <strong>Title:</strong>
                {!! Form::text('title', null, array('placeholder' => 'Title','class' => 'form-control')) !!}
            </div>
        </div>


        <div class="col-xs-12 col-sm-12 col-md-12">
            <div class="form-group">
                <strong>Description:</strong>
                {!! Form::textarea('description', null, array('placeholder' => 'Description','class' => 'form-control','style'=>'height:100px')) !!}
            </div>
        </div>


        <div class="col-xs-12 col-sm-12 col-md-12 text-center">
                <button type="submit" class="btn btn-primary">Submit</button>
        </div>


    </div>
    {!! Form::close() !!}


@endsection
Now, you can check.....
Video

