Angular 9 Reactive Form Validation Example
Today, angular 9 reactive form validation on submit is our main topic. step by step explain how to use reactive forms in angular 9. this example will help you reactive form validation in angular 9. step by step explain reactive form in angular 9 example.
we will create reactive form step by step with validation like required, min length, email etc with angular 9 application.
Reactive forms provide a model-driven approach to handling form inputs whose values change over the time. In Reactive forms, we need to import "ReactiveFormsModule" from angular forms library. we will use FormControl, FormGroup, FormArray, Validation classes with Reactive forms in angular 9 app.
If you have simple and basic form in your angular 9 application then i will prefer to use Reactive forms in angular. here i write simple example of Reactive forms with validation in angular 9.
You need to follow bellow step to add form validation in angular 9.
Step 1: Install Angular App
Here, in this step you need to create new ng app for this demo. if you have already created then don't create new angular 9 app.
ng new my-new-app
Step 2: Import FormsModule
If you want to create form in angular app then you need to import FormsModule from @angular/forms library. so let's add following code to app.module.ts file.
src/app/app.module.ts
import { BrowserModule } from '@angular/platform-browser';
import { NgModule } from '@angular/core';
import { AppComponent } from './app.component';
import { FormsModule, ReactiveFormsModule } from '@angular/forms';
@NgModule({
declarations: [
AppComponent
],
imports: [
BrowserModule,
FormsModule,
ReactiveFormsModule
],
providers: [],
bootstrap: [AppComponent]
})
export class AppModule { }
Step 3: Form with ngModel
In this step, we will write code of html form with ngModel. so add following code to app.component.html file.
I used bootstrap class on this form. if you want to add than then follow this link too: Install Boorstrap 4 to Angular 9.
src/app/app.component.html
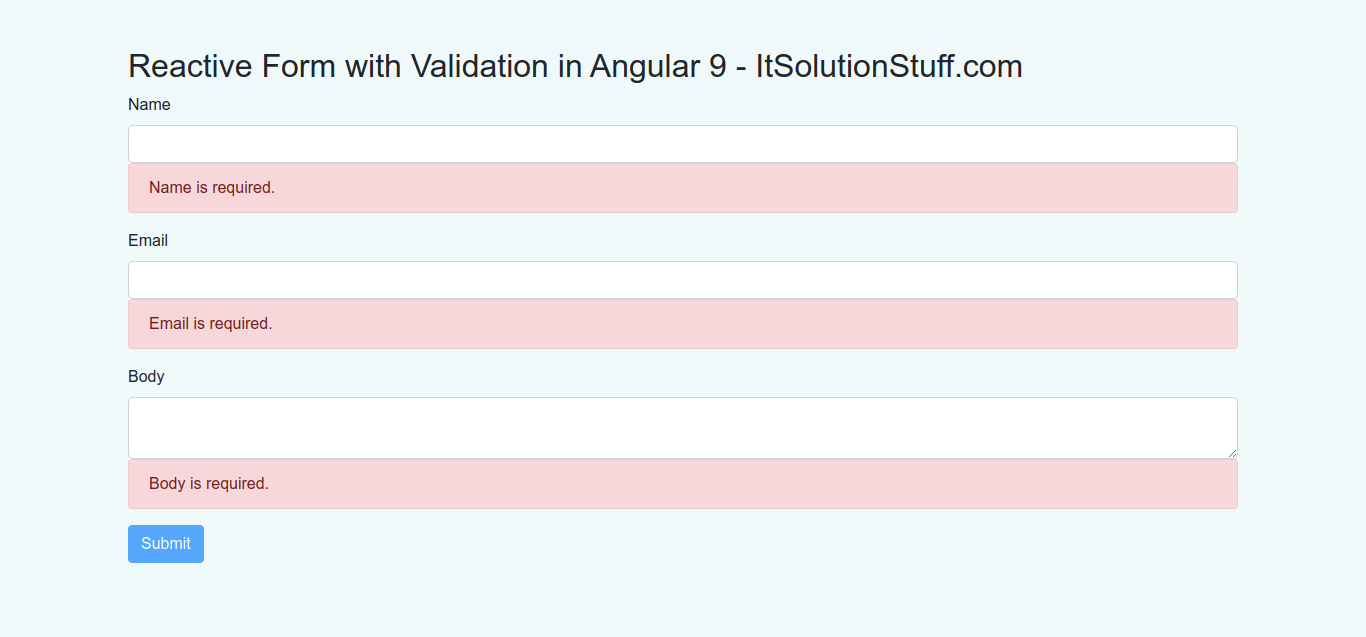
<div class="container">
<h1>Angular 9 Reactive Form Validation Example - ItSolutionStuff.com</h1>
<form [formGroup]="form" (ngSubmit)="submit()">
<div class="form-group">
<label for="name">Name</label>
<input
formControlName="name"
id="name"
type="text"
class="form-control">
<div *ngIf="f.name.touched && f.name.invalid" class="alert alert-danger">
<div *ngIf="f.name.errors.required">Name is required.</div>
<div *ngIf="f.name.errors.minlength">Name should be 3 character.</div>
</div>
</div>
<div class="form-group">
<label for="email">Email</label>
<input
formControlName="email"
id="email"
type="text"
class="form-control">
<div *ngIf="f.email.touched && f.email.invalid" class="alert alert-danger">
<div *ngIf="f.email.errors.required">Email is required.</div>
<div *ngIf="f.email.errors.email">Please, enter valid email address.</div>
</div>
</div>
<div class="form-group">
<label for="body">Body</label>
<textarea
formControlName="body"
id="body"
type="text"
class="form-control">
</textarea>
<div *ngIf="f.body.touched && f.body.invalid" class="alert alert-danger">
<div *ngIf="f.body.errors.required">Body is required.</div>
</div>
</div>
<button class="btn btn-primary" type="submit" [disabled]="!form.valid">Submit</button>
</form>
</div>
Step 4: updated Ts File
In ts file. we will write submit() and get all input fields values. so let's add following code to app.component.ts file.
src/app/app.component.ts
import { Component } from '@angular/core';
import { FormGroup, FormControl, Validators} from '@angular/forms';
@Component({
selector: 'app-root',
templateUrl: './app.component.html',
styleUrls: ['./app.component.css']
})
export class AppComponent {
form = new FormGroup({
name: new FormControl('', [Validators.required, Validators.minLength(3)]),
email: new FormControl('', [Validators.required, Validators.email]),
body: new FormControl('', Validators.required)
});
get f(){
return this.form.controls;
}
submit(){
console.log(this.form.value);
}
}
Now you can run your application using following command:
ng serve
Output
{name: "Hardik Savani", email: "itsolutionstuff@gmail.com", body: "This is a test"}
I hope it can help you...

