Laravel Firebase Push Notification to Android and IOS App Example
Hi All,
In this example, you will learn laravel push notification to android and ios firebase. We will look at example of laravel firebase push notification android. i would like to show you laravel push notification android. if you want to see example of laravel push notifications ios android then you are a right place.
Today, i will give you simple example of send firebase push notification to android and ios app a using laravel. you can also use in laravel 6, laravel 7, laravel 8, laravel 9, laravel 10 and laravel 11 version.
Here, i will give you very simple step to sending push notification to android and ios app using laravel application. so basically your front-end mobile application provides you device token and you will store on database. Then you will use that device token to sending push notification using firebase laravel. so let's follow bellow steps:
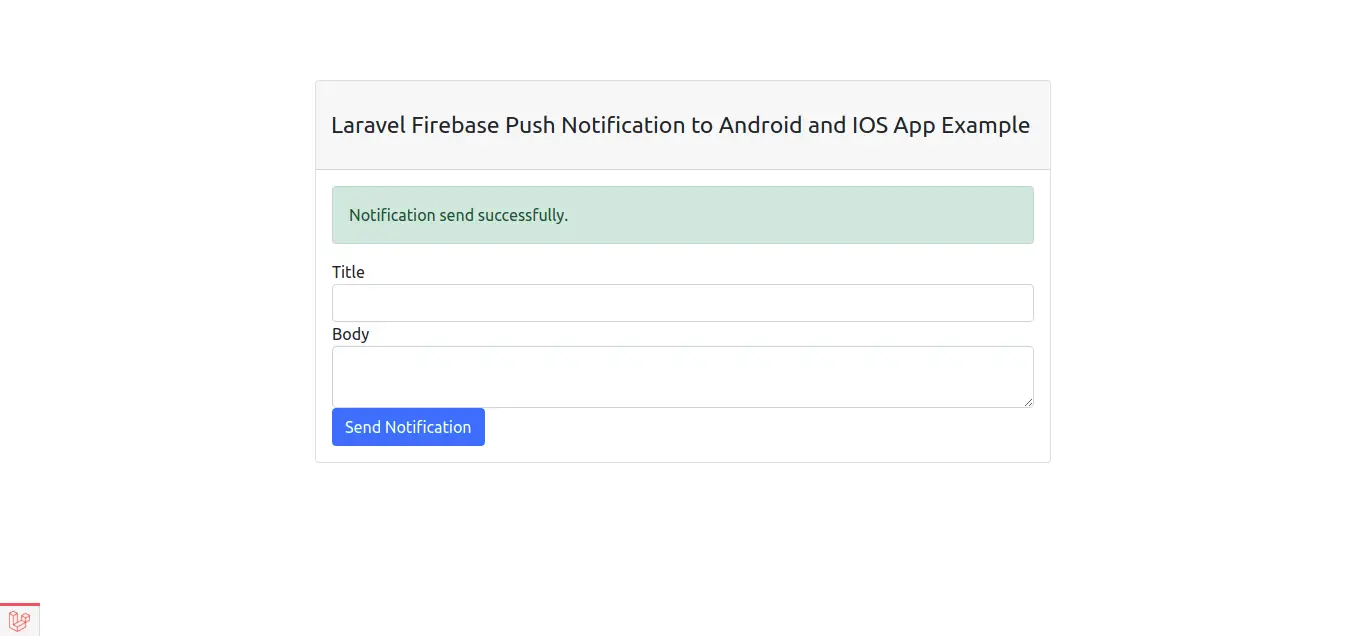
Preview:
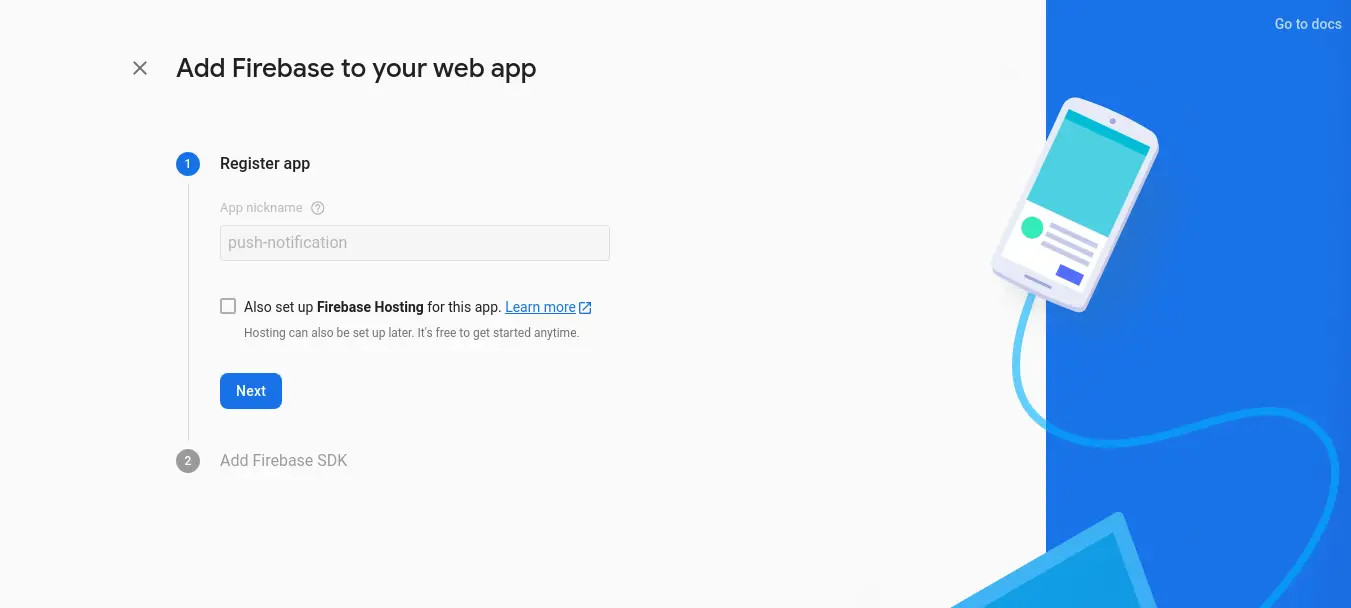
Step 1: Create Firebase Project and App
In first step, we have to go Firebase Console and create a project. then you have to create web app on that project as like i added bellow screenshot:
After created successfully created app we will go to setting page and get server api key as like bellow screen shot:
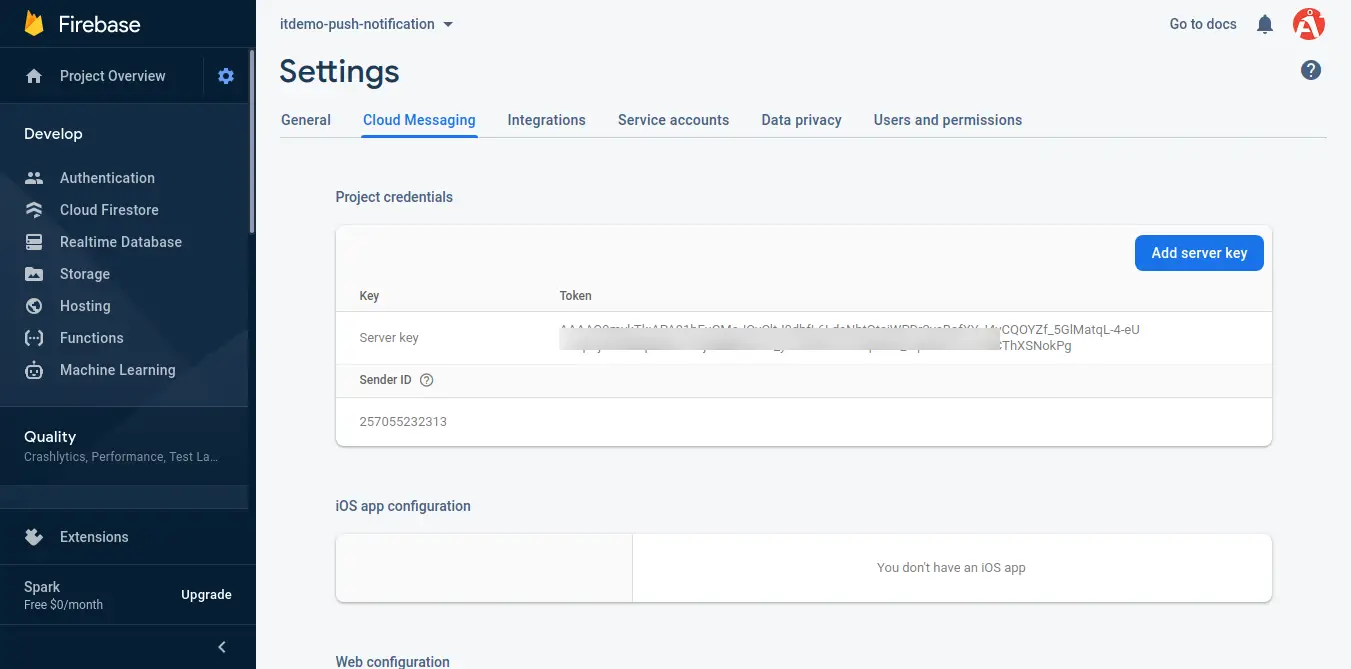
You can copy that key and add on env file as bellow:
.env
FCM_SERVER_KEY=XXXXX
Step 2: Create Route
Here, we need to add some routes to send push notification so let's add that route in web.php file.
routes/web.php
<?php
use Illuminate\Support\Facades\Route;
use App\Http\Controllers\NotificationController;
/*
|--------------------------------------------------------------------------
| Web Routes
|--------------------------------------------------------------------------
|
| Here is where you can register web routes for your application. These
| routes are loaded by the RouteServiceProvider within a group which
| contains the "web" middleware group. Now create something great!
|
*/
Route::get('push-notification', [NotificationController::class, 'index']);
Route::post('sendNotification', [NotificationController::class, 'sendNotification'])->name('send.notification');
Step 3: Create Controller
Here, we need add index() and sendNotification() method for admin route in NotificationController.
In sendNotification() method we will get all device token from users table and send notification to user.
now, so let's add like as bellow:
app/Http/Controllers/NotificationController.php
<?php
namespace App\Http\Controllers;
use Illuminate\Http\Request;
use App\Models\User;
class NotificationController extends Controller
{
/**
* Write code on Method
*
* @return response()
*/
public function index()
{
return view('pushNotification');
}
/**
* Write code on Method
*
* @return response()
*/
public function sendNotification(Request $request)
{
$firebaseToken = User::whereNotNull('device_token')->pluck('device_token')->all();
$SERVER_API_KEY = env('FCM_SERVER_KEY');
$data = [
"registration_ids" => $firebaseToken,
"notification" => [
"title" => $request->title,
"body" => $request->body,
]
];
$dataString = json_encode($data);
$headers = [
'Authorization: key=' . $SERVER_API_KEY,
'Content-Type: application/json',
];
$ch = curl_init();
curl_setopt($ch, CURLOPT_URL, 'https://fcm.googleapis.com/fcm/send');
curl_setopt($ch, CURLOPT_POST, true);
curl_setopt($ch, CURLOPT_HTTPHEADER, $headers);
curl_setopt($ch, CURLOPT_SSL_VERIFYPEER, false);
curl_setopt($ch, CURLOPT_RETURNTRANSFER, true);
curl_setopt($ch, CURLOPT_POSTFIELDS, $dataString);
$response = curl_exec($ch);
return back()->with('success', 'Notification send successfully.');
}
}
Step 4: Update Blade File
In this step, we will create pushNotification.blade.php file with following code:
resources/views/pushNotification.blade.php
<!DOCTYPE html>
<html>
<head>
<meta charset="utf-8">
<title>Laravel Firebase Push Notification to Android and IOS App Example - ItSolutionStuff.com</title>
<link href="https://cdn.jsdelivr.net/npm/bootstrap@5.0.2/dist/css/bootstrap.min.css" rel="stylesheet">
</head>
<body>
<br/>
<div class="container">
<div class="row justify-content-center">
<div class="col-md-8">
<div class="card">
<div class="card-header">{{ __('Dashboard') }}</div>
<div class="card-body">
@if (session('success'))
<div class="alert alert-success" role="alert">
{{ session('success') }}
</div>
@endif
<form action="{{ route('send.notification') }}" method="POST">
@csrf
<div class="form-group">
<label>Title</label>
<input type="text" class="form-control" name="title">
</div>
<div class="form-group">
<label>Body</label>
<textarea class="form-control" name="body"></textarea>
</div>
<button type="submit" class="btn btn-primary">Send Notification</button>
</form>
</div>
</div>
</div>
</div>
</div>
</body>
</html>
Run Laravel App:
All the required steps have been done, now you have to type the given below command and hit enter to run the Laravel app:
php artisan serve
Now, Go to your web browser, type the given URL and view the app output:
http://localhost:8000/push-notification
I hope it can help you...

