Laravel 10 Google Recaptcha V3 Example Tutorial
Hey Artisan,
This definitive guide, we will show you laravel 10 google recaptcha v3. I would like to show you laravel 10 google recaptcha example. This post will give you a simple example of how to use google recaptcha v3 in laravel 10. It's a simple example of recaptcha v3 in laravel 10. Here, Create a basic example of google recaptcha register laravel 10.
Google ReCaptcha V3 is a captcha like system, that provides security against hackers and sticks or curl requests. It assures that a computer user is a human. It is the best and most used captcha system available where users are only required to click on a checkbox and in some cases select some similar images related to the conman question.
As we know, When we created a contact us form or feedback form, or any form that is accessed publicly Then we have so many submissions from spam. They submit those forms using a curl request or something. So we can not get the real users from those forms. Here, i we will use google recaptcha v3 to prevent spam submission. we will create a contact us form and use google recaptcha v3 and prevent them. So that way you have only real users and real feedback you will get.

Let's see the below steps and make it done.
Step 1: Install Laravel
This step is not required; however, if you have not created the laravel app, then you may go ahead and execute the below command:
composer create-project laravel/laravel example-app
Step 2: Add Google API Key
In this step we need to set google site key and secret key. If you don't have site key and secret key then you can create from here. First click on this link : Recaptcha Admin
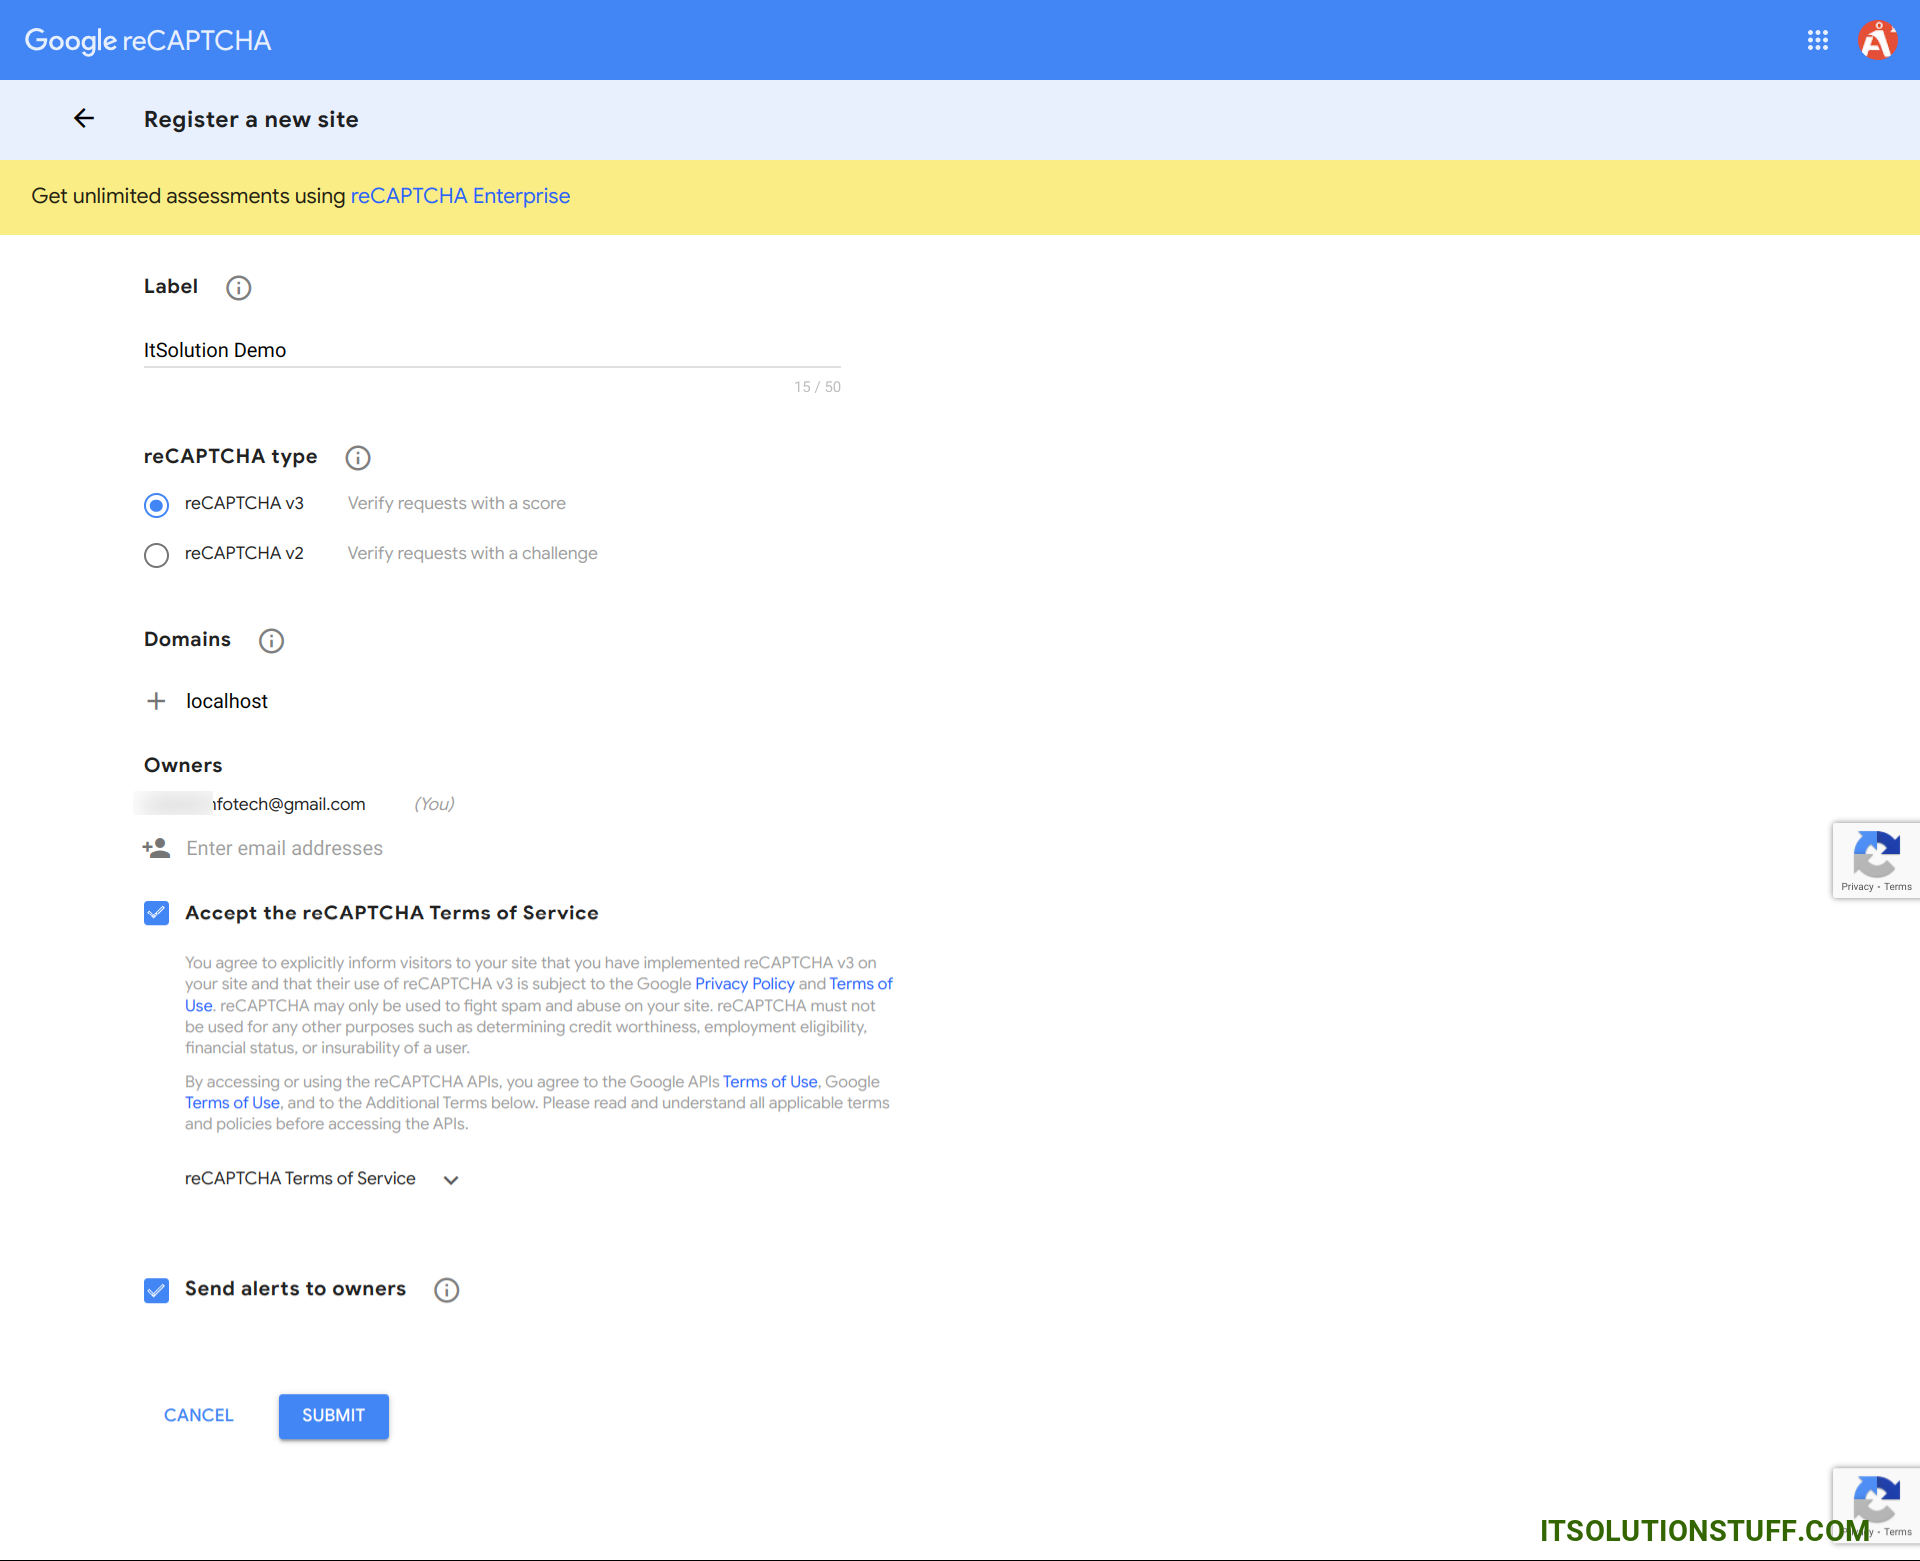
Ok, after successfully register you can get site key and secret key from like bellow preview.
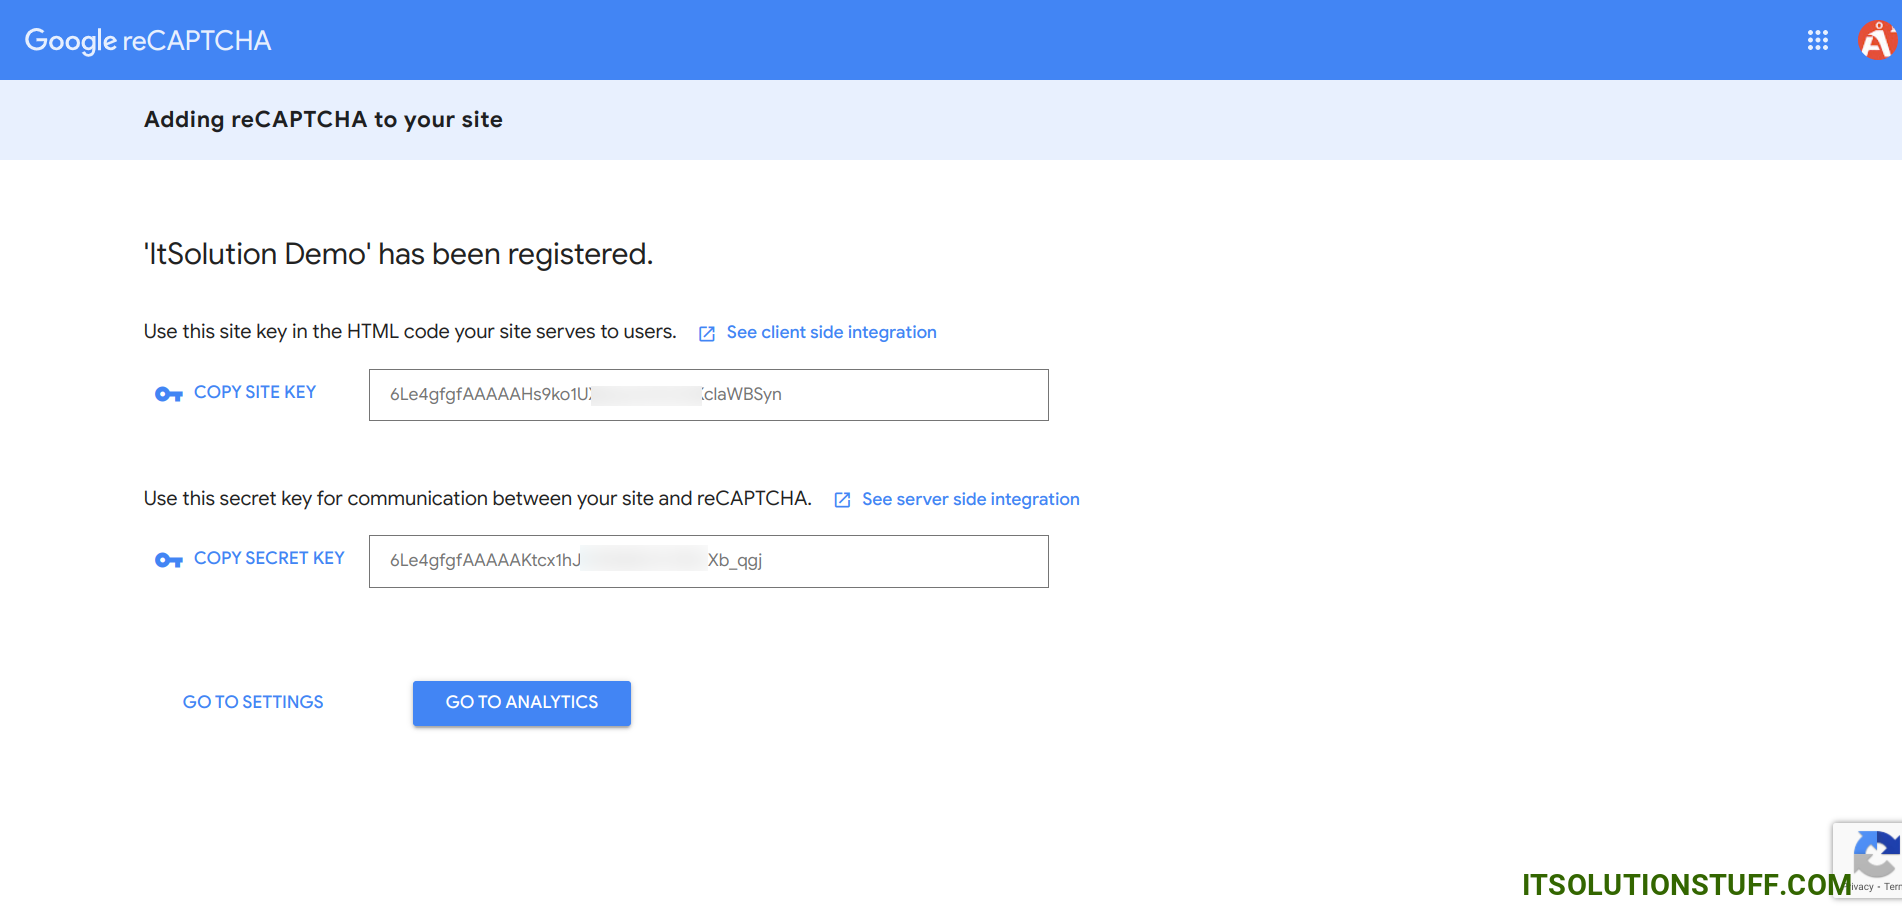
Now open .env file and add this two variable
.env
GOOGLE_RECAPTCHA_KEY=6Lc9hfMfAAAAAMNLm5_2P4jbzVSNWxaF0vgk
GOOGLE_RECAPTCHA_SECRET=6Lc9hfMfAAAAAAdBOKGoz88JVgc5LwMO9
Step 3: Create Routes
In this step, we will create two routes GET and POST. so let's add it.
routes/web.php
<?php
use Illuminate\Support\Facades\Route;
use App\Http\Controllers\ContactController;
/*
|--------------------------------------------------------------------------
| Web Routes
|--------------------------------------------------------------------------
|
| Here is where you can register web routes for your application. These
| routes are loaded by the RouteServiceProvider within a group which
| contains the "web" middleware group. Now create something great!
|
*/
Route::get('contact-us', [ContactController::class, 'index']);
Route::post('contact-us', [ContactController::class, 'store'])->name('contact.us.store');
Step 4: Create Validation Rule
In this step, we will create new "ReCaptcha" validation rule that will check user is real or not using google recaptcha v3 API. so let's run below command and update rule validation file.
php artisan make:rule ReCaptcha
app/Rules/ReCaptcha.php
<?php
namespace App\Rules;
use Closure;
use Illuminate\Contracts\Validation\ValidationRule;
use Illuminate\Support\Facades\Http;
class ReCaptcha implements ValidationRule
{
/**
* Run the validation rule.
*
* @param \Closure(string): \Illuminate\Translation\PotentiallyTranslatedString $fail
*/
public function validate(string $attribute, mixed $value, Closure $fail): void
{
$response = Http::get("https://www.google.com/recaptcha/api/siteverify",[
'secret' => env('GOOGLE_RECAPTCHA_SECRET'),
'response' => $value
]);
if (!($response->json()["success"] ?? false)) {
$fail('The google recaptcha is required.');
}
}
}
Step 5: Create Controller
In this step, we have to create new controller as ContactController and we have also need to add two methods index() and store() on that controller. We will use recaptcha validation on store method. so let's update follow code:
app/Http/Controllers/ContactController.php
<?php
namespace App\Http\Controllers;
use Illuminate\Http\Request;
use App\Rules\ReCaptcha;
use Illuminate\View\View;
use Illuminate\Http\RedirectResponse;
class ContactController extends Controller
{
/**
* Write code on Method
*
* @return response()
*/
public function index(): View
{
return view('contactForm');
}
/**
* Write code on Method
*
* @return response()
*/
public function store(Request $request): RedirectResponse
{
$request->validate([
'name' => 'required',
'email' => 'required|email',
'phone' => 'required|digits:10|numeric',
'subject' => 'required',
'message' => 'required',
'g-recaptcha-response' => ['required', new ReCaptcha]
]);
$input = $request->all();
/*------------------------------------------
--------------------------------------------
Write Code for Store into Database
--------------------------------------------
--------------------------------------------*/
dd($input);
return redirect()->back()->with(['success' => 'Contact Form Submit Successfully']);
}
}
Step 6: Create View File
In Last step, let's create contactForm.blade.php(resources/views/contactForm.blade.php) for create form with google recaptcha v3 and put following code:
resources/views/contactForm.blade.php
<!DOCTYPE html>
<html>
<head>
<title>Laravel Google ReCaptcha V3 Example - ItSolutionStuff.com</title>
<meta charset="utf-8">
<meta http-equiv="X-UA-Compatible" content="IE=edge">
<meta name="viewport" content="width=device-width, initial-scale=1">
<link rel="stylesheet" href="https://cdnjs.cloudflare.com/ajax/libs/twitter-bootstrap/4.5.2/css/bootstrap.min.css" />
<script src="https://code.jquery.com/jquery-3.4.1.min.js"></script>
<script src="https://www.google.com/recaptcha/api.js?render={{ env('GOOGLE_RECAPTCHA_KEY') }}"></script>
</head>
<body>
<div class="container">
<div class="row mt-5 mb-5">
<div class="col-10 offset-1 mt-5">
<div class="card">
<div class="card-header bg-primary">
<h3 class="text-white">Laravel 10 Google ReCaptcha V3 Example - ItSolutionStuff.com</h3>
</div>
<div class="card-body">
<form method="POST" action="{{ route('contact.us.store') }}" id="contactUSForm">
{{ csrf_field() }}
<div class="row">
<div class="col-md-6">
<div class="form-group">
<strong>Name:</strong>
<input type="text" name="name" class="form-control" placeholder="Name" value="{{ old('name') }}">
@if ($errors->has('name'))
<span class="text-danger">{{ $errors->first('name') }}</span>
@endif
</div>
</div>
<div class="col-md-6">
<div class="form-group">
<strong>Email:</strong>
<input type="text" name="email" class="form-control" placeholder="Email" value="{{ old('email') }}">
@if ($errors->has('email'))
<span class="text-danger">{{ $errors->first('email') }}</span>
@endif
</div>
</div>
</div>
<div class="row">
<div class="col-md-6">
<div class="form-group">
<strong>Phone:</strong>
<input type="text" name="phone" class="form-control" placeholder="Phone" value="{{ old('phone') }}">
@if ($errors->has('phone'))
<span class="text-danger">{{ $errors->first('phone') }}</span>
@endif
</div>
</div>
<div class="col-md-6">
<div class="form-group">
<strong>Subject:</strong>
<input type="text" name="subject" class="form-control" placeholder="Subject" value="{{ old('subject') }}">
@if ($errors->has('subject'))
<span class="text-danger">{{ $errors->first('subject') }}</span>
@endif
</div>
</div>
</div>
<div class="row">
<div class="col-md-12">
<div class="form-group">
<strong>Message:</strong>
<textarea name="message" rows="3" class="form-control">{{ old('message') }}</textarea>
@if ($errors->has('message'))
<span class="text-danger">{{ $errors->first('message') }}</span>
@endif
@if ($errors->has('g-recaptcha-response'))
<span class="text-danger">{{ $errors->first('g-recaptcha-response') }}</span>
@endif
</div>
</div>
</div>
<div class="form-group text-center">
<button class="btn btn-success btn-submit">Submit</button>
</div>
</form>
</div>
</div>
</div>
</div>
</div>
</body>
<script type="text/javascript">
$('#contactUSForm').submit(function(event) {
event.preventDefault();
grecaptcha.ready(function() {
grecaptcha.execute("{{ env('GOOGLE_RECAPTCHA_KEY') }}", {action: 'subscribe_newsletter'}).then(function(token) {
$('#contactUSForm').prepend('<input type="hidden" name="g-recaptcha-response" value="' + token + '">');
$('#contactUSForm').unbind('submit').submit();
});;
});
});
</script>
</html>
Run Laravel App:
All the required steps have been done, now you have to type the given below command and hit enter to run the Laravel app:
php artisan serve
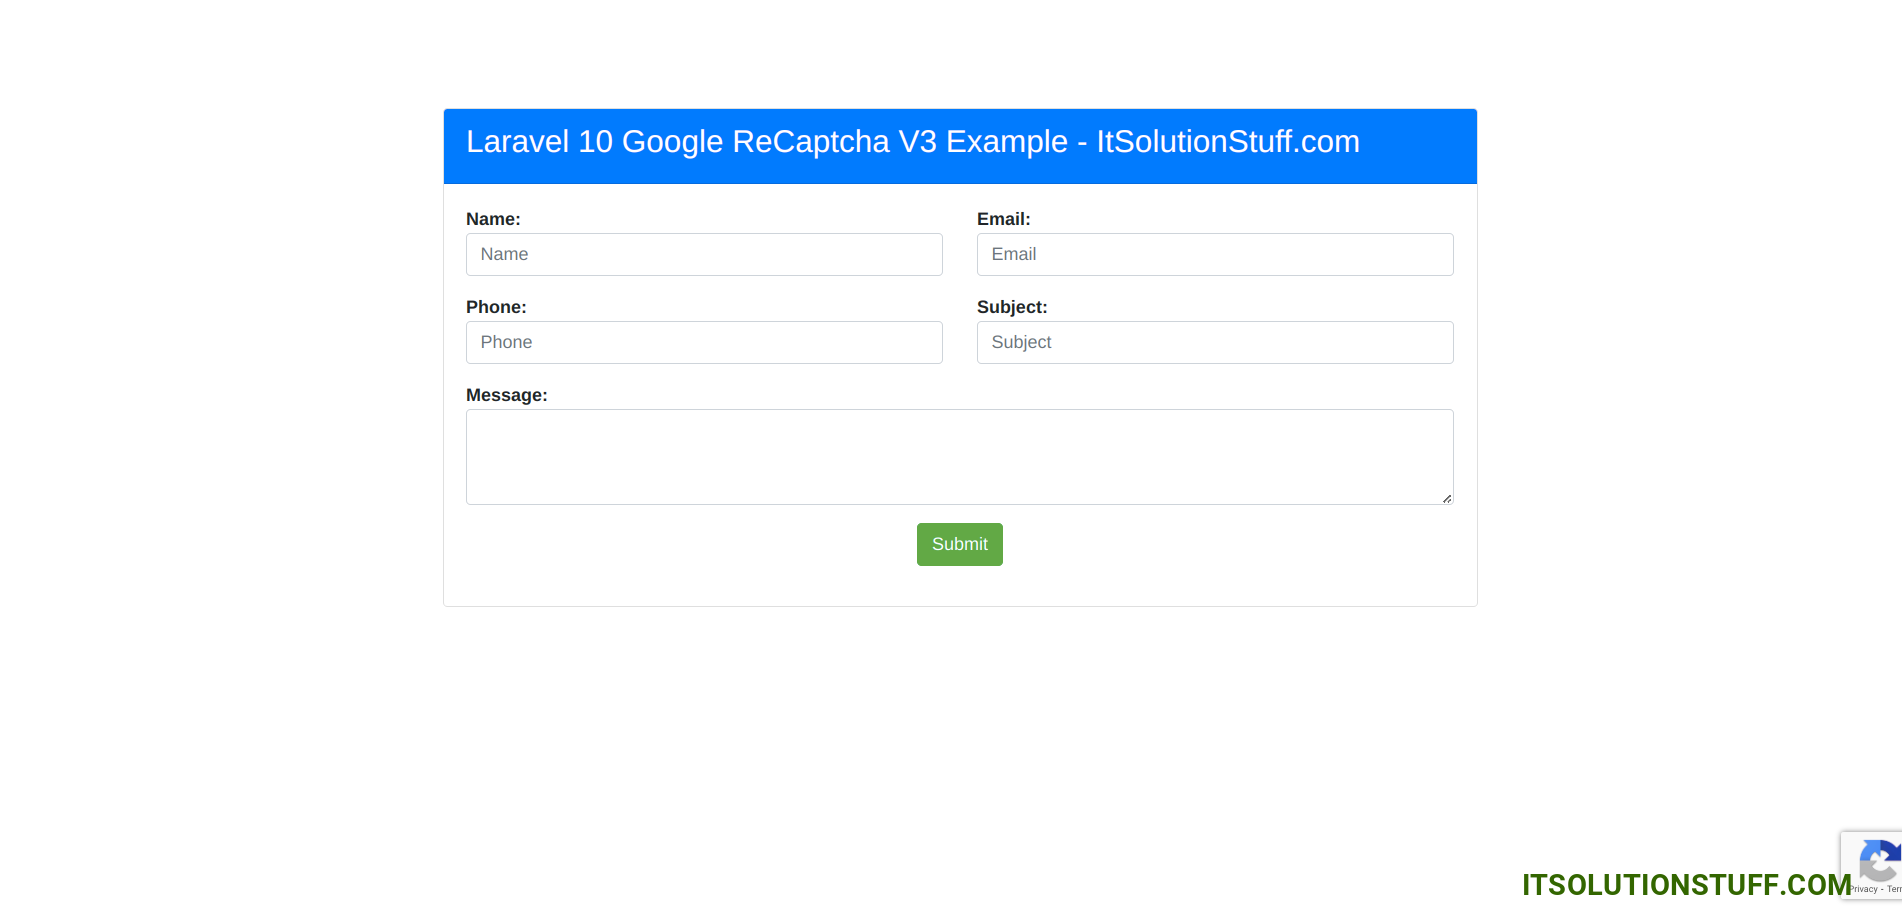
Now, Go to your web browser, type the given URL and view the app output:
http://localhost:8000/contact-us
Output: You Email Look Like This
I hope it can help you...

