Laravel 10 Custom Login and Registration Example
Hey Developer,
In this guide, we are going to learn laravel 10 custom login and registration example. you will learn laravel 10 custom login authentication. This post will give you a simple example of laravel 10 custom login and registration. This article goes in detailed on laravel 10 custom registration and login. So, let us see in detail an example.
Laravel provide auth using jetstream and ui package. but sometime we need to create our own login, registration, dashboard and logout then i will help you how to create step by step custom login and registration page in laravel application.
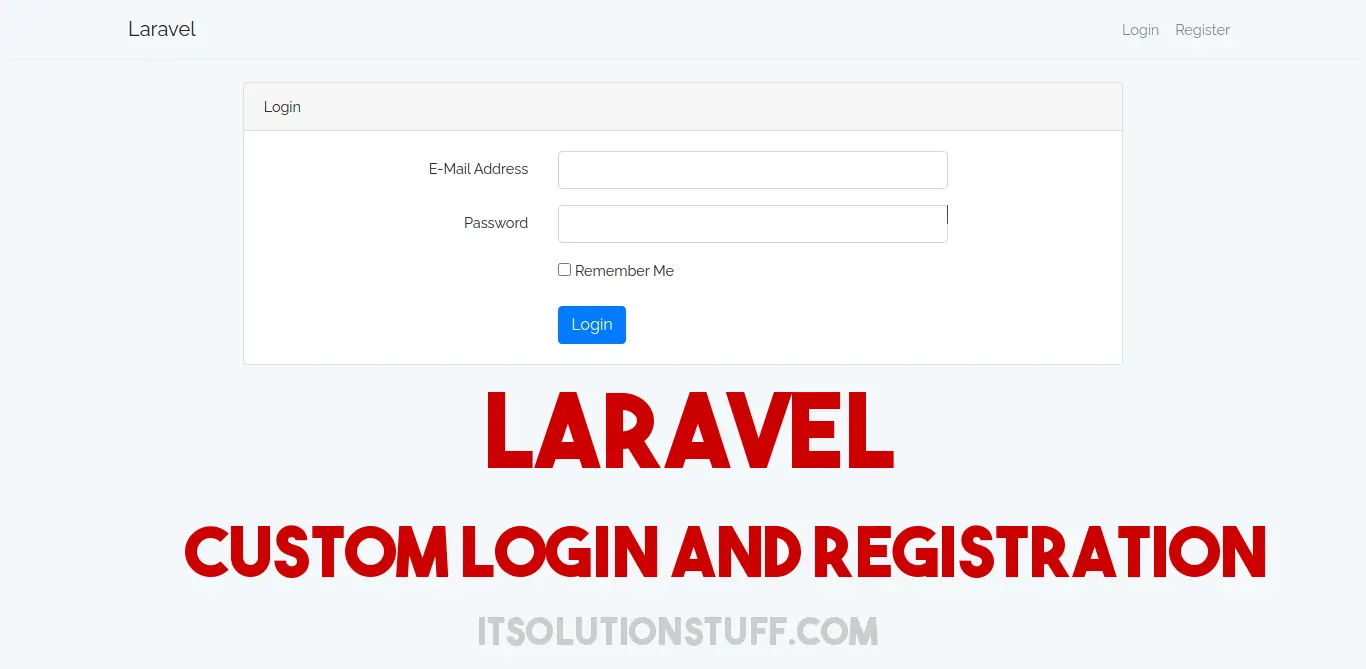
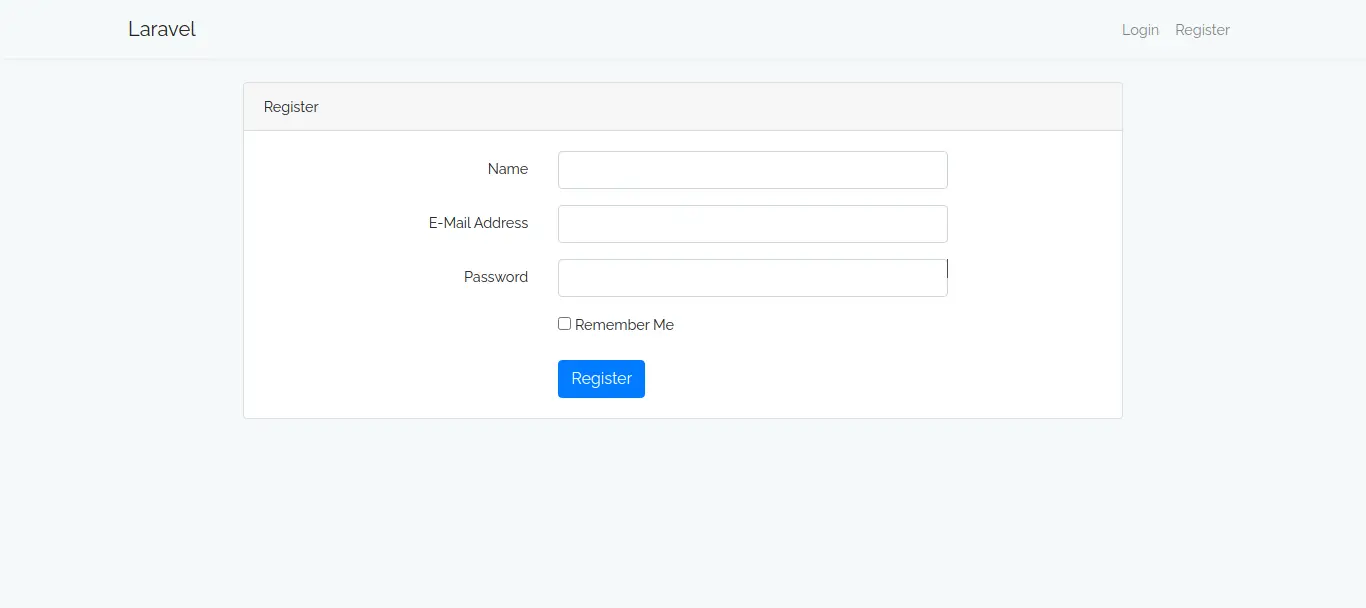
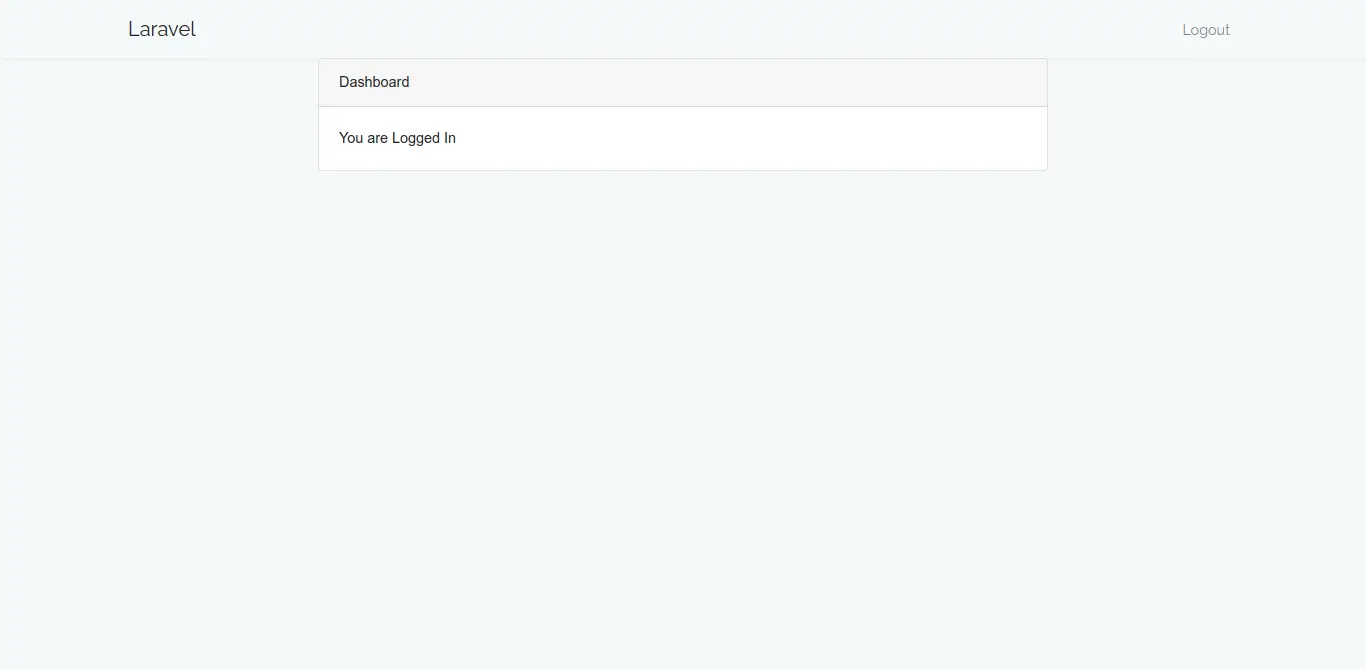
you can see bellow preview of pages:
Login Page:
Register Page:
Dashboard Page:
Step 1: Install Laravel
first of all we need to get fresh Laravel version application using bellow command, So open your terminal OR command prompt and run bellow command:
composer create-project laravel/laravel example-app
Step 2: Database Configuration
In this step, we need to add database configuration in .env file. so let's add following details and then run migration command:
.env
DB_CONNECTION=mysql
DB_HOST=127.0.0.1
DB_PORT=3306
DB_DATABASE=laravel9_blog
DB_USERNAME=root
DB_PASSWORD=password
Next, run migration command to create users table.
php artisan migrate
Step 3: Create Route
In this is step we need to create custom route for login, register, home and logout. so open your routes/web.php file and add following route.
routes/web.php
<?php
use Illuminate\Support\Facades\Route;
use App\Http\Controllers\Auth\AuthController;
/*
|--------------------------------------------------------------------------
| Web Routes
|--------------------------------------------------------------------------
|
| Here is where you can register web routes for your application. These
| routes are loaded by the RouteServiceProvider within a group which
| contains the "web" middleware group. Now create something great!
|
*/
Route::get('login', [AuthController::class, 'index'])->name('login');
Route::post('post-login', [AuthController::class, 'postLogin'])->name('login.post');
Route::get('registration', [AuthController::class, 'registration'])->name('register');
Route::post('post-registration', [AuthController::class, 'postRegistration'])->name('register.post');
Route::get('dashboard', [AuthController::class, 'dashboard']);
Route::get('logout', [AuthController::class, 'logout'])->name('logout');
Step 4: Create Controller
in this step, we need to create AuthController and add following code on that file:
app/Http/Controllers/Auth/AuthController.php
<?php
namespace App\Http\Controllers\Auth;
use App\Http\Controllers\Controller;
use Illuminate\Http\Request;
use Illuminate\Support\Facades\Auth;
use Session;
use App\Models\User;
use Hash;
use Illuminate\View\View;
use Illuminate\Http\RedirectResponse;
class AuthController extends Controller
{
/**
* Write code on Method
*
* @return response()
*/
public function index(): View
{
return view('auth.login');
}
/**
* Write code on Method
*
* @return response()
*/
public function registration(): View
{
return view('auth.registration');
}
/**
* Write code on Method
*
* @return response()
*/
public function postLogin(Request $request): RedirectResponse
{
$request->validate([
'email' => 'required',
'password' => 'required',
]);
$credentials = $request->only('email', 'password');
if (Auth::attempt($credentials)) {
return redirect()->intended('dashboard')
->withSuccess('You have Successfully loggedin');
}
return redirect("login")->withSuccess('Oppes! You have entered invalid credentials');
}
/**
* Write code on Method
*
* @return response()
*/
public function postRegistration(Request $request): RedirectResponse
{
$request->validate([
'name' => 'required',
'email' => 'required|email|unique:users',
'password' => 'required|min:6',
]);
$data = $request->all();
$check = $this->create($data);
return redirect("dashboard")->withSuccess('Great! You have Successfully loggedin');
}
/**
* Write code on Method
*
* @return response()
*/
public function dashboard(): RedirectResponse
{
if(Auth::check()){
return view('dashboard');
}
return redirect("login")->withSuccess('Opps! You do not have access');
}
/**
* Write code on Method
*
* @return response()
*/
public function create(array $data)
{
return User::create([
'name' => $data['name'],
'email' => $data['email'],
'password' => Hash::make($data['password'])
]);
}
/**
* Write code on Method
*
* @return response()
*/
public function logout(): RedirectResponse
{
Session::flush();
Auth::logout();
return Redirect('login');
}
}
Step 5: Create Blade Files
here, we need to create blade files for layout, login, register and home page. so let's create one by one files:
resources/views/auth/login.blade.php
@extends('layout')
@section('content')
<main class="login-form">
<div class="cotainer">
<div class="row justify-content-center">
<div class="col-md-8">
<div class="card">
<div class="card-header">Login</div>
<div class="card-body">
<form action="{{ route('login.post') }}" method="POST">
@csrf
<div class="form-group row">
<label for="email_address" class="col-md-4 col-form-label text-md-right">E-Mail Address</label>
<div class="col-md-6">
<input type="text" id="email_address" class="form-control" name="email" required autofocus>
@if ($errors->has('email'))
<span class="text-danger">{{ $errors->first('email') }}</span>
@endif
</div>
</div>
<div class="form-group row">
<label for="password" class="col-md-4 col-form-label text-md-right">Password</label>
<div class="col-md-6">
<input type="password" id="password" class="form-control" name="password" required>
@if ($errors->has('password'))
<span class="text-danger">{{ $errors->first('password') }}</span>
@endif
</div>
</div>
<div class="form-group row">
<div class="col-md-6 offset-md-4">
<div class="checkbox">
<label>
<input type="checkbox" name="remember"> Remember Me
</label>
</div>
</div>
</div>
<div class="col-md-6 offset-md-4">
<button type="submit" class="btn btn-primary">
Login
</button>
</div>
</form>
</div>
</div>
</div>
</div>
</div>
</main>
@endsection
resources/views/auth/registration.blade.php
@extends('layout')
@section('content')
<main class="login-form">
<div class="cotainer">
<div class="row justify-content-center">
<div class="col-md-8">
<div class="card">
<div class="card-header">Register</div>
<div class="card-body">
<form action="{{ route('register.post') }}" method="POST">
@csrf
<div class="form-group row">
<label for="name" class="col-md-4 col-form-label text-md-right">Name</label>
<div class="col-md-6">
<input type="text" id="name" class="form-control" name="name" required autofocus>
@if ($errors->has('name'))
<span class="text-danger">{{ $errors->first('name') }}</span>
@endif
</div>
</div>
<div class="form-group row">
<label for="email_address" class="col-md-4 col-form-label text-md-right">E-Mail Address</label>
<div class="col-md-6">
<input type="text" id="email_address" class="form-control" name="email" required autofocus>
@if ($errors->has('email'))
<span class="text-danger">{{ $errors->first('email') }}</span>
@endif
</div>
</div>
<div class="form-group row">
<label for="password" class="col-md-4 col-form-label text-md-right">Password</label>
<div class="col-md-6">
<input type="password" id="password" class="form-control" name="password" required>
@if ($errors->has('password'))
<span class="text-danger">{{ $errors->first('password') }}</span>
@endif
</div>
</div>
<div class="form-group row">
<div class="col-md-6 offset-md-4">
<div class="checkbox">
<label>
<input type="checkbox" name="remember"> Remember Me
</label>
</div>
</div>
</div>
<div class="col-md-6 offset-md-4">
<button type="submit" class="btn btn-primary">
Register
</button>
</div>
</form>
</div>
</div>
</div>
</div>
</div>
</main>
@endsection
resources/views/dashboard.blade.php
@extends('layout')
@section('content')
<div class="container">
<div class="row justify-content-center">
<div class="col-md-8">
<div class="card">
<div class="card-header">{{ __('Dashboard') }}</div>
<div class="card-body">
@if (session('success'))
<div class="alert alert-success" role="alert">
{{ session('success') }}
</div>
@endif
You are Logged In
</div>
</div>
</div>
</div>
</div>
@endsection
resources/views/layout.blade.php
<!DOCTYPE html>
<html>
<head>
<title>Laravel - ItSolutionStuff.com</title>
<link rel="stylesheet" href="https://stackpath.bootstrapcdn.com/bootstrap/4.1.3/css/bootstrap.min.css">
<style type="text/css">
@import url(https://fonts.googleapis.com/css?family=Raleway:300,400,600);
body{
margin: 0;
font-size: .9rem;
font-weight: 400;
line-height: 1.6;
color: #212529;
text-align: left;
background-color: #f5f8fa;
}
.navbar-laravel
{
box-shadow: 0 2px 4px rgba(0,0,0,.04);
}
.navbar-brand , .nav-link, .my-form, .login-form
{
font-family: Raleway, sans-serif;
}
.my-form
{
padding-top: 1.5rem;
padding-bottom: 1.5rem;
}
.my-form .row
{
margin-left: 0;
margin-right: 0;
}
.login-form
{
padding-top: 1.5rem;
padding-bottom: 1.5rem;
}
.login-form .row
{
margin-left: 0;
margin-right: 0;
}
</style>
</head>
<body>
<nav class="navbar navbar-expand-lg navbar-light navbar-laravel">
<div class="container">
<a class="navbar-brand" href="#">Laravel</a>
<button class="navbar-toggler" type="button" data-toggle="collapse" data-target="#navbarSupportedContent" aria-controls="navbarSupportedContent" aria-expanded="false" aria-label="Toggle navigation">
<span class="navbar-toggler-icon"></span>
</button>
<div class="collapse navbar-collapse" id="navbarSupportedContent">
<ul class="navbar-nav ml-auto">
@guest
<li class="nav-item">
<a class="nav-link" href="{{ route('login') }}">Login</a>
</li>
<li class="nav-item">
<a class="nav-link" href="{{ route('register') }}">Register</a>
</li>
@else
<li class="nav-item">
<a class="nav-link" href="{{ route('logout') }}">Logout</a>
</li>
@endguest
</ul>
</div>
</div>
</nav>
@yield('content')
</body>
</html>
Run Laravel App:
All the required steps have been done, now you have to type the given below command and hit enter to run the Laravel app:
php artisan serve
Now, Go to your web browser, type the given URL and view the app output:
http://localhost:8000/login
I hope it can help you...

