How to Encrypt Decrypt Database Fields in Laravel?
Hey Artisan,
In this tutorial, you will discover laravel encrypt database fields. This article goes in detailed on laravel encrypt decrypt database fields. It's a simple example of how to encrypt database fields in laravel. you will learn encrypt database fields in laravel example.
In this illustration, we'll be establishing a "products" table featuring fields for name, details, and a code. Our objective is to securely store encrypted data within these fields and, when presenting this data on a webpage, to decrypt it. To streamline this process, we'll utilize Laravel model "casts" to automatically handle the encryption and decryption of field values. Let's explore a straightforward example to demonstrate this.
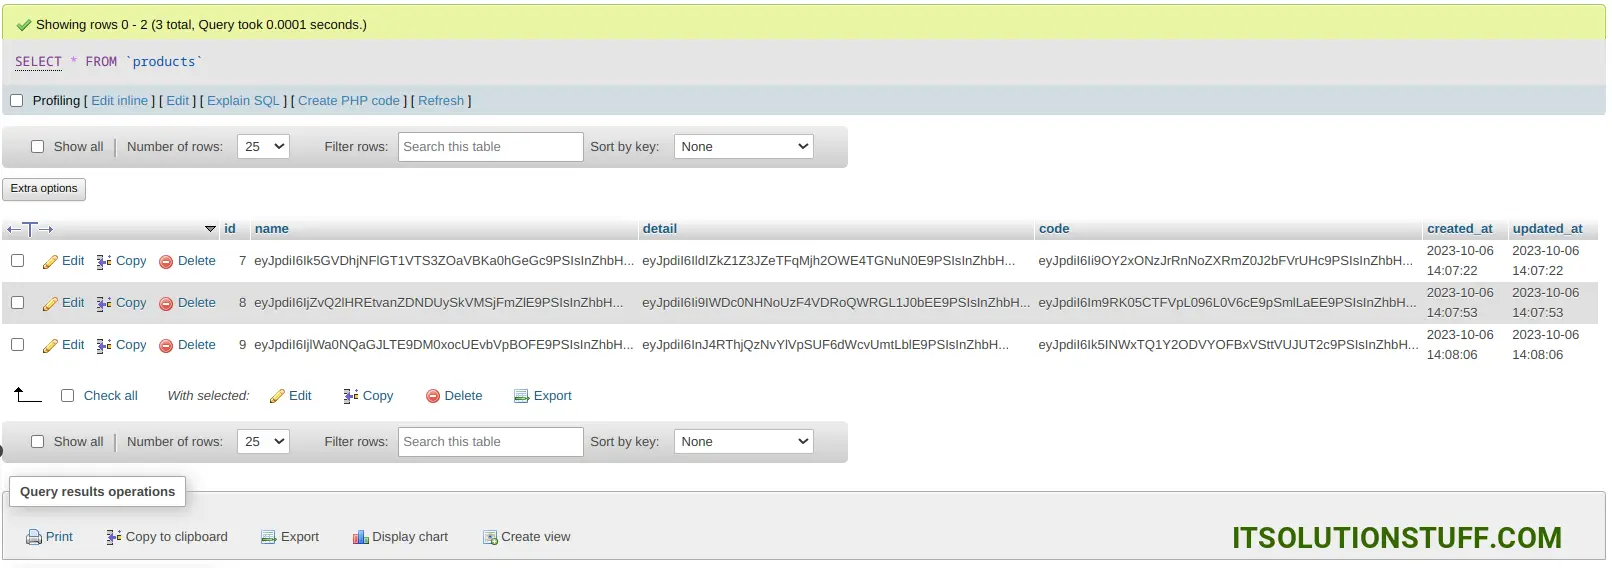
DB Preview:
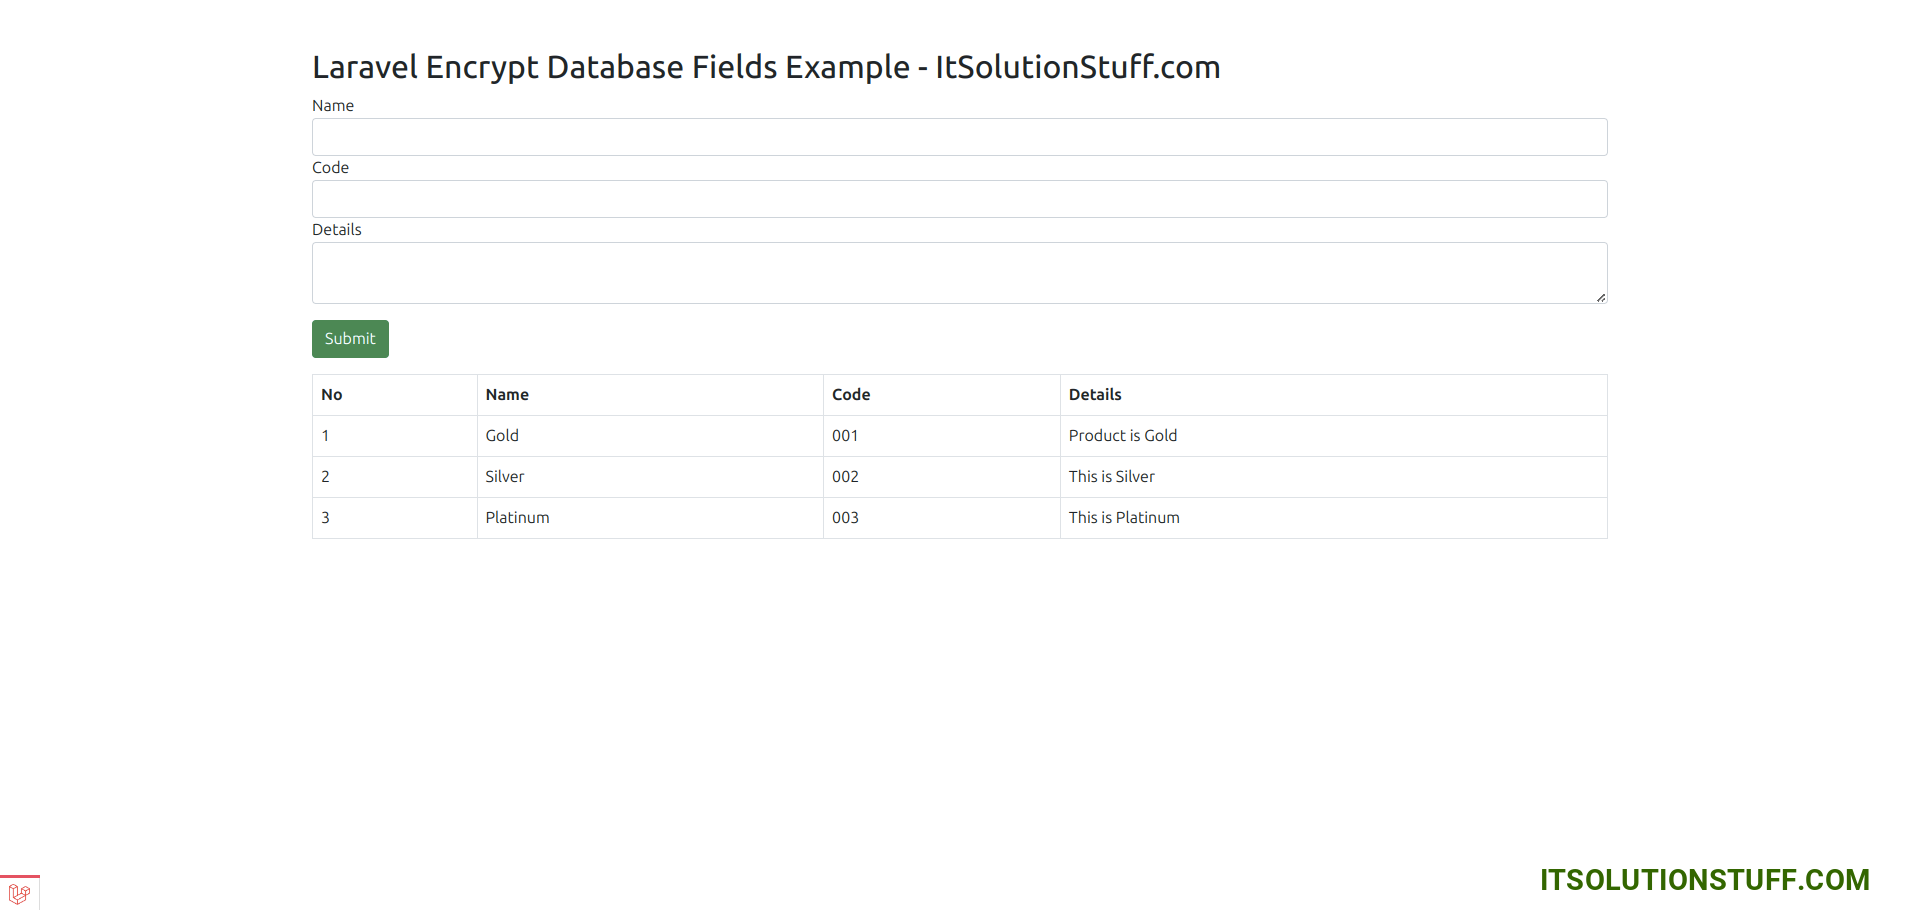
Display Preview:
Step 1: Install Laravel
first of all, we need to get a fresh Laravel version application using the bellow command, So open your terminal OR command prompt and run the bellow command:
composer create-project laravel/laravel example-app
Step 2: Create Products Table
Here, we need to create a database migration for the "products" table and also we will create a model for the "products" table.
php artisan make:migration create_products_table
Migration:
<?php
use Illuminate\Database\Migrations\Migration;
use Illuminate\Database\Schema\Blueprint;
use Illuminate\Support\Facades\Schema;
return new class extends Migration
{
/**
* Run the migrations.
*/
public function up(): void
{
Schema::create('products', function (Blueprint $table) {
$table->id();
$table->text('name');
$table->text('detail');
$table->text('code');
$table->timestamps();
});
}
/**
* Reverse the migrations.
*/
public function down(): void
{
Schema::dropIfExists('products');
}
};
php artisan migrate
Step 3: Create Product Model
Here, we will create Product.php file for model and define encrypted cast for name, detail and code fields. so, let's update code.
app/Models/Product.php
<?php
namespace App\Models;
use Illuminate\Database\Eloquent\Factories\HasFactory;
use Illuminate\Database\Eloquent\Model;
class Product extends Model
{
use HasFactory;
/**
* Write code on Method
*
* @return response()
*/
protected $fillable = [
'name', 'code', 'detail'
];
/**
* Write code on Method
*
* @return response()
*/
protected $hidden = [
'name', 'code', 'detail'
];
/**
* Write code on Method
*
* @return response()
*/
protected $casts = [
'name' => 'encrypted',
'code' => 'encrypted',
'detail' => 'encrypted'
];
}
Step 4: Create Controller
In this step, we will create ProductController with index() and store() where we getting records and store it. so let's create controller using bellow command.
php artisan make:controller ProductController
Now, update the code on the controller file.
app/Http/Controllers/ProductController.php
<?php
namespace App\Http\Controllers;
use Illuminate\Http\Request;
use Illuminate\Http\RedirectResponse;
use Illuminate\View\View;
use App\Models\Product;
class ProductController extends Controller
{
/**
* Display a listing of the resource.
*
* @return response()
*/
public function index(): View
{
$products = Product::get();
return view('products',compact('products'));
}
/**
* Store a newly created resource in storage.
*/
public function store(Request $request): RedirectResponse
{
$request->validate([
'name' => 'required',
'code' => 'required',
'detail' => 'required'
]);
$input = $request->all();
Product::create($input);
return redirect()->route('products.index')
->with('success','Product created successfully.');
}
}
Step 5: Add Route
Furthermore, open routes/web.php file and update code on it.
routes/web.php
<?php
use Illuminate\Support\Facades\Route;
use App\Http\Controllers\ProductController;
/*
|--------------------------------------------------------------------------
| Web Routes
|--------------------------------------------------------------------------
|
| Here is where you can register web routes for your application. These
| routes are loaded by the RouteServiceProvider within a group which
| contains the "web" middleware group. Now create something great!
|
*/
Route::get('products', [ProductController::class, 'index'])->name('products.index');
Route::post('products', [ProductController::class, 'store'])->name('products.store');
Step 6: Create View File
In Last step, let's create products.blade.php for display products and put following code:
resources/views/products.blade.php
<!DOCTYPE html>
<html lang="{{ str_replace('_', '-', app()->getLocale()) }}">
<head>
<meta name="csrf-token" content="{{ csrf_token() }}">
<title>Laravel Encrypt Database Fields Example - ItSolutionStuff.com</title>
<link rel="stylesheet" href="https://cdn.jsdelivr.net/npm/bootstrap@5.0.0-beta1/dist/css/bootstrap.min.css">
</head>
<body>
<div class="container mt-5">
<div class="row">
<div class="col-lg-12 margin-tb">
<div class="pull-left">
<h2>Laravel Encrypt Database Fields Example - ItSolutionStuff.com</h2>
</div>
</div>
</div>
@if ($message = Session::get('success'))
<div class="alert alert-success">
<p>{{ $message }}</p>
</div>
@endif
<form method="post" action="{{ route('products.store') }}" enctype="multipart/form-data">
@csrf
<div class="form-group">
<label>Name</label>
<input type="text" name="name" class="form-control" />
</div>
<div class="form-group">
<label>Code</label>
<input type="text" name="code" class="form-control" />
</div>
<div class="form-group">
<label>Details</label>
<textarea id="summernote" class="form-control" name="detail"></textarea>
</div>
<div class="form-group mt-3 mb-3">
<button type="submit" class="btn btn-success btn-block">Submit</button>
</div>
</form>
<table class="table table-bordered">
<tr>
<th>No</th>
<th>Name</th>
<th>Code</th>
<th>Details</th>
</tr>
@foreach ($products as $k => $product)
<tr>
<td>{{ ++$k }}</td>
<td>{{ $product->name }}</td>
<td>{{ $product->code }}</td>
<td>{{ $product->detail }}</td>
</tr>
@endforeach
</table>
</div>
</body>
</html>
Run Laravel App:
All the required steps have been done, now you have to type the given below command and hit enter to run the Laravel app:
php artisan serve
Now, Go to your web browser, type the given URL and view the app output:
http://localhost:8000/products
Now we are ready to run this example and check it...
I hope it can help you...

