Laravel PayPal Send Payment to Email Example
Hi Friends,
In this profound tutorial, we will learn laravel paypal send payment to email. This article goes in detailed on laravel paypal send payment api. if you want to see an example of laravel paypal api to send payment then you are in the right place. we will help you to give an example of paypal send payment to email in laravel. Let's get started with send money to email using paypal in laravel.
In this example, I will show you how to send payment to a user's email using PayPal in a Laravel application. We will use the srmklive/paypal composer package for this. The process involves creating a simple form where you enter the email and USD amount, which will then be transferred to that account.
So, let's see step by step laravel paypal send payment to email example from starting.
Step 1: Install Laravel
first of all we need to get fresh Laravel version application using bellow command, So open your terminal OR command prompt and run bellow command:
composer create-project --prefer-dist laravel/laravel blog
Step 2: Create PayPal Developer Account
First you need to create PayPal Developer account and create app inside that account.
Create Account from here: developer.paypal.com.
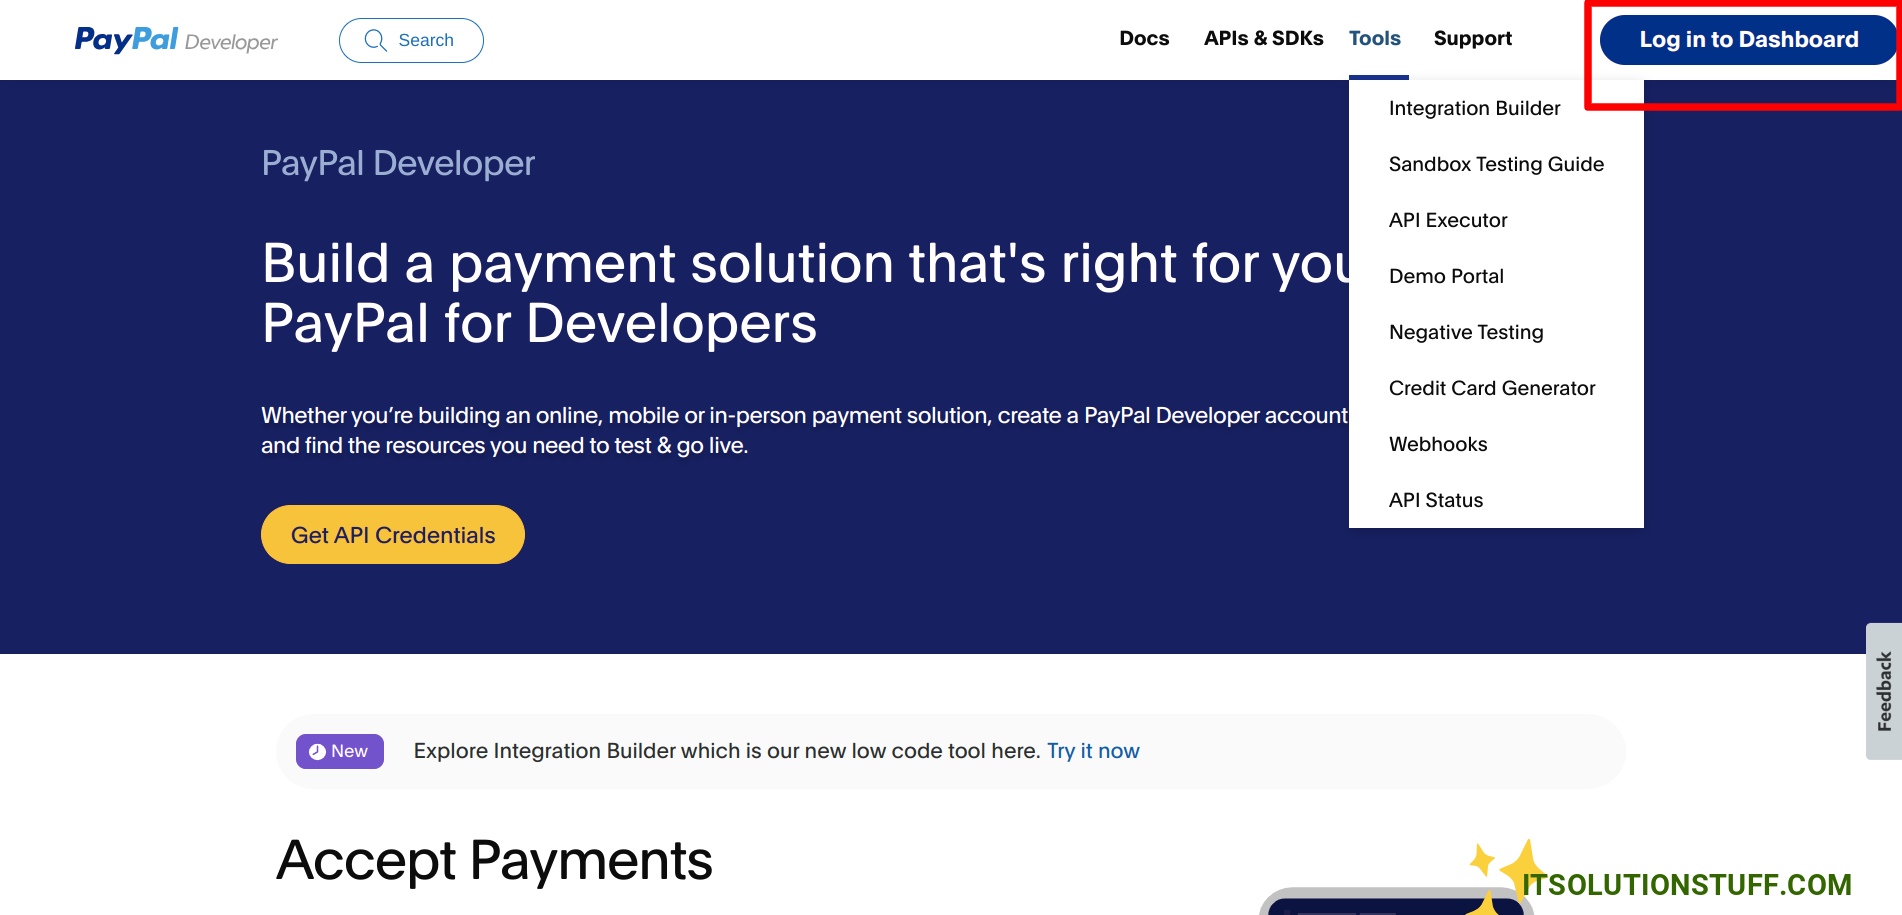
1. Click to "Login in to Dashboard", If you don't have account with paypal then create new:
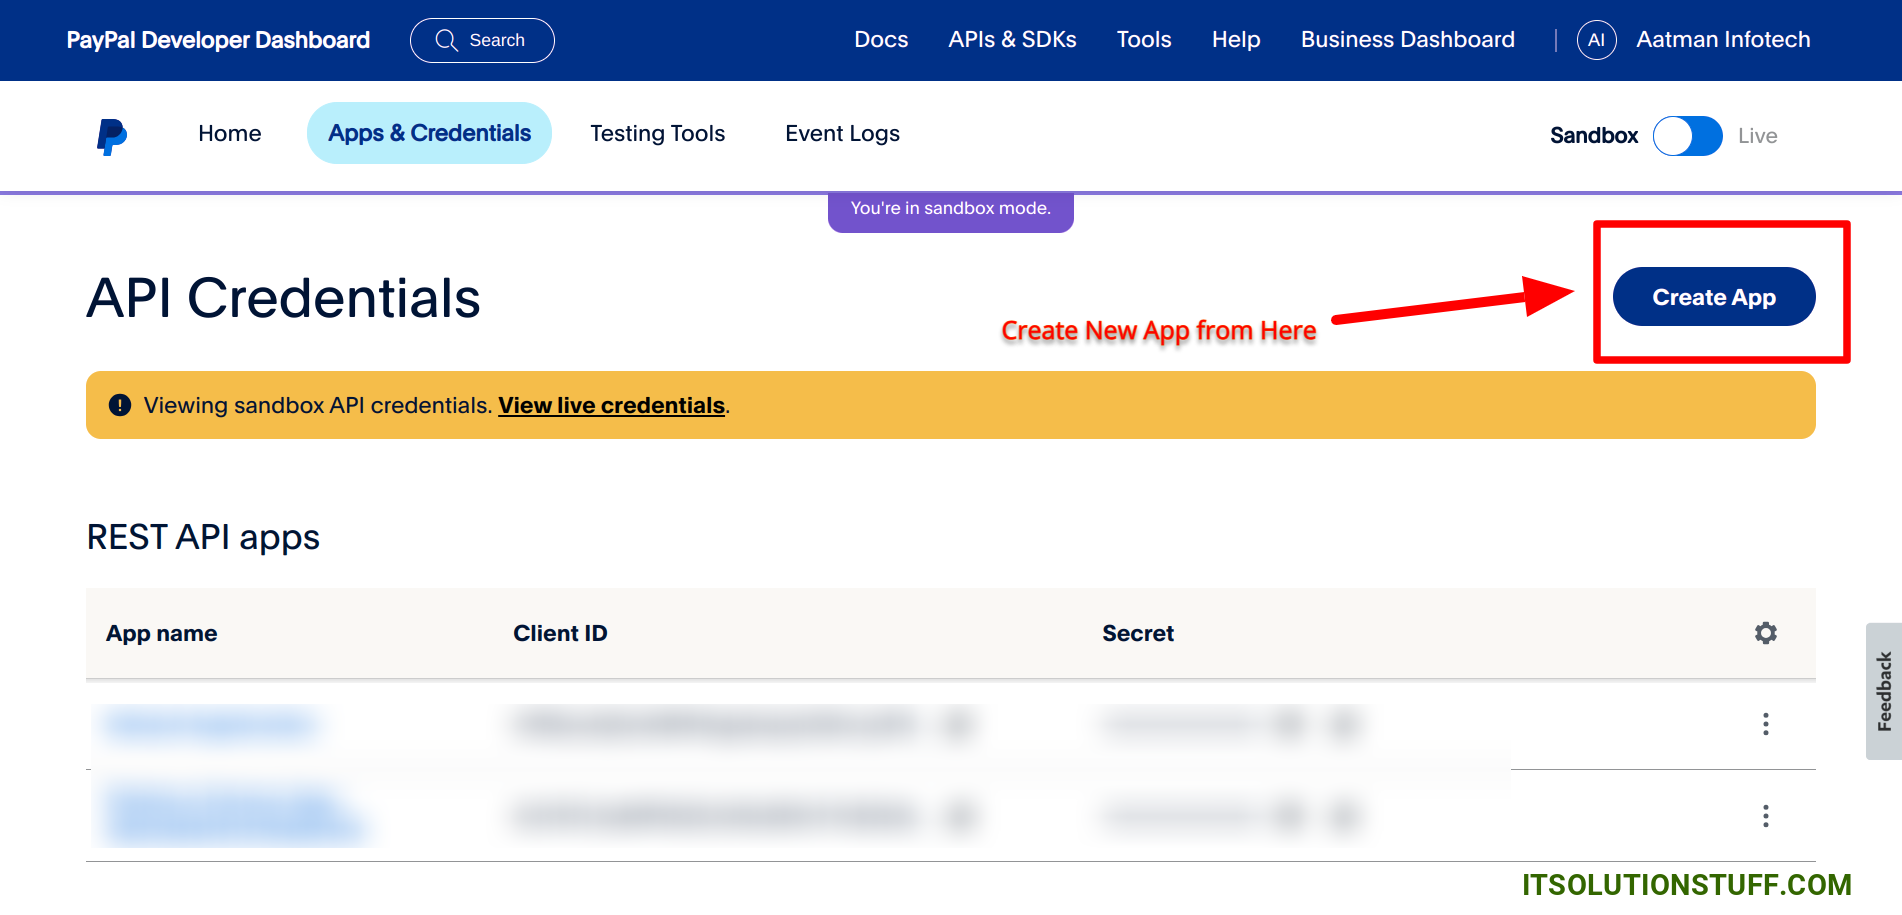
2. Next, Click on "Create App" button to create new developer app.
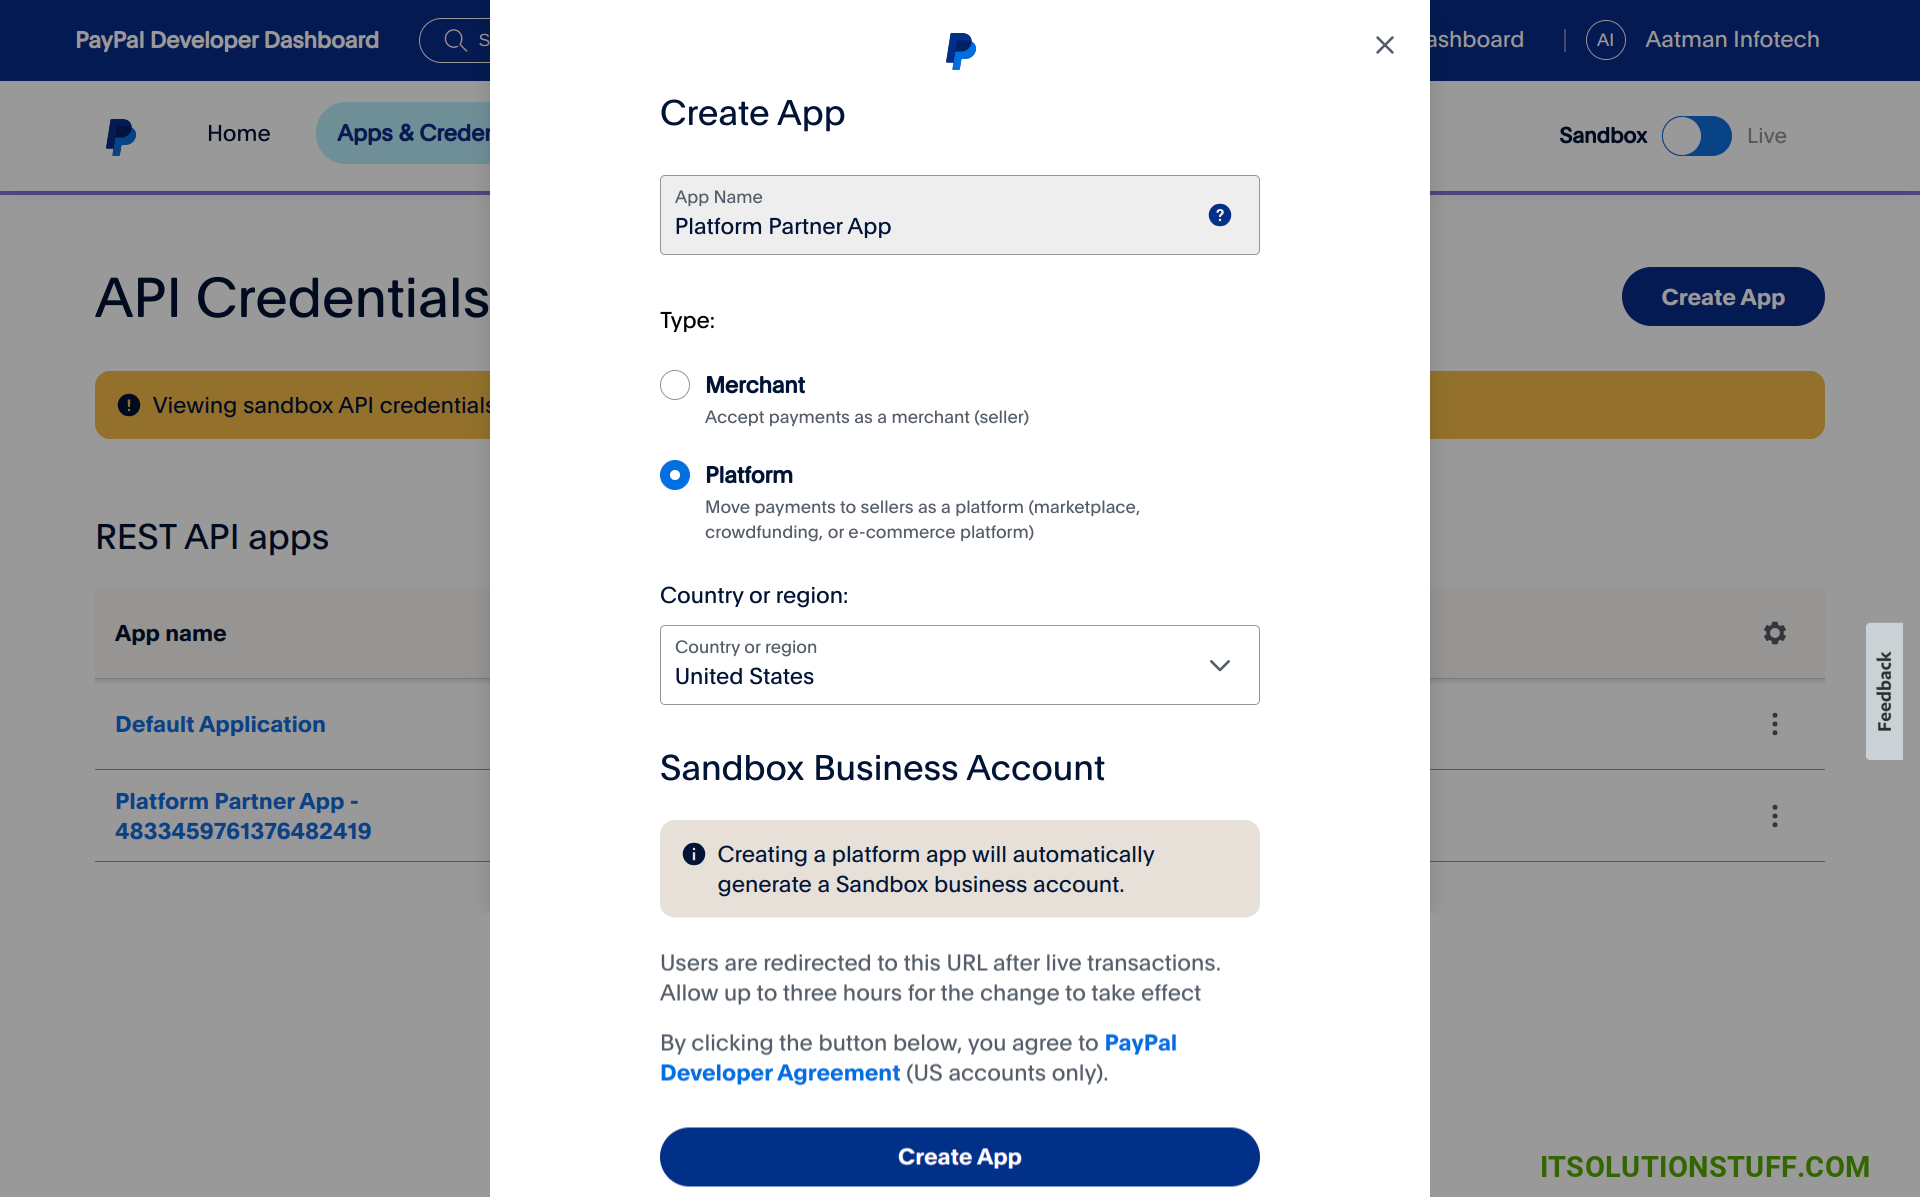
3. Next, Choose Platform and create app.
4. Next, You will have PAYPAL_SANDBOX_CLIENT_ID and PAYPAL_SANDBOX_CLIENT_SECRET from app page.
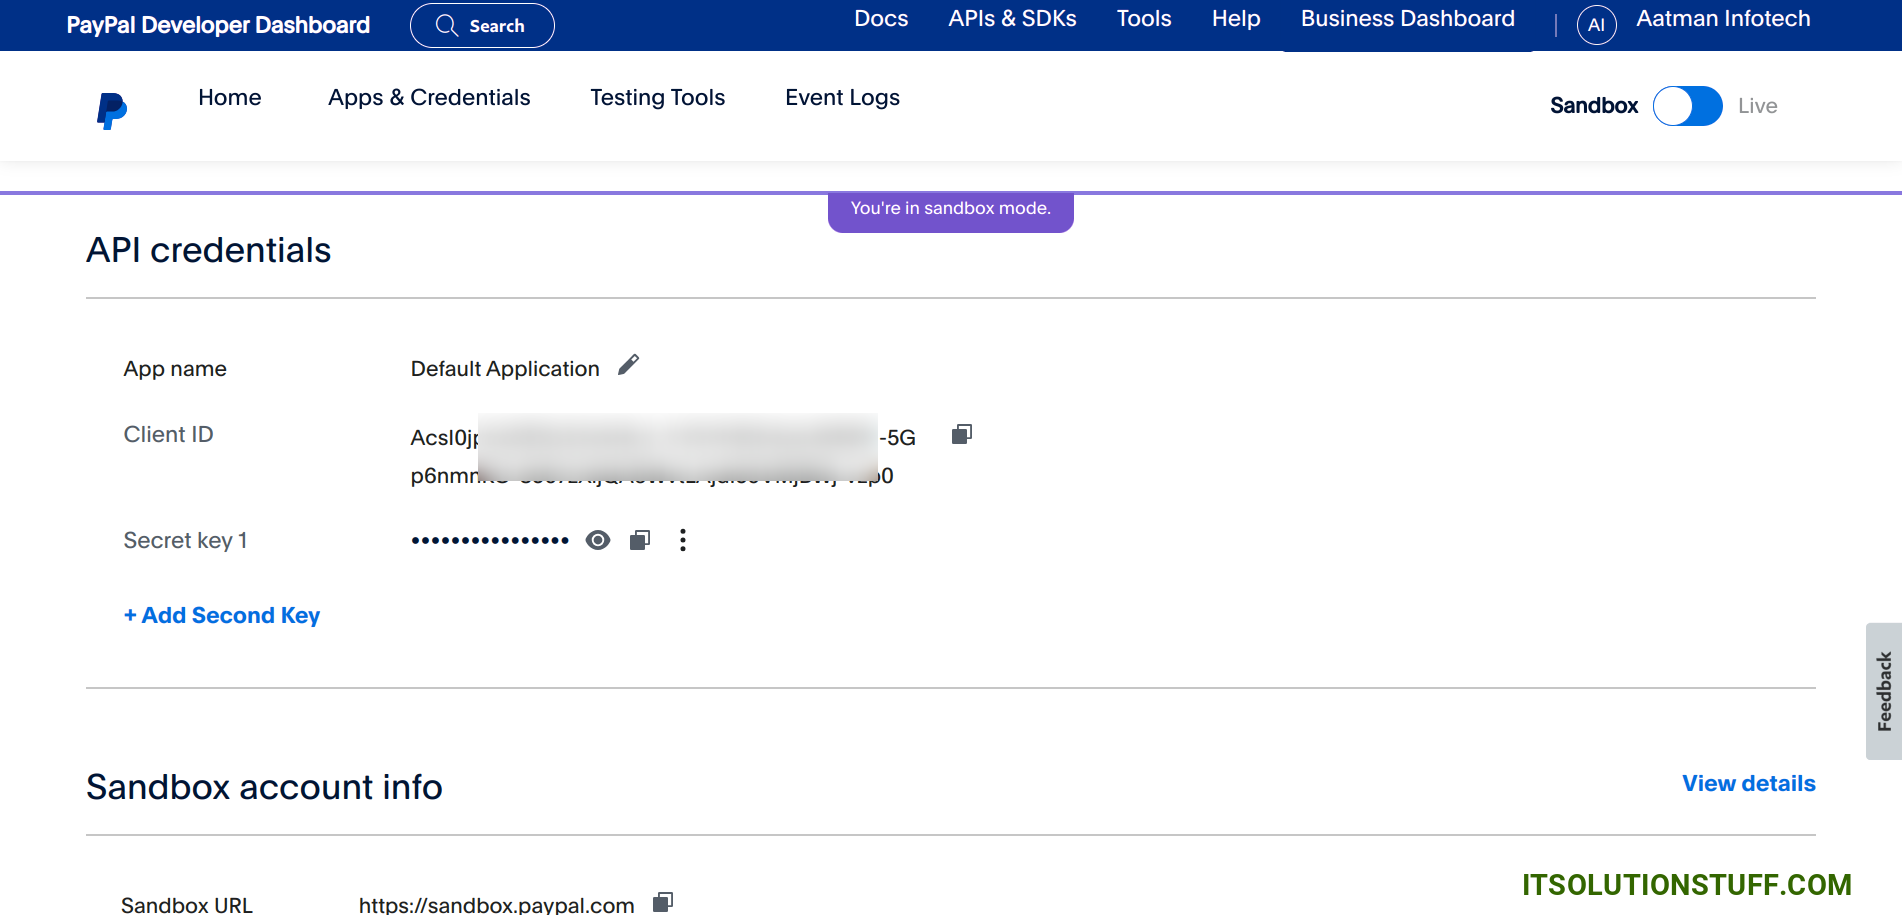
Next you need to add PAYPAL_MODE, PAYPAL_SANDBOX_CLIENT_ID and PAYPAL_SANDBOX_CLIENT_SECRET on .env file as like bellow:
.env
PAYPAL_MODE=sandbox
PAYPAL_SANDBOX_CLIENT_ID=YourClientKey
PAYPAL_SANDBOX_CLIENT_SECRET=YourClientSecret
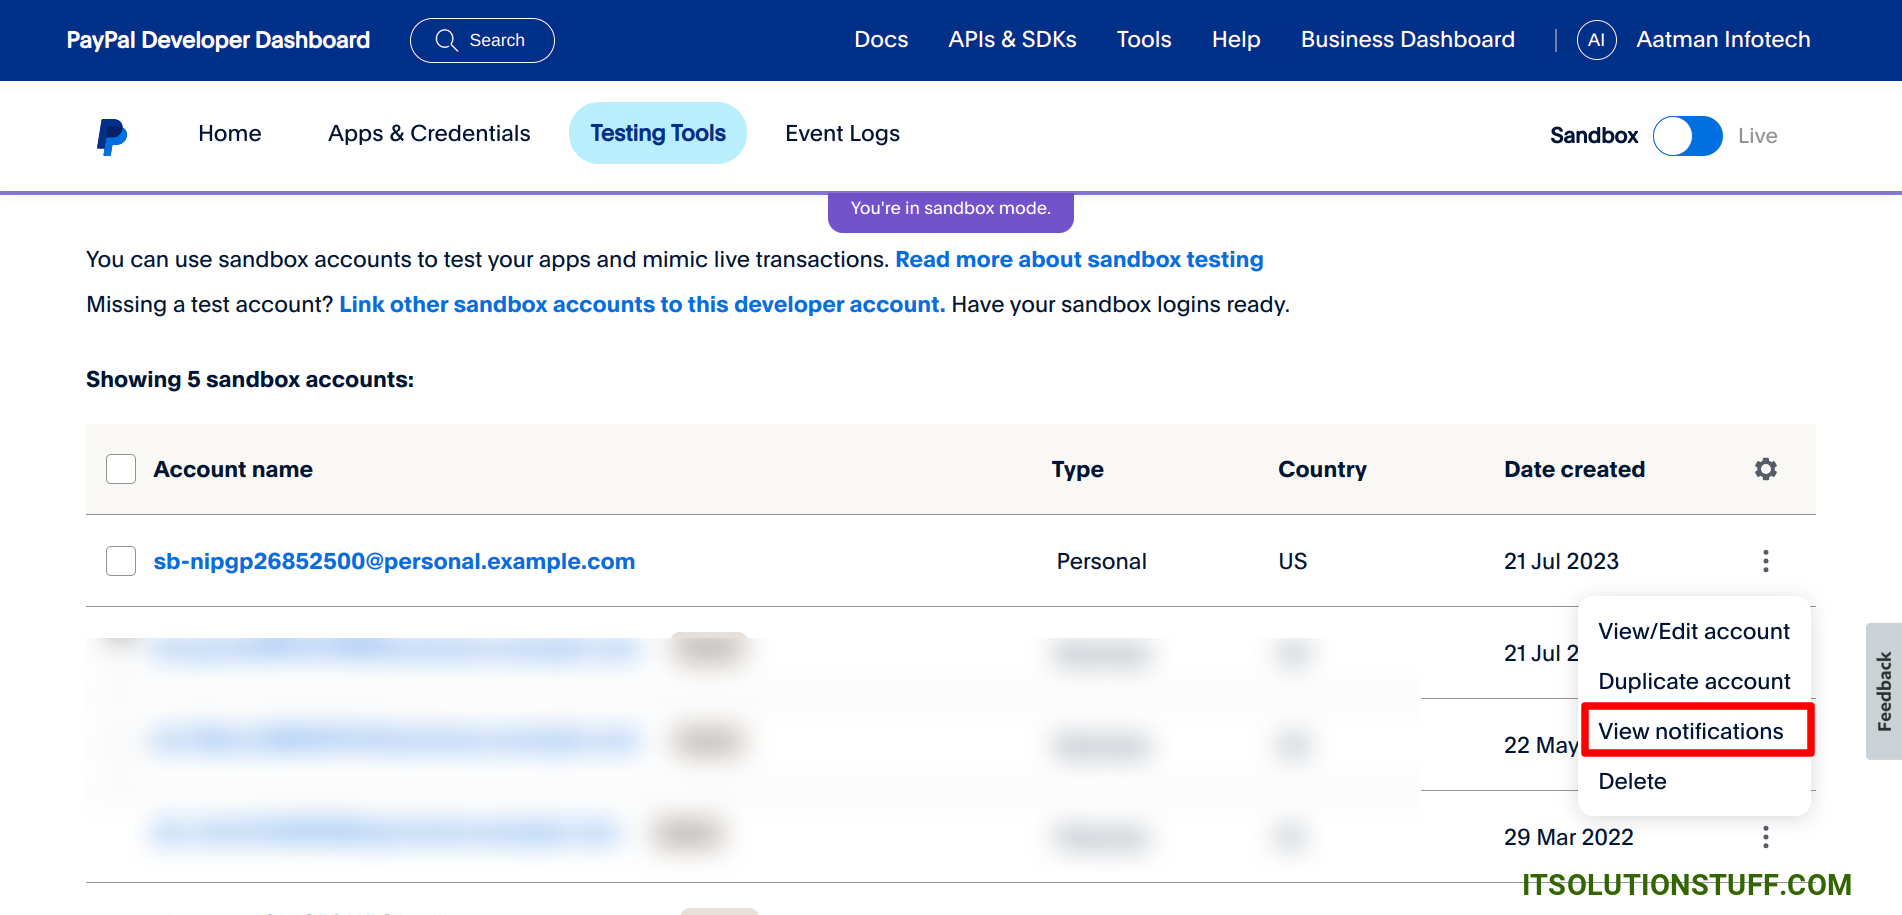
5. Next, Go to "Testing Tools" and Click to "Create Account".
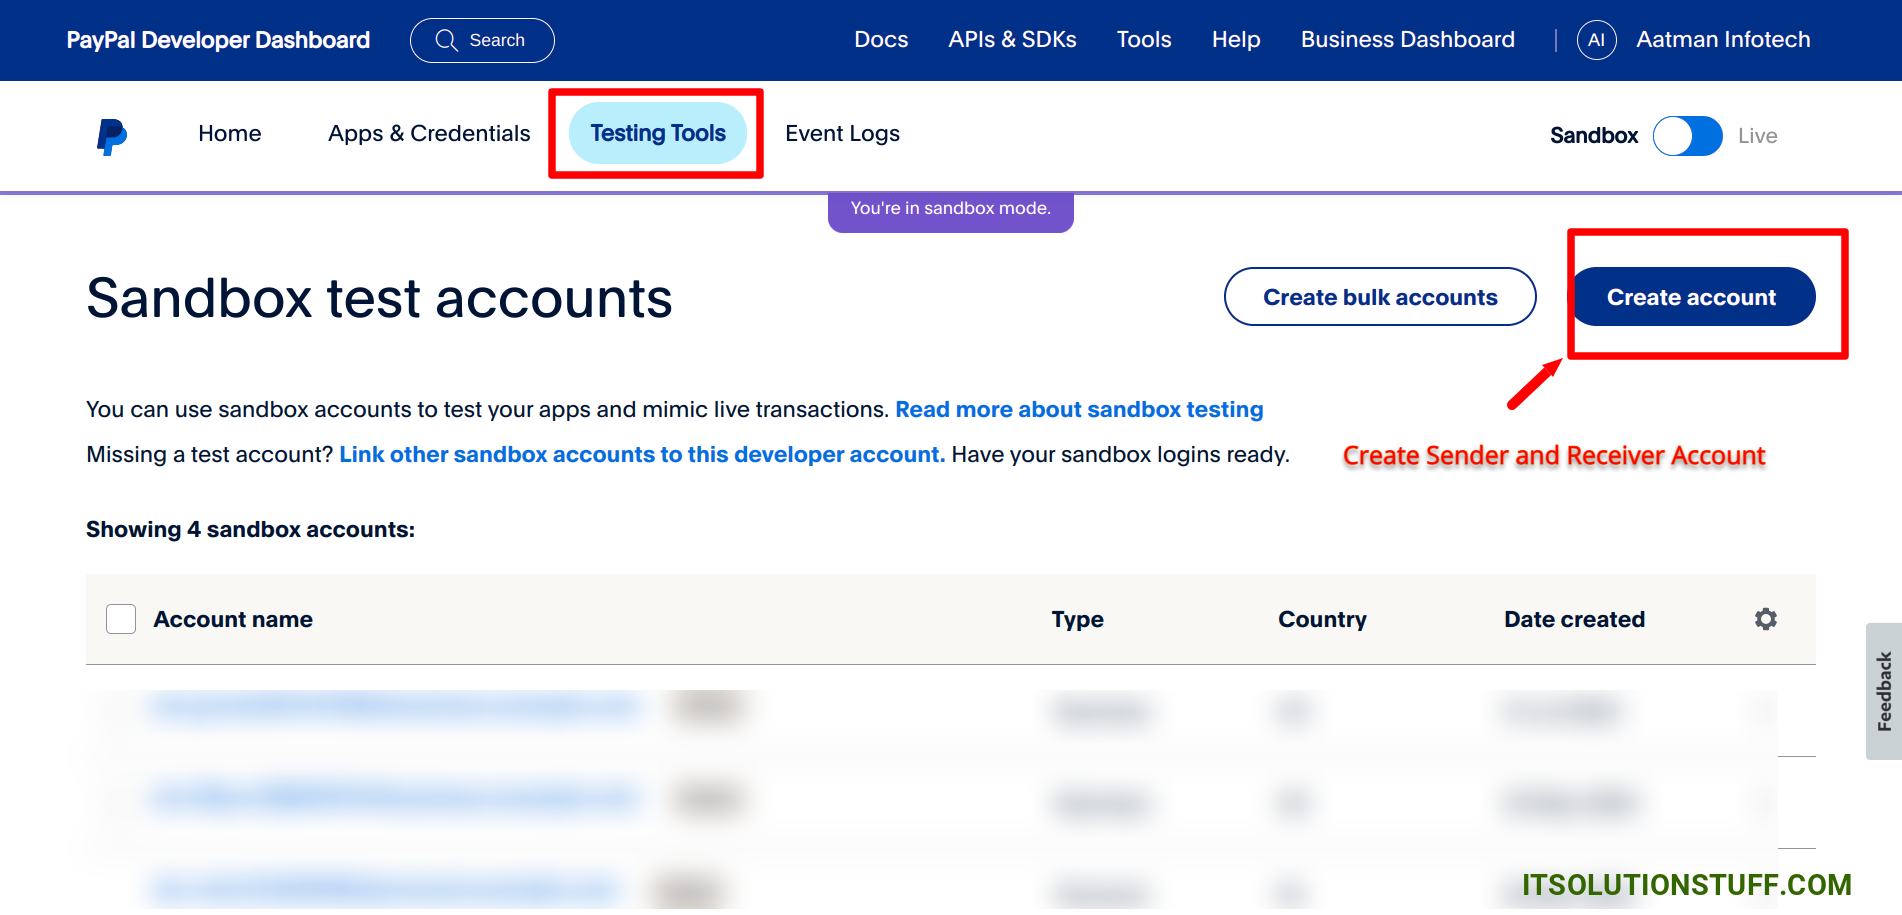
6. Next, Choose "Personal" and create account on it.
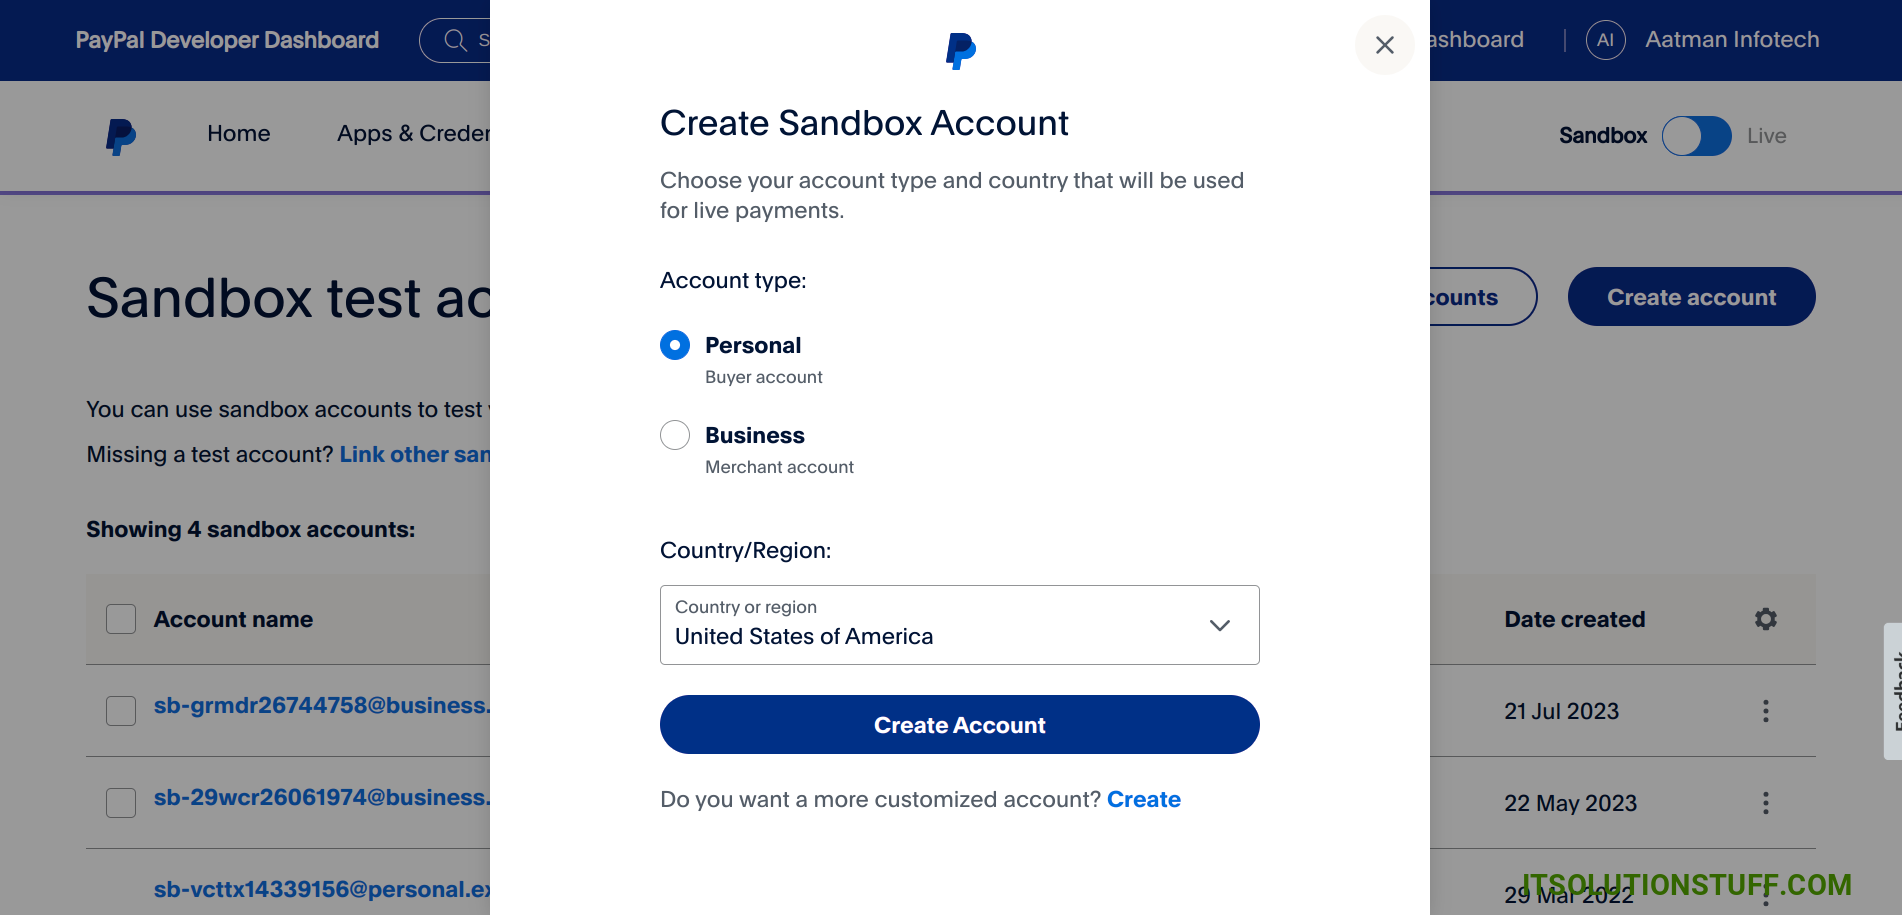
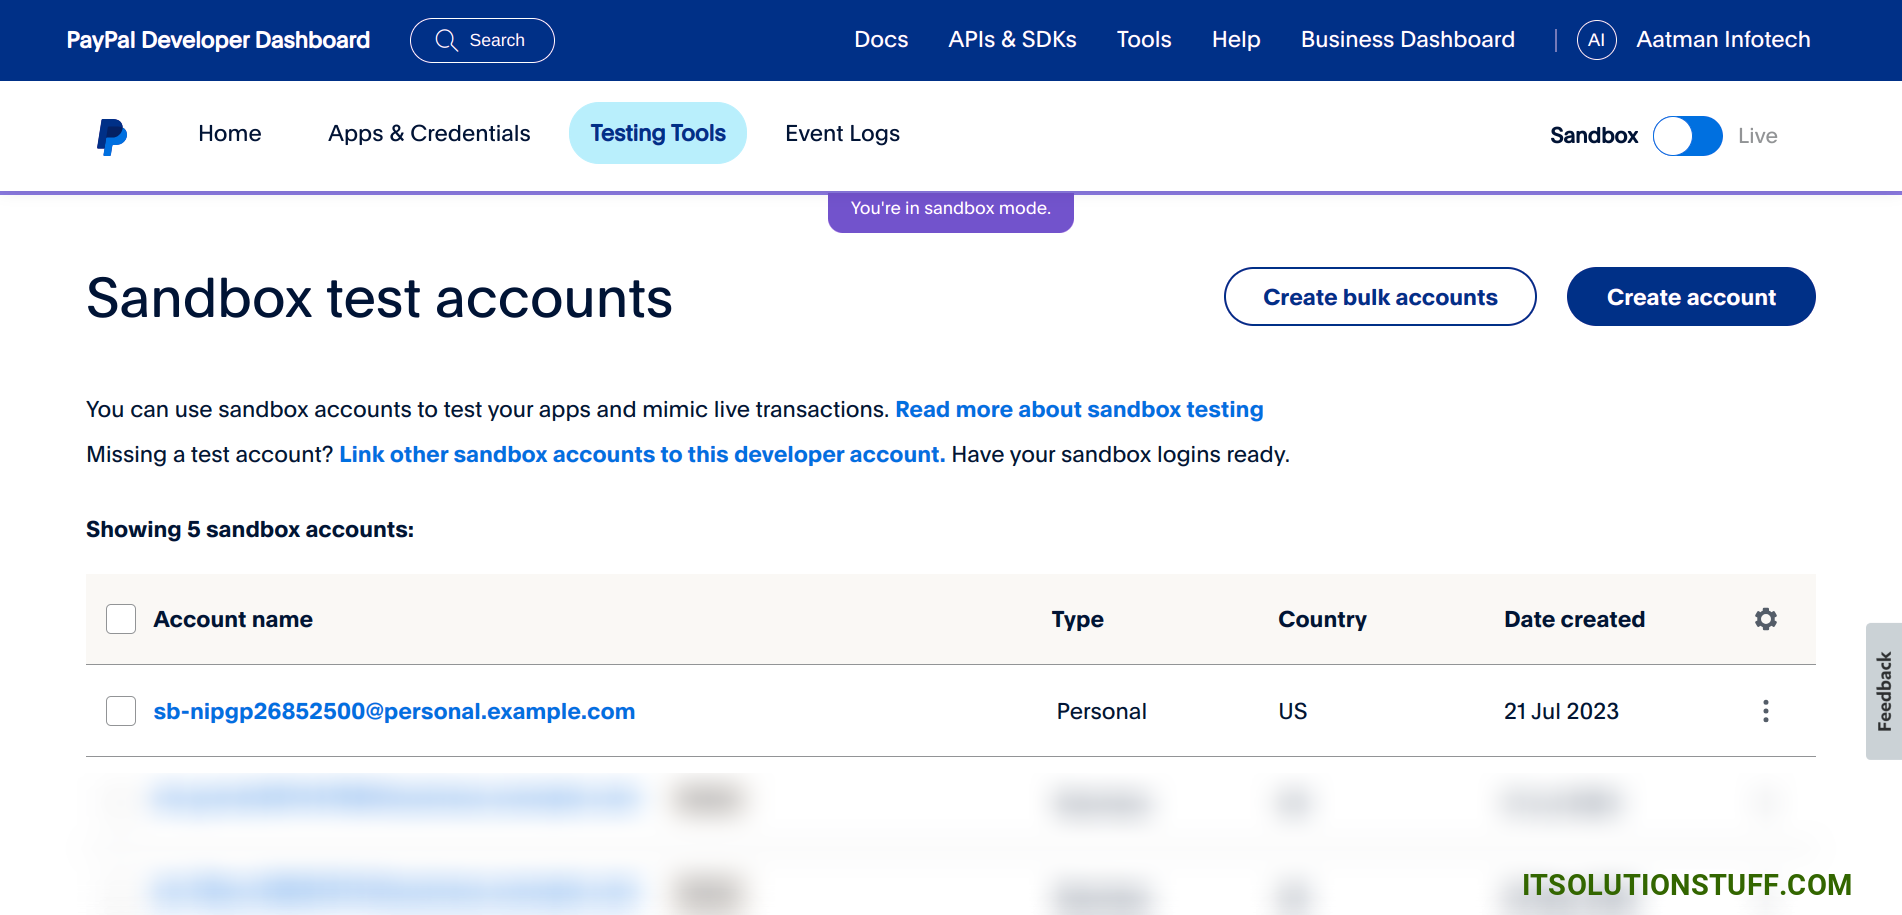
7. Next, Keep save this email that generated.
Step 3: Install srmklive/paypal Package
In this step, we need to install srmklive/paypal composer package to use PayPal api. so let's run bellow command:
composer require srmklive/paypal
Step 4: Create Route
now we will create one route for calling our example, so let's add new route to web.php file as bellow:
routes/web.php
<?php
use Illuminate\Support\Facades\Route;
use App\Http\Controllers\PayPalController;
/*
|--------------------------------------------------------------------------
| Web Routes
|--------------------------------------------------------------------------
|
| Here is where you can register web routes for your application. These
| routes are loaded by the RouteServiceProvider within a group which
| contains the "web" middleware group. Now create something great!
|
*/
Route::get('paypal', [PayPalController::class, 'index'])->name('paypal');
Route::post('paypal', [PayPalController::class, 'store'])->name('paypal.store');
Step 5: Create Controller
in this step, we will create PayPalController and write send payment logic, so let's add new route to web.php file as bellow:
app/Http/Controllers/PayPalController.php
<?php
namespace App\Http\Controllers;
use Srmklive\PayPal\Services\PayPal as PayPalClient;
use Illuminate\Http\Request;
class PayPalController extends Controller
{
/**
* Write code on Method
*
* @return response()
*/
public function index()
{
return view('paypal');
}
/**
* Write code on Method
*
* @return response()
*/
public function store(Request $request)
{
$provider = new PayPalClient;
$provider->getAccessToken();
$data = json_decode('{
"sender_batch_header": {
"sender_batch_id": "Payouts_2023_'.time().'",
"email_subject": "You have a payout form ItSolutionStuff.com!",
"email_message": "You have received a payout! Thanks for using our service!"
},
"items": [
{
"recipient_type": "EMAIL",
"amount": {
"value": "'.$request->usd.'",
"currency": "USD"
},
"note": "Thanks for your patronage!",
"sender_item_id": "201403140001",
"receiver": "'.$request->email.'",
"notification_language": "fr-FR"
}
]
}', true);
$response = $provider->createBatchPayout($data);
return redirect()->route('paypal')
->with('success', 'PayPal payment sent successfully.');
}
}
Step 6: Create Blade File
here, we need to create paypal.blade.php file and update following code on it.
resources/views/auth/paypal.blade.php
<!DOCTYPE html>
<html>
<head>
<meta charset="utf-8">
<meta name="viewport" content="width=device-width, initial-scale=1">
<title>Laravel PayPal Send Payment to Email Example - ItSolutionStuff.com</title>
<link href="https://cdn.jsdelivr.net/npm/bootstrap@5.0.2/dist/css/bootstrap.min.css" rel="stylesheet">
</head>
<body>
<div class="container">
<div class="row mt-5 mb-5">
<div class="col-10 offset-1 mt-5">
<div class="card">
<div class="card-header bg-primary">
<h3 class="text-white">Laravel PayPal Send Payment to Email Example - ItSolutionStuff.com</h3>
</div>
<div class="card-body">
<form method="POST" action="{{ route('paypal.store') }}">
{{ csrf_field() }}
@if ($message = Session::get('success'))
<div class="alert alert-success alert-dismissible fade show" role="alert">
<strong>{{ $message }}</strong>
<button type="button" class="btn-close" data-bs-dismiss="alert" aria-label="Close"></button>
</div>
@endif
<div class="row">
<div class="col-md-6">
<div class="form-group">
<strong>Receiver Email:</strong>
<input type="text" name="email" class="form-control" placeholder="Email" value="{{ old('email') }}">
</div>
</div>
</div>
<div class="row">
<div class="col-md-6">
<div class="form-group">
<strong>USD:</strong>
<input type="text" name="usd" class="form-control" placeholder="USD" value="{{ old('usd') }}">
</div>
</div>
</div>
<div class="form-group text-center">
<button class="btn btn-success btn-submit">Send Payment by Paypal</button>
</div>
</form>
</div>
</div>
</div>
</div>
</div>
</body>
</html>
Run Laravel App:
All the required steps have been done, now you have to type the given below command and hit enter to run the Laravel app:
php artisan serve
Now, Go to your web browser, type the given URL and view the app output:
http://localhost:8000/paypal
Now, you will see the following output:
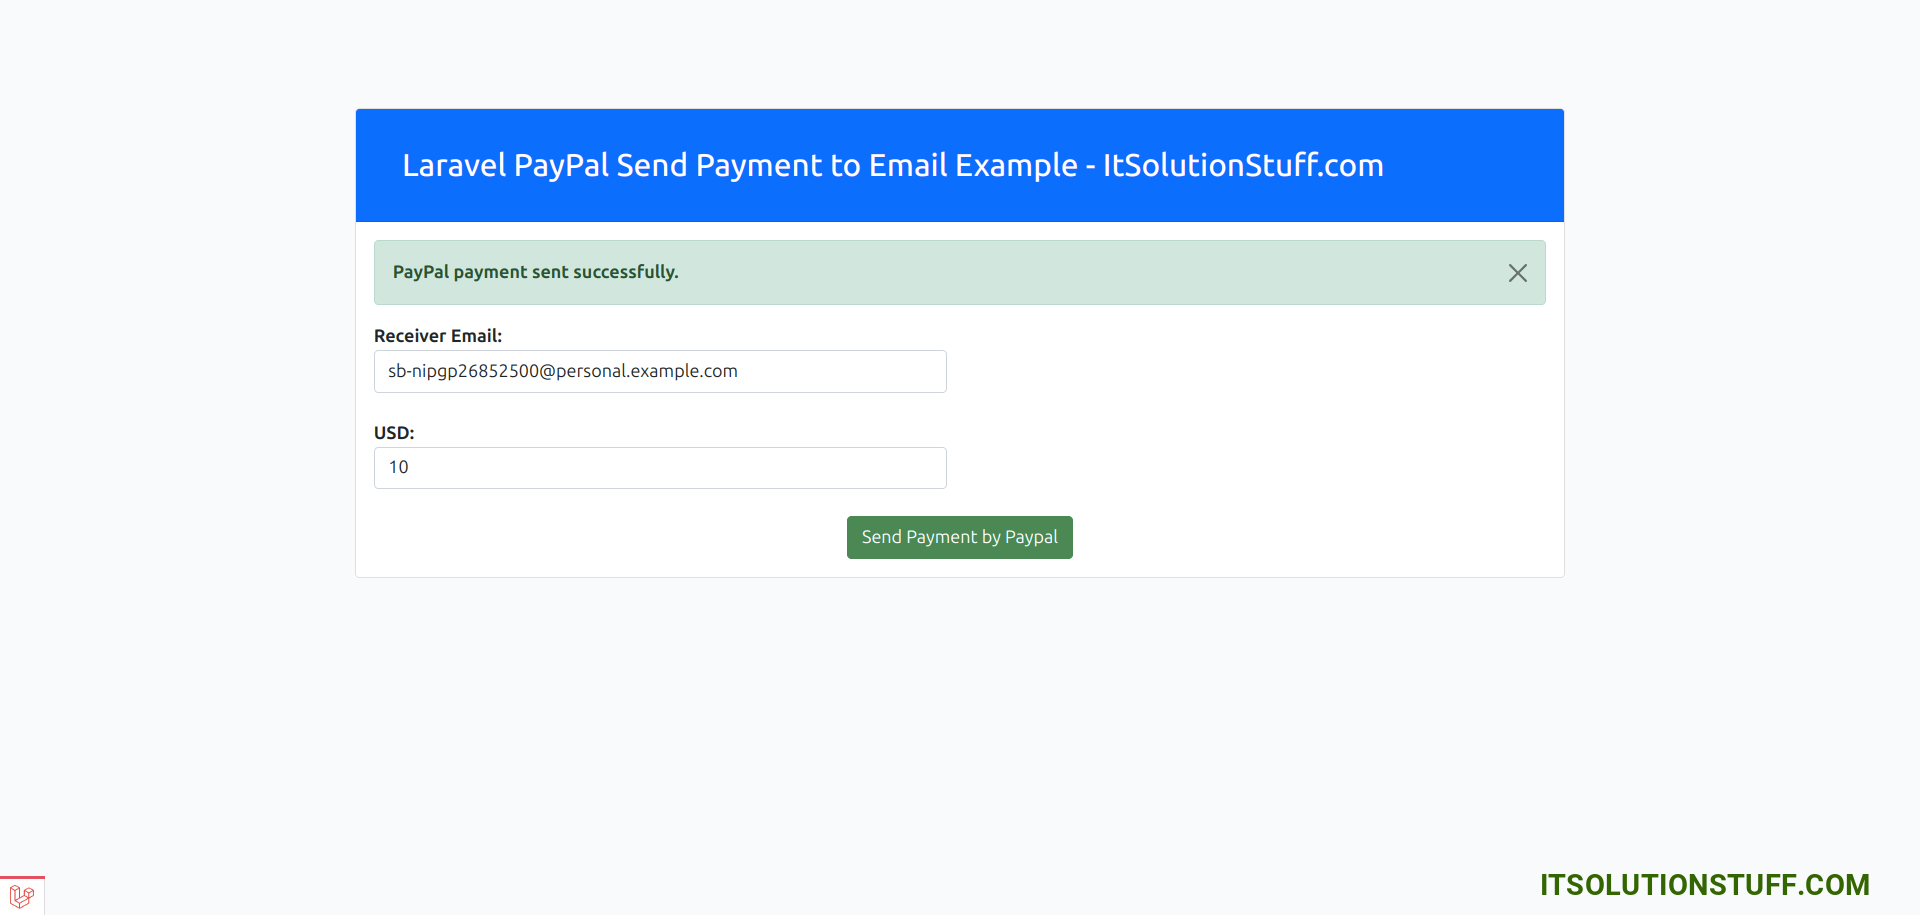
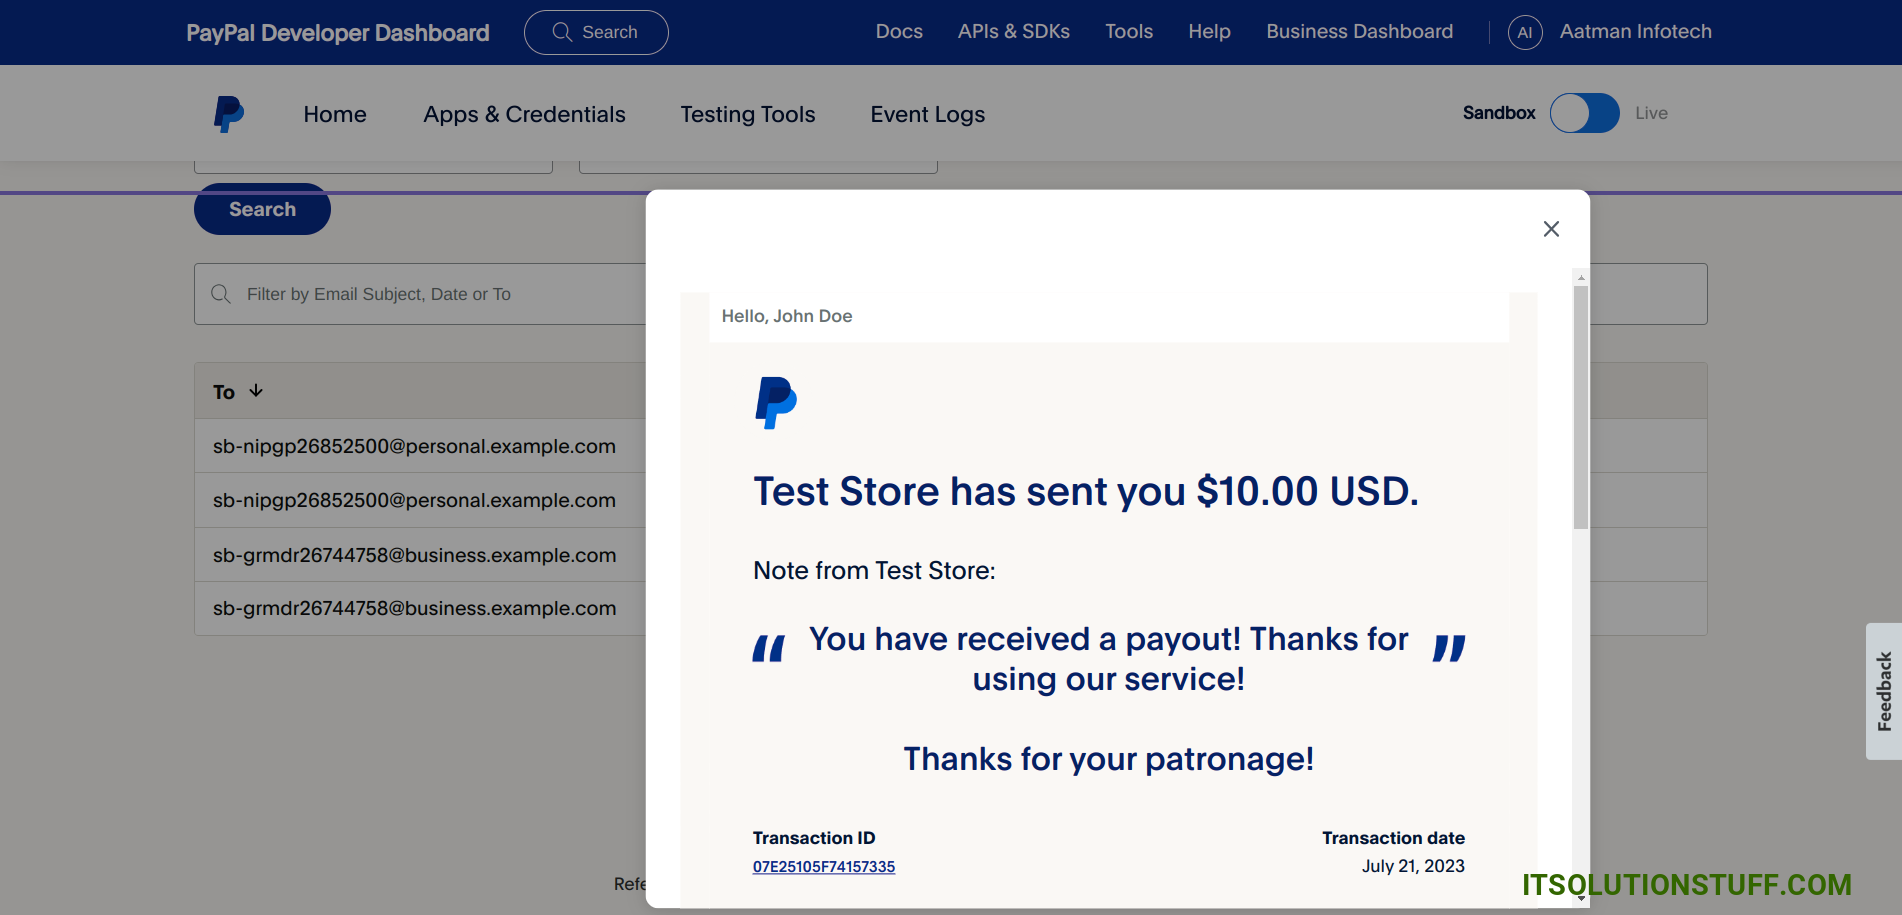
Next, you can check payment it received or not.
I hope it can help you...

