How to Change Column Position in Laravel Migration?
Hello Artisan,
Welcome to this brief tutorial where we will discuss how to change the position of a column in Laravel migration. Throughout this tutorial, you will gain an understanding of reordering columns in Laravel migrations and witness the process of changing the column order. By the end, you will have the knowledge to adjust the position of columns in Laravel migrations effectively.
Laravel migration provides way to add column name and datatype. But if you need to change column position then you have to install doctrine/dbal package to change position or you can use DB::statement(). In this example i will show you two ways to reorder column on existing table in laravel migration.
In this example, i will change position of is_publish column move after viewer column.
So, let's see the simple example steps.
Install doctrine/dbal: optional
First of all we need to install "doctrine/dbal" composer package. This package allow to use change() method to update datatype using laravel migration.
composer require doctrine/dbal
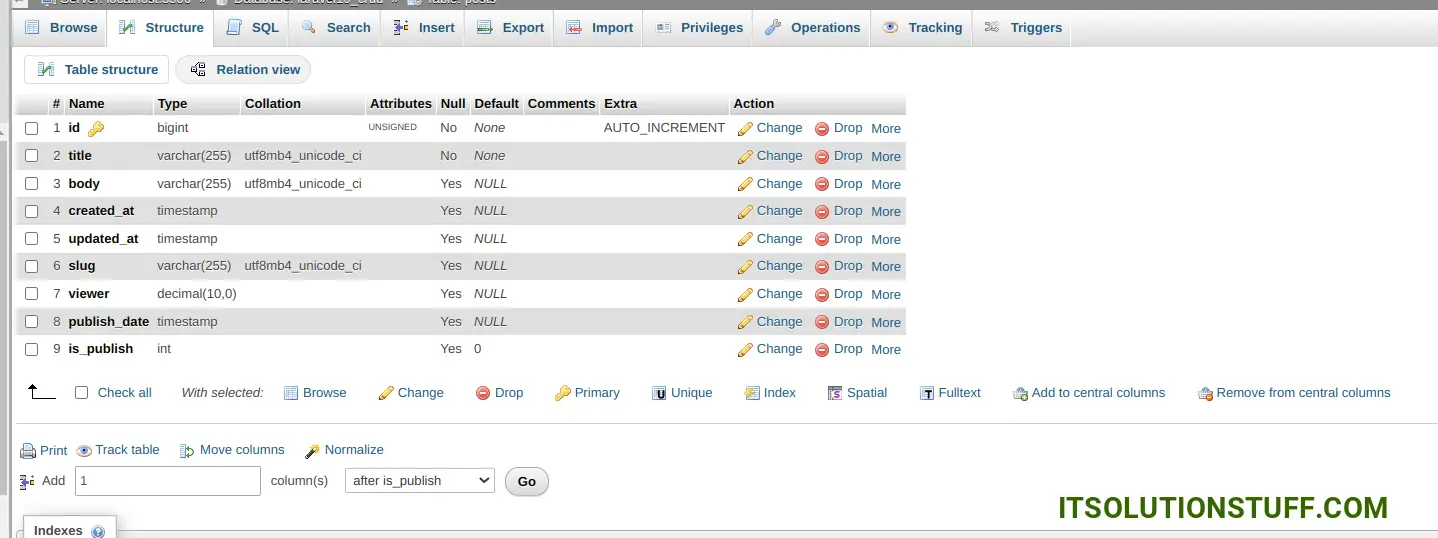
Default Created Table
Here, you will see the default created table screenshot.
Way 1: Create Migration
Create new migration using following command:
php artisan make:migration change_datatype_column
Now, You can update it as like the bellow:
database/migrations/migration_name.php
<?php
use Illuminate\Database\Migrations\Migration;
use Illuminate\Database\Schema\Blueprint;
use Illuminate\Support\Facades\Schema;
return new class extends Migration
{
/**
* Run the migrations.
*/
public function up(): void
{
Schema::table('posts', function (Blueprint $table) {
$table->integer('is_publish')->after('viewer')->change();
});
}
/**
* Reverse the migrations.
*/
public function down(): void
{
Schema::table('posts', function (Blueprint $table) {
});
}
};
Now, you are ready to run migration command:
php artisan migrate
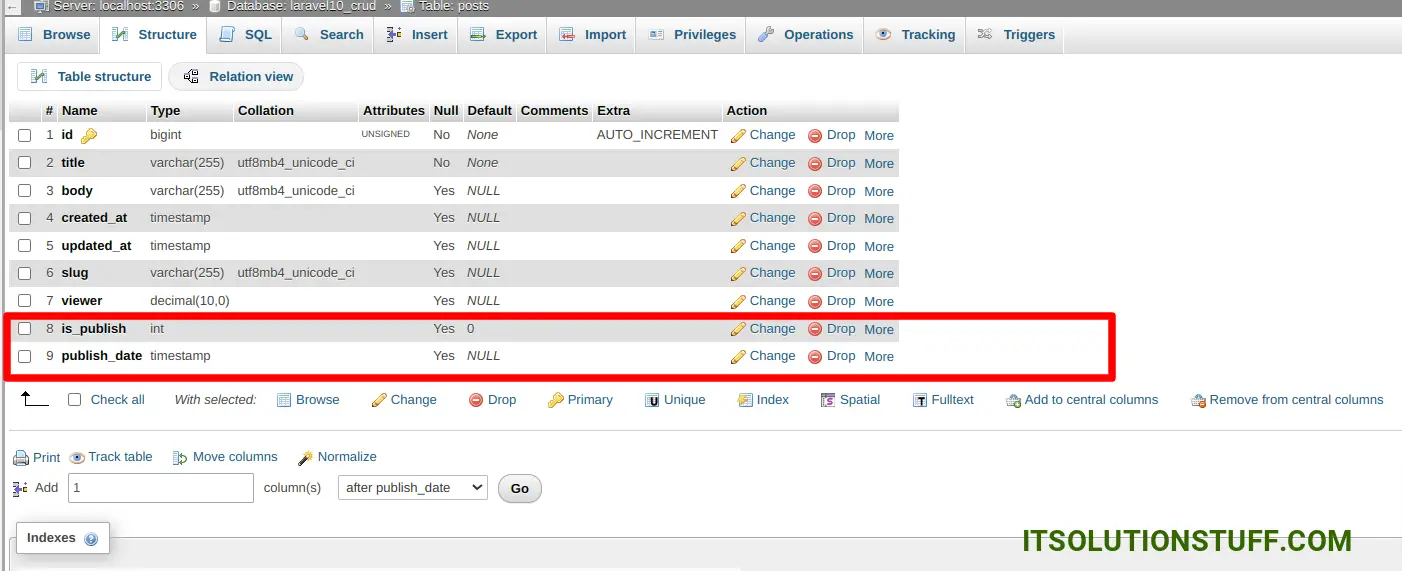
You will see the layout as like the below:
Way 2: Create Migration
Create new migration using following command:
php artisan make:migration change_datatype_column
Now, You can update it as like the bellow:
database/migrations/migration_name.php
<?php
use Illuminate\Database\Migrations\Migration;
use Illuminate\Database\Schema\Blueprint;
use Illuminate\Support\Facades\Schema;
return new class extends Migration
{
/**
* Run the migrations.
*/
public function up(): void
{
\DB::statement('ALTER TABLE `posts` CHANGE `is_publish` `is_publish` INT NULL DEFAULT '0' AFTER `viewer`;');
}
/**
* Reverse the migrations.
*/
public function down(): void
{
Schema::table('posts', function (Blueprint $table) {
});
}
};
Now, you are ready to run migration command:
php artisan migrate
I hope it can help you...

