Laravel Send Mail using Mailgun Example
Hi All,
Now, let's see article of laravel mailgun integration. you can see laravel send mail using mailgun. I’m going to show you about laravel mailgun setup. In this article, we will implement a laravel mailgun tutorial. Let's see bellow example laravel mailgun integration.
we can easily setup with mailgun for email send in laravel 6, laravel 7, laravel 8, laravel 9, laravel 10 and laravel 11 app.
In this example, i will give you step by step instruction to send email in laravel using mailgun. you can create blade file design and also with dynamic information for mail layout. so let's see step by step guide and send email to your requirement.
Step 1: Add Configuration
First you need to create account on mailgun if you don't have. So click bellow link to create account:
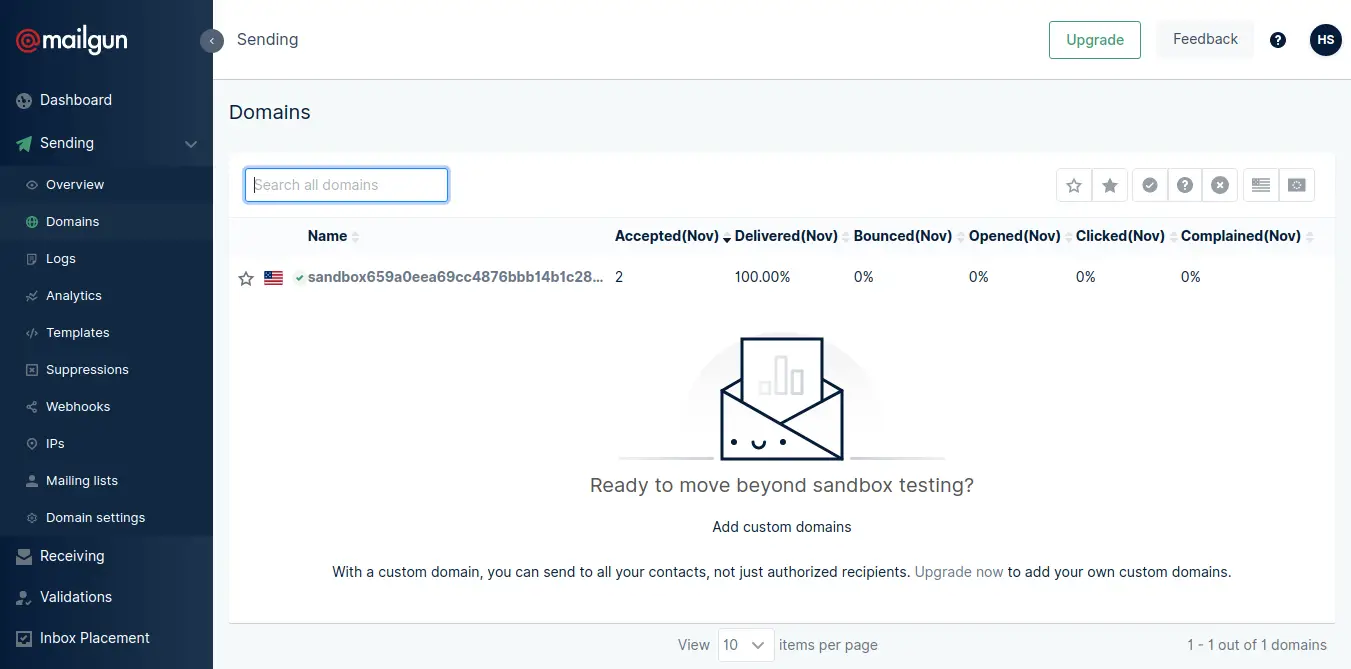
After creating account you will get mail configuration as mail host, mail port, mail username, mail passwor. you can see bellow screen shot:
Domain Page: Sending->Domain
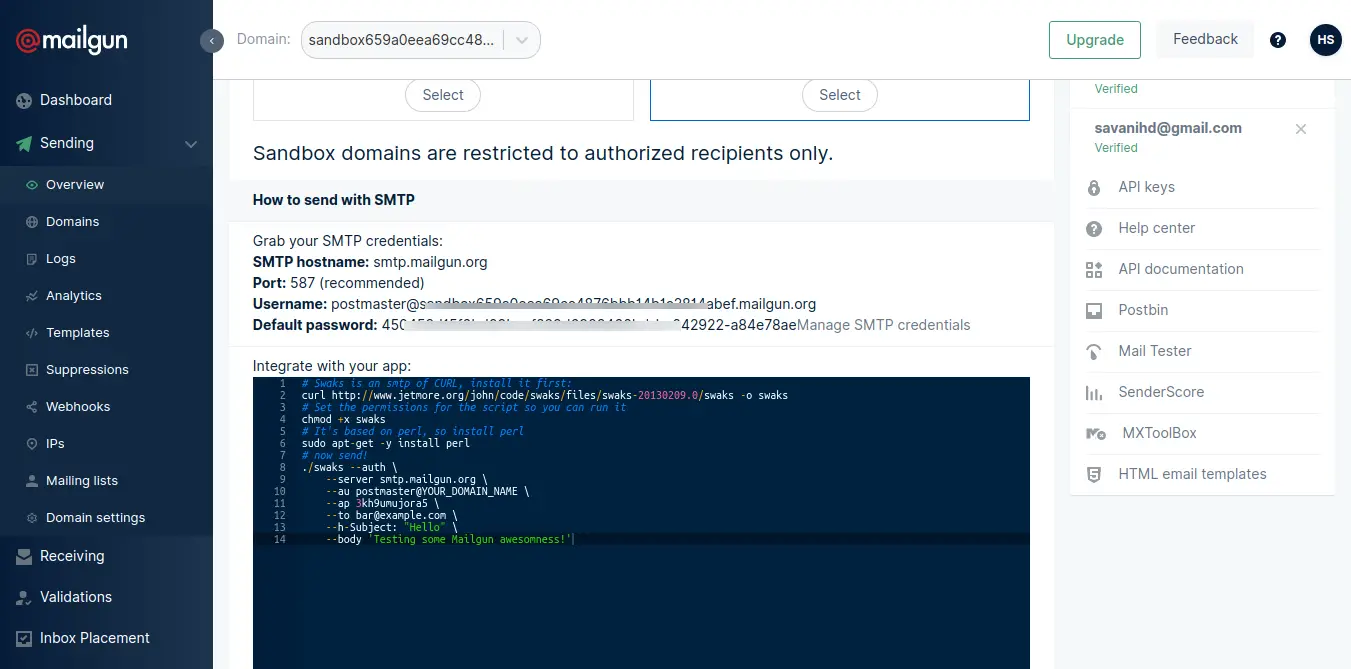
In Domain Detail page -> Click to SMTP

Get SMTP Details
Add Receiver Email for Testing:
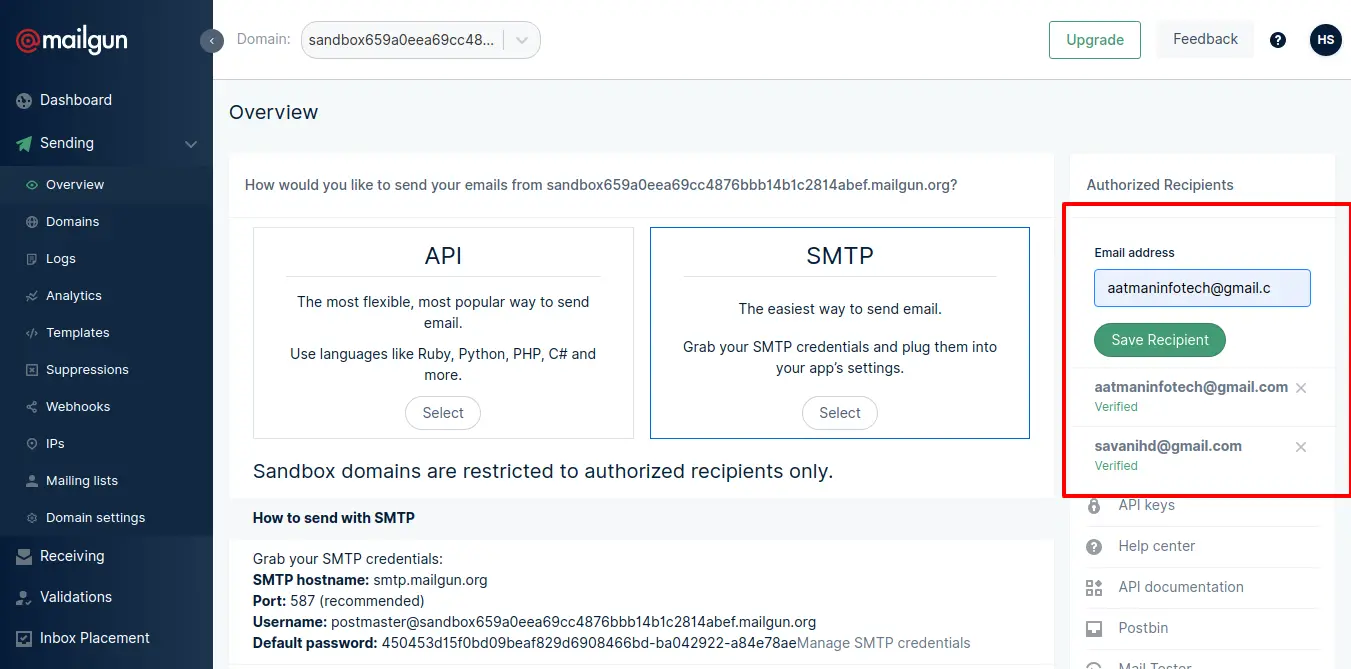
add details from there bellow:
.env
MAIL_DRIVER=mailgun
MAIL_HOST=smtp.mailgun.org
MAIL_PORT=587
MAIL_USERNAME=postmaster@sandbox659a0eea69cc4..
MAIL_PASSWORD=73c29..
MAIL_ENCRYPTION=tls
MAIL_FROM_ADDRESS=mygoogle@gmail.com
MAIL_FROM_NAME="${APP_NAME}"
Step 2: Create Mail
In this step we will create mail class MyTestMail for email sending. Here we will write code for which view will call and object of user. So let's run bellow command.
php artisan make:mail MyTestMail
app/Mail/MyTestMail.php
<?php
namespace App\Mail;
use Illuminate\Bus\Queueable;
use Illuminate\Contracts\Queue\ShouldQueue;
use Illuminate\Mail\Mailable;
use Illuminate\Queue\SerializesModels;
class MyTestMail extends Mailable
{
use Queueable, SerializesModels;
public $details;
/**
* Create a new message instance.
*
* @return void
*/
public function __construct($details)
{
$this->details = $details;
}
/**
* Build the message.
*
* @return $this
*/
public function build()
{
return $this->subject('Mail from ItSolutionStuff.com')
->view('emails.myTestMail');
}
}
Step 3: Create Blade View
In this step, we will create blade view file and write email that we want to send. now we just write some dummy text. create bellow files on "emails" folder.
resources/views/emails/myTestMail.blade.php
<!DOCTYPE html>
<html>
<head>
<title>ItsolutionStuff.com</title>
</head>
<body>
<h1>{{ $details['title'] }}</h1>
<p>{{ $details['body'] }}</p>
<p>Thank you</p>
</body>
</html>
Step 4: Add Route
Now at last we will create "MyTestMail" for sending our test email. so let's create bellow web route for testing send email.
routes/web.php
Route::get('send-mail', function () {
$details = [
'title' => 'Mail from ItSolutionStuff.com',
'body' => 'This is for testing email using smtp'
];
\Mail::to('your_receiver_email@gmail.com')->send(new \App\Mail\MyTestMail($details));
dd("Email is Sent.");
});
Now you can run and check example.
It will send you email, let' see.
Run Project:
php artisan serve
Open Link:
localhost:8000/send-mail
Output:
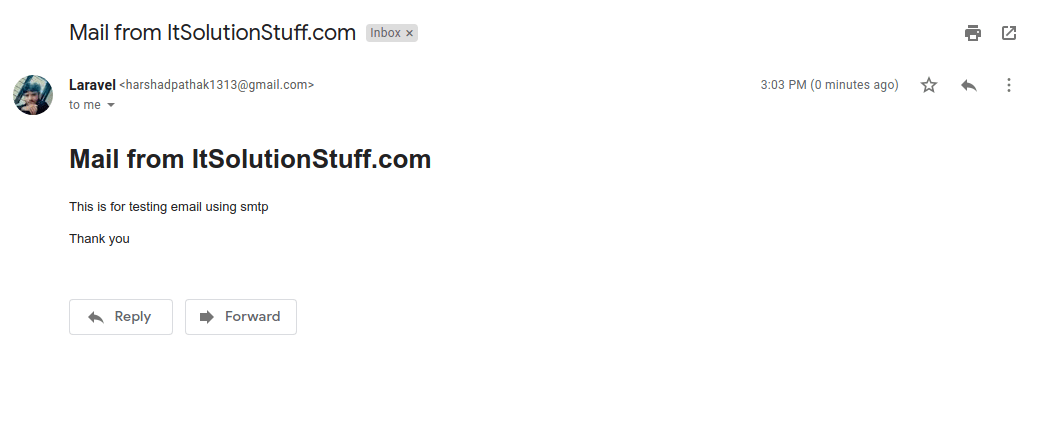
I hope it can help you...

