Laravel 8 Multiple Image Upload Tutorial
Now, let's see post of laravel 8 multiple image upload example. Here you will learn laravel 8 multiple images upload. We will look at example of multiple image upload laravel 8. this example will help you laravel 8 multiple image upload with preview. Alright, let’s dive into the steps.
We will create simple multiple image upload in laravel 8. So you basically use this code on your laravel 8 application.
We are going from starch so, we will upload multiple file and store on server then after we will store database too. so in this example we will create "files" table using laravel migration and write code for route, controller and view step by step.
So here you have to just follow bellow step to create Laravel 8 multiple File Upload with Validation Example.
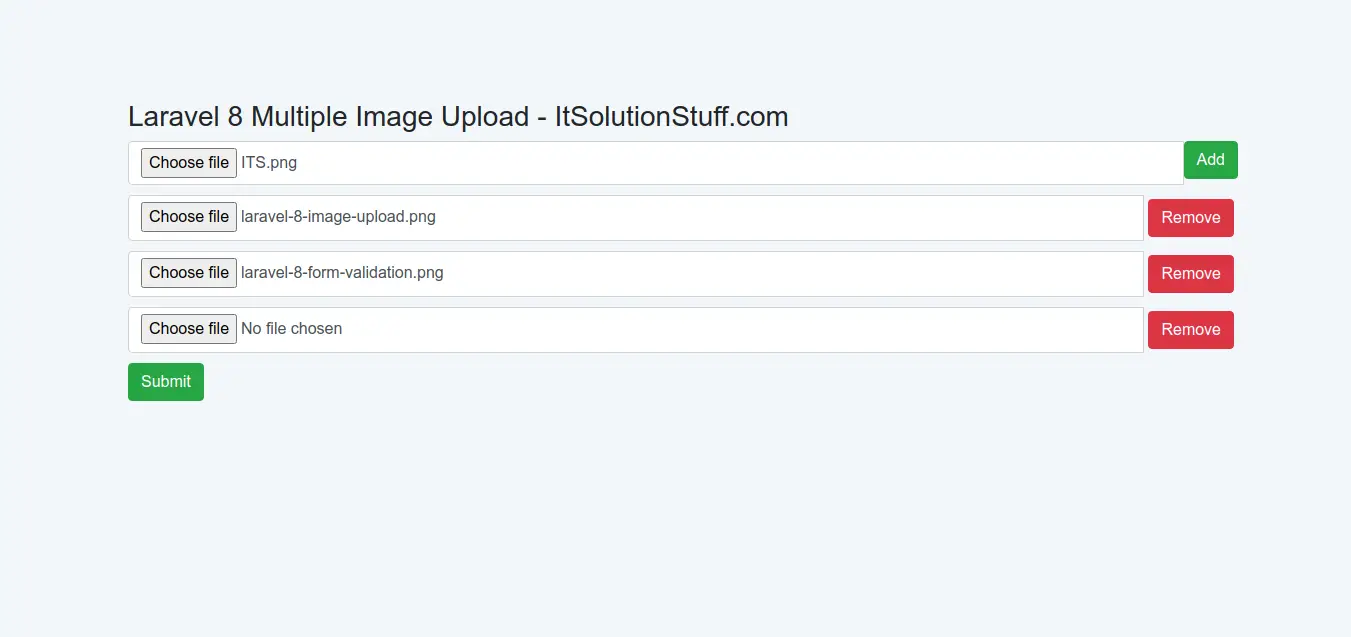
Preview:
Step 1: Download Laravel 8
In the first step, we will download a new simple copy source code of Laravel App project by typing the some following command.
composer create-project --prefer-dist laravel/laravel blog
Step 2: Add Migration and Model
Here, we need create database migration for files table and also we will create model for files table.
php artisan make:migration create_files_table
Migration:
<?php
use Illuminate\Database\Migrations\Migration;
use Illuminate\Database\Schema\Blueprint;
use Illuminate\Support\Facades\Schema;
class CreateFilesTable extends Migration
{
/**
* Run the migrations.
*
* @return void
*/
public function up()
{
Schema::create('files', function (Blueprint $table) {
$table->id();
$table->string('filenames');
$table->timestamps();
});
}
/**
* Reverse the migrations.
*
* @return void
*/
public function down()
{
Schema::dropIfExists('files');
}
}
php artisan migrate
now we will create File model by using following command:
php artisan make:model File
app/Models/File.php
<?php
namespace App\Models;
use Illuminate\Database\Eloquent\Factories\HasFactory;
use Illuminate\Database\Eloquent\Model;
class File extends Model
{
use HasFactory;
protected $fillable = [
'filenames'
];
/**
* Set the user's first name.
*
* @param string $value
* @return void
*/
public function setFilenamesAttribute($value)
{
$this->attributes['filenames'] = json_encode($value);
}
}
Step 3: Create Routes
In third step, we will create routes for multiple file upload. so create two route with GET and POST route example.
routes/web.php
<?php
use Illuminate\Support\Facades\Route;
use App\Http\Controllers\FileController;
/*
|--------------------------------------------------------------------------
| Web Routes
|--------------------------------------------------------------------------
|
| Here is where you can register web routes for your application. These
| routes are loaded by the RouteServiceProvider within a group which
| contains the "web" middleware group. Now create something great!
|
*/
Route::get('file', [FileController::class, 'create']);
Route::post('file', [FileController::class, 'store']);
Step 4: Create Controller
Now we require to add new FileController controller for manage route So let's create FileController with create and store method. Make sure you need to create "files" folder in your public directory.
app/Http/Controllers/FileController.php
<?php
namespace App\Http\Controllers;
use Illuminate\Http\Request;
use App\Models\File;
class FileController extends Controller
{
/**
* Show the application dashboard.
*
* @return \Illuminate\Http\Response
*/
public function create()
{
return view('create');
}
/**
* Show the application dashboard.
*
* @return \Illuminate\Http\Response
*/
public function store(Request $request)
{
$this->validate($request, [
'filenames' => 'required',
'filenames.*' => 'image'
]);
$files = [];
if($request->hasfile('filenames'))
{
foreach($request->file('filenames') as $file)
{
$name = time().rand(1,100).'.'.$file->extension();
$file->move(public_path('files'), $name);
$files[] = $name;
}
}
$file= new File();
$file->filenames = $files;
$file->save();
return back()->with('success', 'Data Your files has been successfully added');
}
}
Store Image in Storage Folder
$file->storeAs('images', $imageName);
// storage/app/files/file.png
Store Image in Public Folder
$file->move(public_path('images'), $imageName);
// public/files/file.png
Store Image in S3
$file->storeAs('images', $imageName, 's3');
Step 5: Create Blade File
in this step we need to create create.blade.php file in resources folder. So let's create file:
resources/views/create.blade.php
<html lang="en">
<head>
<title>Laravel 8 Multiple Image Upload Example - ItSolutionStuff.com</title>
<link rel="stylesheet" href="https://maxcdn.bootstrapcdn.com/bootstrap/4.0.0/css/bootstrap.min.css">
<script src="https://cdnjs.cloudflare.com/ajax/libs/jquery/3.5.1/jquery.min.js"></script>
</head>
<body>
<div class="container lst">
@if (count($errors) > 0)
<div class="alert alert-danger">
<strong>Sorry!</strong> There were more problems with your HTML input.<br><br>
<ul>
@foreach ($errors->all() as $error)
<li>{{ $error }}</li>
@endforeach
</ul>
</div>
@endif
@if(session('success'))
<div class="alert alert-success">
{{ session('success') }}
</div>
@endif
<h3 class="well">Laravel 8 Multiple Image Upload - ItSolutionStuff.com</h3>
<form method="post" action="{{url('file')}}" enctype="multipart/form-data">
@csrf
<div class="input-group hdtuto control-group lst increment" >
<input type="file" name="filenames[]" class="myfrm form-control">
<div class="input-group-btn">
<button class="btn btn-success" type="button"><i class="fldemo glyphicon glyphicon-plus"></i>Add</button>
</div>
</div>
<div class="clone hide">
<div class="hdtuto control-group lst input-group" style="margin-top:10px">
<input type="file" name="filenames[]" class="myfrm form-control">
<div class="input-group-btn">
<button class="btn btn-danger" type="button"><i class="fldemo glyphicon glyphicon-remove"></i> Remove</button>
</div>
</div>
</div>
<button type="submit" class="btn btn-success" style="margin-top:10px">Submit</button>
</form>
</div>
<script type="text/javascript">
$(document).ready(function() {
$(".btn-success").click(function(){
var lsthmtl = $(".clone").html();
$(".increment").after(lsthmtl);
});
$("body").on("click",".btn-danger",function(){
$(this).parents(".hdtuto").remove();
});
});
</script>
</body>
</html>
Now you can simple run and check it.
I hope it can help you...

