How to Install and Use Laravel Debugbar?
Hey Guys,
In this short tutorial, we will share the quick and straightforward way to how to use laravel debugbar. I explained simply about how to install and use laravel debugbar. I explained simply about laravel debugbar package. If you have a question about laravel debug using debugbar then I will give a simple example with a solution. Here, Create a basic example of laravel install barryvdh/laravel-debugbar.
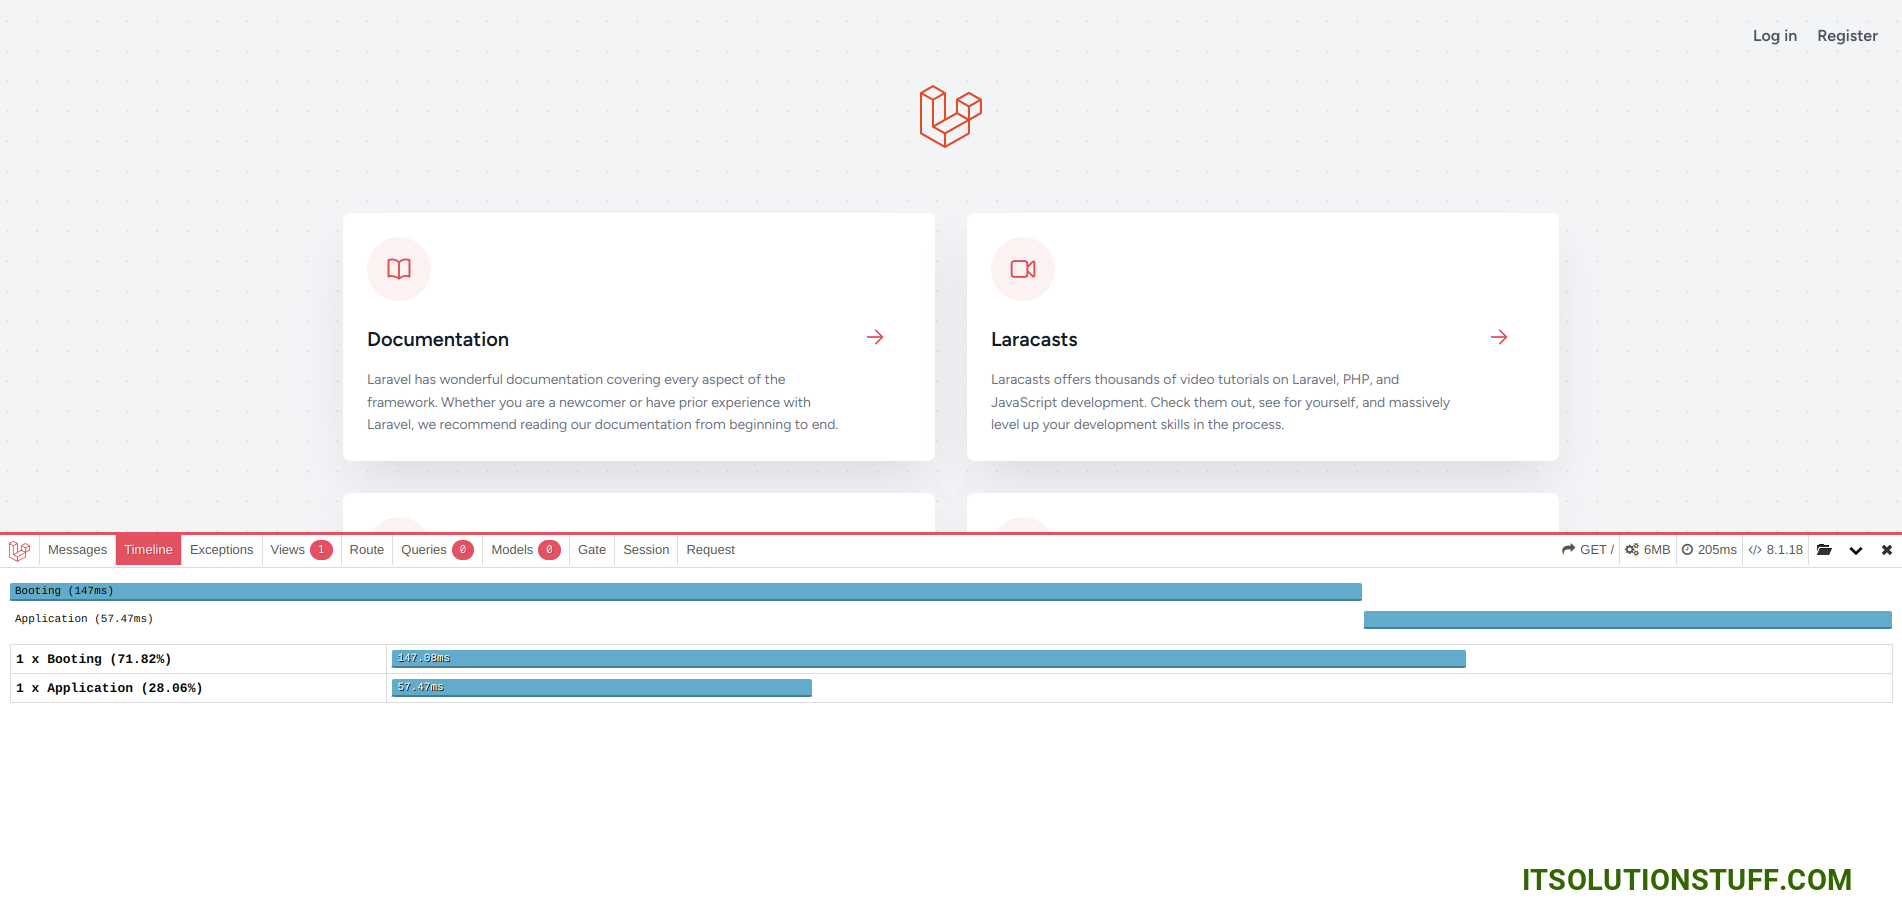
The Laravel Debugbar is one of the most useful Laravel packages for development. Laravel Debugbar will help you to debug your entire laravel app. you can debug Timeline, Messages, Query time, Models, Route, Session, Request etc. as Laravel developer you must have to use Laravel debugbar in your app.
Here, i will show you how to install it and use laravel debugbar. we can install using barryvdh/laravel-debugbar composer package. so, let's follow the following step.
Step 1: Install Laravel
first of all we need to get fresh Laravel version application using bellow command, So open your terminal OR command prompt and run bellow command:
composer create-project --prefer-dist laravel/laravel blog
Step 2: Install barryvdh/laravel-debugbar
Here, you need to install barryvdh/laravel-debugbar package for laravel debugger, so, let's run following command:
composer require barryvdh/laravel-debugbar --dev
You need to set ServiceProvider and facade in your config file. it's optional step.
config/app.php
<?php
use Illuminate\Support\Facades\Facade;
return [
.....
'providers' => [
...
Barryvdh\Debugbar\ServiceProvider::class,
],
'aliases' => [
'Debugbar' => Barryvdh\Debugbar\Facades\Debugbar::class,
]
Next, The Debugbar will be enabled when APP_DEBUG is true in .env file.
Run Laravel App:
All the required steps have been done, now you have to type the given below command and hit enter to run the Laravel app:
php artisan serve
Now, Go to your web browser, type the given URL and view the app output:
http://localhost:8000/
Now, you will see the following output:
Step 3: Display Users
Here, we just create simple example to understand more about laravel debugbar. so, let's add one route, controller and blade file as like the bellow:
routes/web.php
Route::get('users', [App\Http\Controllers\UserController::class, 'index']);
app/Http/Controllers/UserController.php
<?php
namespace App\Http\Controllers;
use Illuminate\Http\Request;
use App\Models\User;
class UserController extends Controller
{
/**
* Write code on Method
*
* @return response()
*/
public function index(Request $request)
{
$users = User::latest()->get();
return view('users', compact('users'));
}
}
resources/views/users.php
<!DOCTYPE html>
<html>
<head>
<title>List of Users - ItSolutionStuff.com</title>
<meta name="csrf-token" content="{{ csrf_token() }}">
<link href="https://cdnjs.cloudflare.com/ajax/libs/twitter-bootstrap/5.0.1/css/bootstrap.min.css" rel="stylesheet">
</head>
<body>
<div class="container">
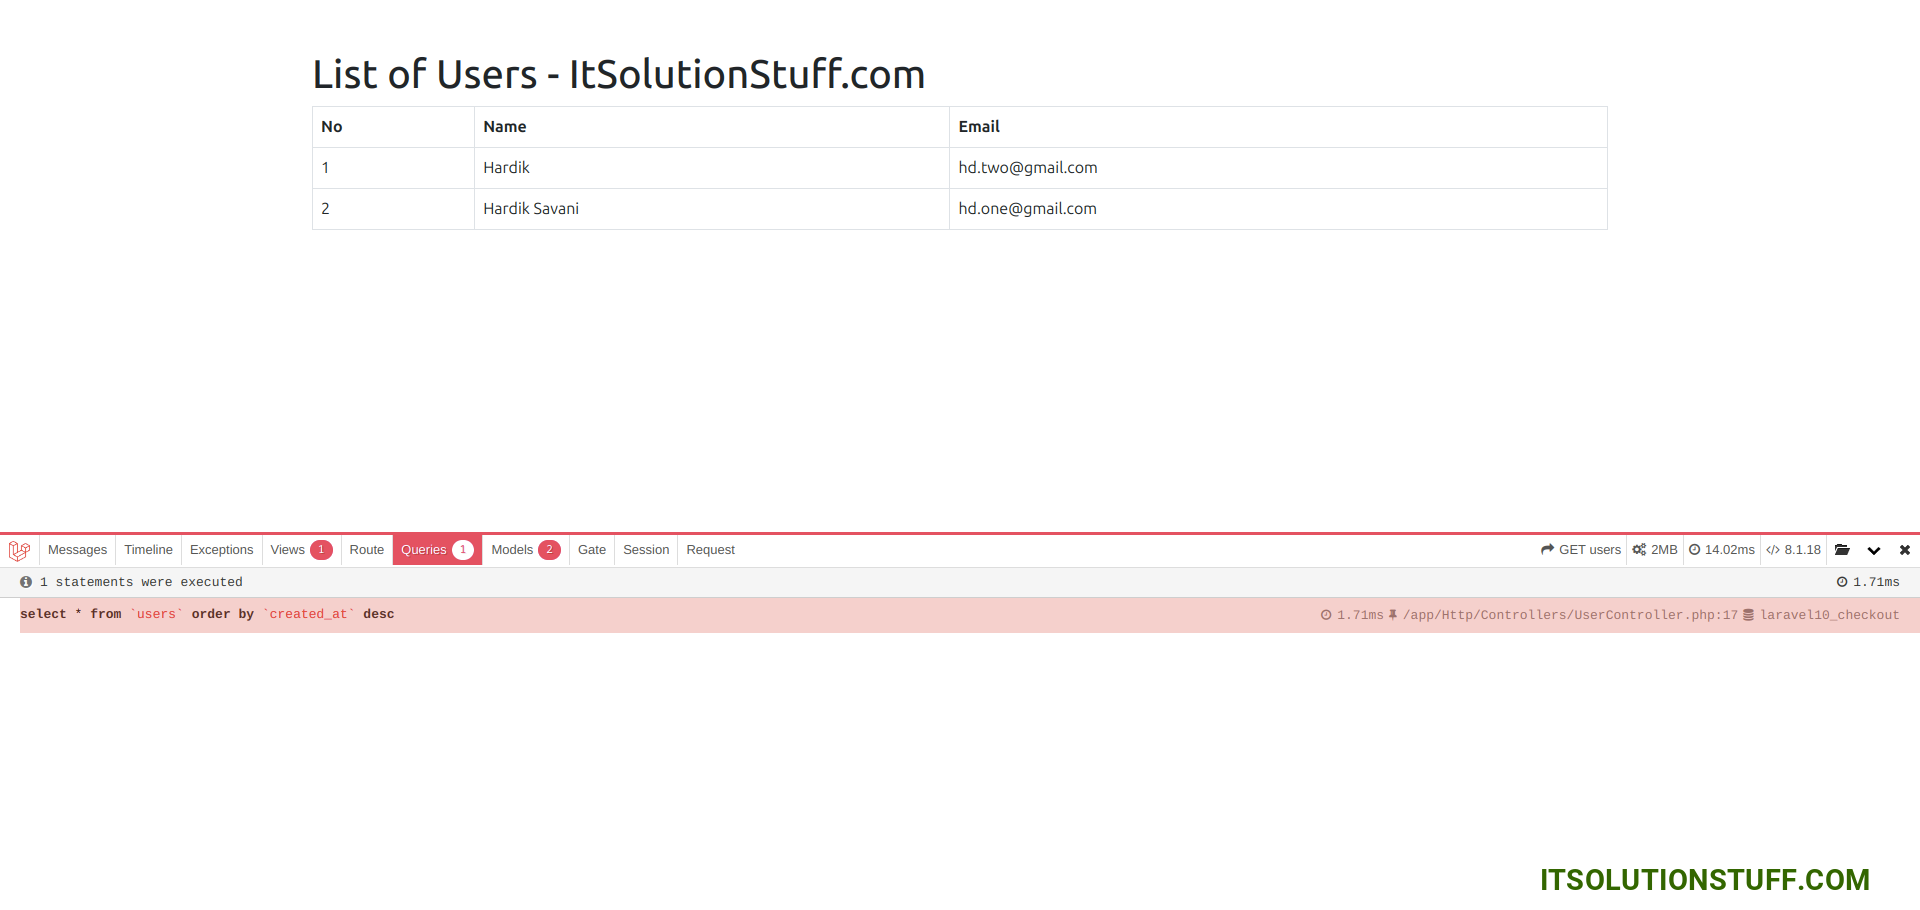
<h1>List of Users - ItSolutionStuff.com</h1>
<table class="table table-bordered data-table" >
<thead>
<tr>
<th>No</th>
<th>Name</th>
<th>Email</th>
</tr>
</thead>
<tbody>
@foreach($users as $key => $user)
<tr>
<td>{{ ++$key }}</td>
<td>{{ $user->name }}</td>
<td>{{ $user->email }}</td>
</tr>
@endforeach
</tbody>
</table>
</div>
</body>
</html>
Run Laravel App:
All the required steps have been done, now you have to type the given below command and hit enter to run the Laravel app:
php artisan serve
Now, Go to your web browser, type the given URL and view the app output:
http://localhost:8000/users
Now, you will see the following output:
I hope it can help you...

