How to Image Upload in Laravel Vapor?
Hi Dev,
This article will provide some of the most important example how to image upload in laravel vapor with s3. it's simple example of laravel vapor image upload example. you will learn laravel vapor storage image upload. We will use images upload in laravel vapor example. Alright, let’s dive into the steps.
If you create simple image upload using storage in laravel app then it will store if storage folder of your app. but if you do it with vapor then it will store images on s3 bucket. we don't need to create new code for that, it will works for both. but in vapor we must have to add storage option in your yml file so it will store files on it.
so let's follow simple tutorial about how to upload image and view in laravel vapor.
Step 1: Create Routes
In next step, we will add new two routes in web.php file. One route for generate form and another for post method So let's simply create both route as bellow listed:
routes/web.php
<?php
use Illuminate\Support\Facades\Route;
use App\Http\Controllers\ImageUploadController;
Route::get('image-upload', [ ImageUploadController::class, 'imageUpload' ])->name('image.upload');
Route::post('image-upload', [ ImageUploadController::class, 'imageUploadPost' ])->name('image.upload.post');
Route::get('image/{filename}', [ ImageUploadController::class, 'displayImage' ])->name('image.displayImage');
Step 2: Create ImageUploadController
In third step we will have to create new ImageUploadController and here we have to write two method imageUpload() and imageUploadPost(). So one method will handle get method another one for post. So let's add code.
app/Http/Controllers/ImageUploadController.php
<?php
namespace App\Http\Controllers;
use Illuminate\Http\Request;
use Illuminate\Support\Facades\Storage;
use Response;
class ImageUploadController extends Controller
{
/**
* Display a listing of the resource.
*
* @return \Illuminate\Http\Response
*/
public function imageUpload()
{
return view('imageUpload');
}
/**
* Display a listing of the resource.
*
* @return \Illuminate\Http\Response
*/
public function imageUploadPost(Request $request)
{
$request->validate([
'image' => 'required|image|mimes:jpeg,png,jpg,gif,svg|max:2048',
]);
$imageName = time().'.'.$request->image->extension();
$request->image->storeAs('images', $imageName);
return back()
->with('success','You have successfully upload image.')
->with('image',$imageName);
}
/**
* Write code on Method
*
* @return response()
*/
public function displayImage($fileName)
{
$path = 'images/'.$fileName;
$file = Storage::get($path);
$type = Storage::mimeType($path);
$response = Response::make($file, 200);
$response->header("Content-Type", $type);
return $response;
}
}
Step 3: Create Blade File
At last step we need to create imageUpload.blade.php file and in this file we will create form with file input button. So copy bellow and put on that file.
resources/views/imageUpload.blade.php
<!DOCTYPE html>
<html>
<head>
<title>Image Upload with Laravel Vapor - ItSolutionStuff.com.com</title>
<link rel="stylesheet" href="https://maxcdn.bootstrapcdn.com/bootstrap/4.0.0/css/bootstrap.min.css">
</head>
<body>
<div class="container">
<div class="panel panel-primary">
<div class="panel-heading"><h2>Image Upload with Laravel Vapor - ItSolutionStuff.com.com</h2></div>
<div class="panel-body">
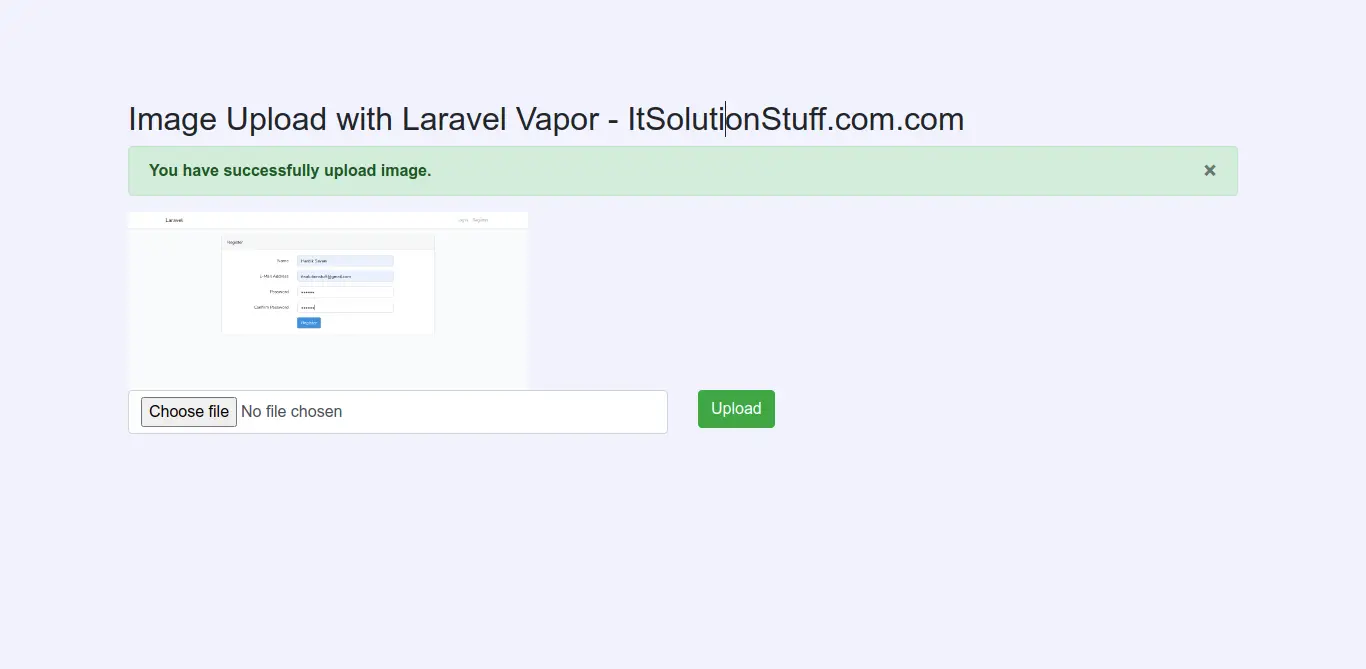
@if ($message = Session::get('success'))
<div class="alert alert-success alert-block">
<button type="button" class="close" data-dismiss="alert">×</button>
<strong>{{ $message }}</strong>
</div>
<img src="{{ route('image.displayImage', Session::get('image')) }}" style="width: 400px">
@endif
@if (count($errors) > 0)
<div class="alert alert-danger">
<strong>Whoops!</strong> There were some problems with your input.
<ul>
@foreach ($errors->all() as $error)
<li>{{ $error }}</li>
@endforeach
</ul>
</div>
@endif
<form action="{{ route('image.upload.post') }}" method="POST" enctype="multipart/form-data">
@csrf
<div class="row">
<div class="col-md-6">
<input type="file" name="image" class="form-control">
</div>
<div class="col-md-6">
<button type="submit" class="btn btn-success">Upload</button>
</div>
</div>
</form>
</div>
</div>
</div>
</body>
</html>
Step 4: Deploy Project
here, in your yml file. you need to add storage s3 bucket name. so all images store on it. so let's add it and deploy.
vapor.yml
id: 22442
name: itsolutionstuff-vapor
environments:
production:
memory: 1024
cli-memory: 512
runtime: 'php-8.0:al2'
build:
- 'COMPOSER_MIRROR_PATH_REPOS=1 composer install --no-dev'
staging:
memory: 1024
cli-memory: 512
runtime: 'php-8.0:al2'
database: itsolutionstuff-vapor-staging
storage: itsolutionstuff-s3-files
build:
- 'COMPOSER_MIRROR_PATH_REPOS=1 composer install'
now just deploy it.
php vendor/bin/vapor deploy
now you can open staging url as bellow:
https://frosty-forest-e7rbjvmbyo40.vapor-farm-a1.com/image-upload
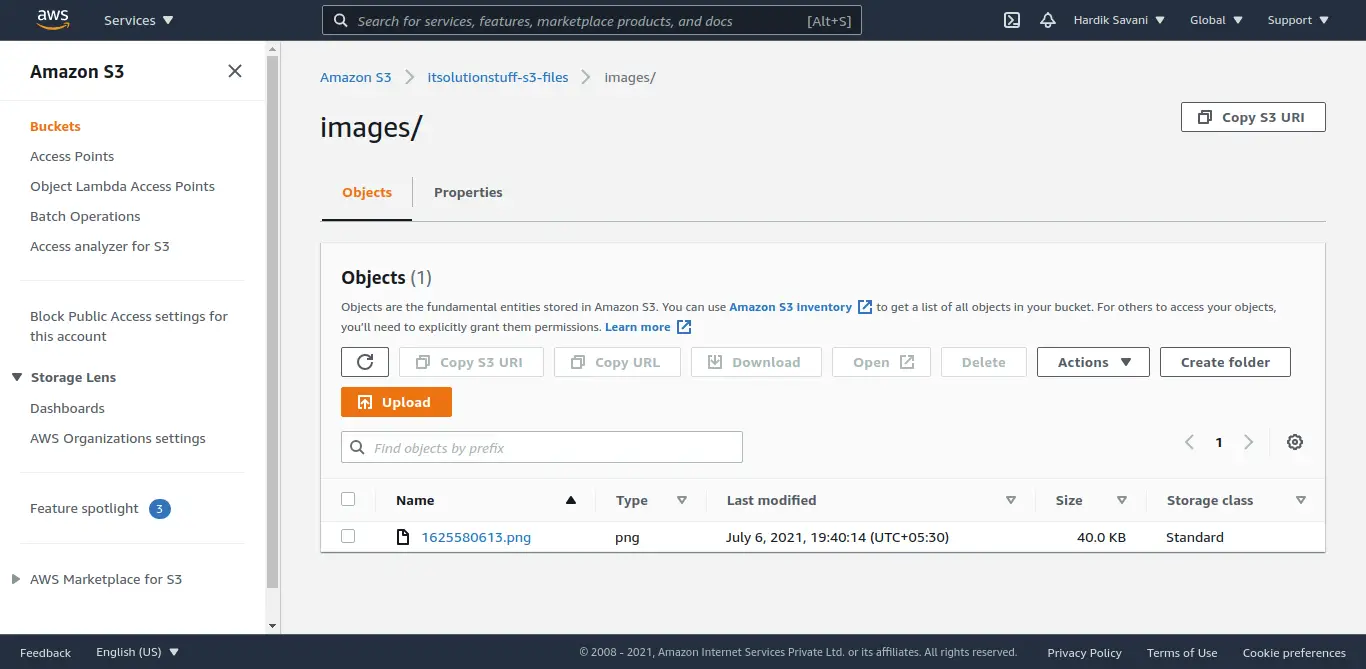
you can see image store on your s3 bucket as like bellow:
Now you can run and check it.
I hope it can help you...

