Codeigniter Crop Image Before Upload Example
In this tutorial, i would like to share with you image crop with preview before upload using croppie jquery plugin in codeigniter 3. we can resize and crop image before upload using jquery ajax in php codeigniter application.
we almost require to crop image before upload feature in big project like cms, crm, social media project. so if you require to crop image with circle or triangle then you should use croppie jquery library. croppie plugin will help to make better way to crop and you can do it easily.
In this example, will create very simple example for you, so basically you can understand how it works. we need to create two routes with get and post method then we will create one controller with two methods. after that we will create one view file for layout and create "upload" folder on root directory so image upload will there.
Let's just follow bellow steps:
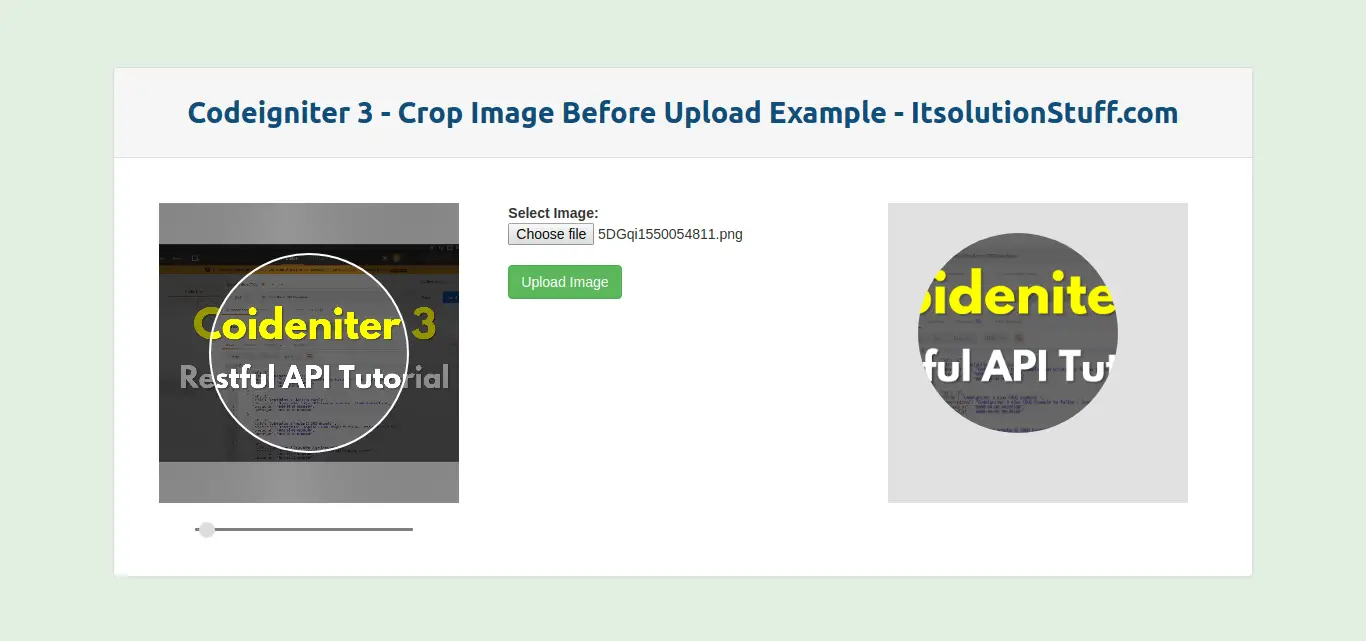
Preview:
Step 1: Create Routes
In first step we require to add two route for display form and post form for image upload. so open routes.php file and add code like as bellow:
application/config/routes.php
<?php
defined('BASEPATH') OR exit('No direct script access allowed');
$route['default_controller'] = 'welcome';
$route['404_override'] = '';
$route['translate_uri_dashes'] = FALSE;
$route['my-form'] = "MyFormController";
$route['my-form-upload']['post'] = "MyFormController/post";
Step 2: Create Controller
In this step, we need to create MyFormController Controller and define two methods, index() and post(). So let's proceed.
application/controllers/MyFormController.php
<?php
class MyFormController extends CI_Controller {
/**
* Get All Data from this method.
*
* @return Response
*/
public function __construct() {
parent::__construct();
}
/**
* Get All Data from this method.
*
* @return Response
*/
public function index()
{
$this->load->view('myForm');
}
/**
* Get All Data from this method.
*
* @return Response
*/
public function post()
{
$data = $_POST['image'];
list($type, $data) = explode(';', $data);
list(, $data) = explode(',', $data);
$data = base64_decode($data);
$imageName = time().'.png';
file_put_contents('upload/'.$imageName, $data);
echo 'done';
}
}
Step 3: Create View File
In last step, we need to create view file, So here create myForm.php view file and copy bellow code, here we will display form.
application/views/myForm.php
<html lang="en">
<head>
<title>Codeigniter 3 - Crop Image Before Upload Example - ItsolutionStuff.com</title>
<script src="http://demo.itsolutionstuff.com/plugin/jquery.js"></script>
<script src="http://demo.itsolutionstuff.com/plugin/croppie.js"></script>
<link rel="stylesheet" href="http://demo.itsolutionstuff.com/plugin/bootstrap-3.min.css">
<link rel="stylesheet" href="http://demo.itsolutionstuff.com/plugin/croppie.css">
</head>
<body>
<div class="container">
<div class="panel panel-default">
<div class="panel-heading">Codeigniter 3 - Crop Image Before Upload Example - ItsolutionStuff.com</div>
<div class="panel-body">
<div class="row">
<div class="col-md-4 text-center">
<div id="upload-demo" style="width:350px"></div>
</div>
<div class="col-md-4" style="padding-top:30px;">
<strong>Select Image:</strong>
<br/>
<input type="file" id="upload">
<br/>
<button class="btn btn-success upload-result">Upload Image</button>
</div>
<div class="col-md-4" style="">
<div id="upload-demo-i" style="background:#e1e1e1;width:300px;padding:30px;height:300px;margin-top:30px"></div>
</div>
</div>
</div>
</div>
</div>
<script type="text/javascript">
$uploadCrop = $('#upload-demo').croppie({
enableExif: true,
viewport: {
width: 200,
height: 200,
type: 'circle'
},
boundary: {
width: 300,
height: 300
}
});
$('#upload').on('change', function () {
var reader = new FileReader();
reader.onload = function (e) {
$uploadCrop.croppie('bind', {
url: e.target.result
}).then(function(){
console.log('jQuery bind complete');
});
}
reader.readAsDataURL(this.files[0]);
});
$('.upload-result').on('click', function (ev) {
$uploadCrop.croppie('result', {
type: 'canvas',
size: 'viewport'
}).then(function (resp) {
$.ajax({
url: "/my-form-upload",
type: "POST",
data: {"image":resp},
success: function (data) {
html = '<img src="' + resp + '" />';
$("#upload-demo-i").html(html);
}
});
});
});
</script>
</body>
</html>
Now you need to create "upload" directory on your root folder.
Now we are ready to this full example.
So let's run bellow command on your root directory for quick run:
php -S localhost:8000
Now you can open bellow URL on your browser:
http://localhost:8000/my-form
I hope it can help you...

