Laravel Stripe Checkout Payment Integration Example
Hello Folks,
I am going to explain to you example of laravel stripe checkout payment gateway integration. This article will give you a simple example of laravel stripe checkout tutorial. I explained simply about stripe checkout integration in laravel example. It's a simple example of stripe checkout process in laravel.
You need to create a stripe developer account and need to get API key and secret from there. Then we will use stripe/stripe-php composer library for the stripe checkout process payment gateway in laravel. I write step by step integration for the stripe checkout session payment gateway.
Stripe is a very popular and secure internet payment gateway company that helps to accept payments worldwide. Stripe provides really nice development interface to start and you don’t have to pay subscription charges to learn it provides a free developer account, before starting to code in your app.
I will give you an example from scratch to implement a stripe checkout payment gateway in the laravel application. You can use this example with laravel 6, laravel 7, laravel 8, laravel 9, laravel 10 and laravel 11 versions.
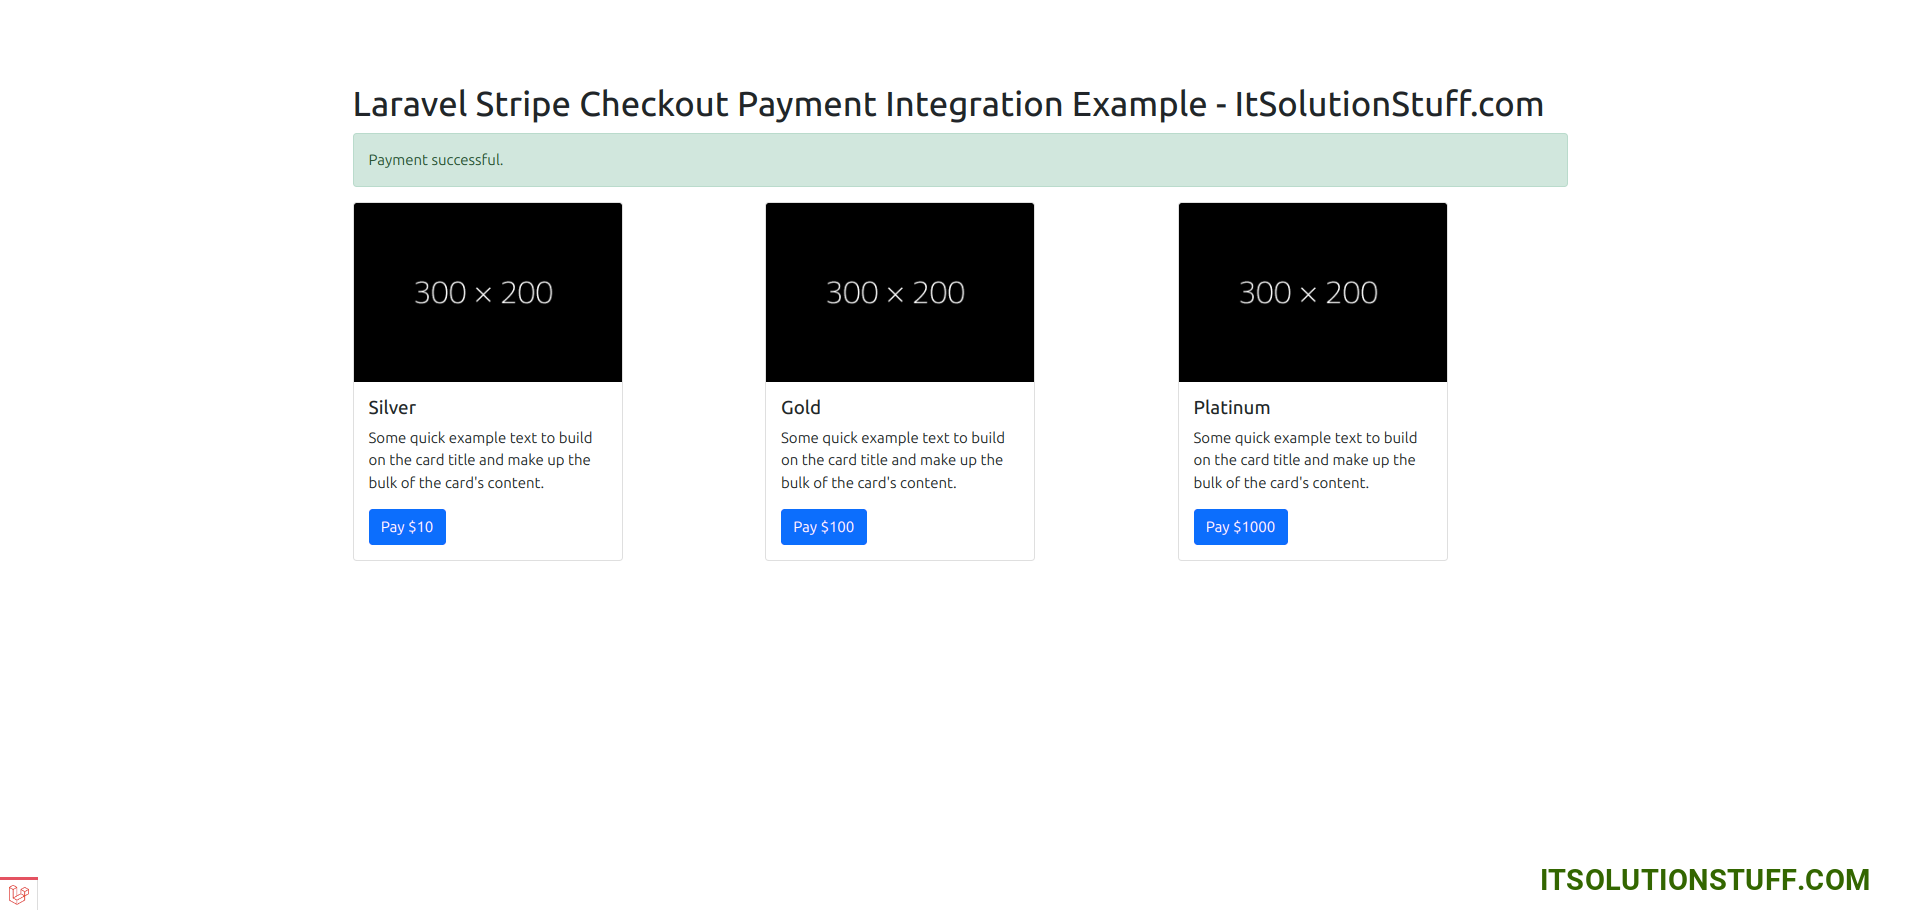
Preview:
Step 1: Install Laravel
This is optional; however, if you have not created the laravel app, then you may go ahead and execute the below command:
composer create-project laravel/laravel example-app
Step 2: Install stripe-php Package
In this step we need to install stripe-php via the Composer package manager, so one your terminal and fire the bellow command:
composer require stripe/stripe-php
Step 3: Set Stripe API Key and SECRET
Now, we need to set the stripe key and secret. so first you can go on Stripe website and create a development stripe account key and secret and add bellow:
.env
STRIPE_KEY=pk_test_reFxwbsm9cdCKASdTfxAR
STRIPE_SECRET=sk_test_oQMFWteJiPd4wj4AtgApY
Step 4: Create Controller File
in the next step, now we have create a new controller as StripePaymentController and write both methods on it like as below, So let's create both controllers:
app/Http/Controllers/StripePaymentController.php
<?php
namespace App\Http\Controllers;
use Illuminate\Http\Request;
use Stripe;
use Illuminate\View\View;
class StripePaymentController extends Controller
{
/**
* success response method.
*
* @return \Illuminate\Http\Response
*/
public function stripe(): View
{
return view('stripe');
}
/**
* Write code on Method
*
* @return response()
*/
public function stripeCheckout(Request $request)
{
$stripe = new \Stripe\StripeClient(env('STRIPE_SECRET'));
$redirectUrl = route('stripe.checkout.success').'?session_id={CHECKOUT_SESSION_ID}';
$response = $stripe->checkout->sessions->create([
'success_url' => $redirectUrl,
'customer_email' => 'demo@gmail.com',
'payment_method_types' => ['link', 'card'],
'line_items' => [
[
'price_data' => [
'product_data' => [
'name' => $request->product,
],
'unit_amount' => 100 * $request->price,
'currency' => 'USD',
],
'quantity' => 1
],
],
'mode' => 'payment',
'allow_promotion_codes' => true
]);
return redirect($response['url']);
}
/**
* Write code on Method
*
* @return response()
*/
public function stripeCheckoutSuccess(Request $request)
{
$stripe = new \Stripe\StripeClient(env('STRIPE_SECRET'));
$session = $stripe->checkout->sessions->retrieve($request->session_id);
info($session);
return redirect()->route('stripe.index')
->with('success', 'Payment successful.');
}
}
Step 5: Create Routes
In this step, we will create two routes for get request and another for post request. So, let's add a new route to that file.
routes/web.php
<?php
use Illuminate\Support\Facades\Route;
use App\Http\Controllers\StripePaymentController;
/*
|--------------------------------------------------------------------------
| Web Routes
|--------------------------------------------------------------------------
|
| Here is where you can register web routes for your application. These
| routes are loaded by the RouteServiceProvider within a group which
| contains the "web" middleware group. Now create something great!
|
*/
Route::controller(StripePaymentController::class)->group(function(){
Route::get('stripe', 'stripe')->name('stripe.index');
Route::get('stripe/checkout', 'stripeCheckout')->name('stripe.checkout');
Route::get('stripe/checkout/success', 'stripeCheckoutSuccess')->name('stripe.checkout.success');
});
Step 6: Create Blade File
In the Last step, let's create stripe.blade.php(resources/views/stripe.blade.php) for layout and write code of jquery to get token from stripe here and put the following code:
resources/views/stripe.blade.php
<!DOCTYPE html>
<html>
<head>
<title>Laravel Stripe Checkout Payment Integration Example - ItSolutionStuff.com</title>
<link href="https://cdn.jsdelivr.net/npm/bootstrap@5.0.2/dist/css/bootstrap.min.css" rel="stylesheet" integrity="sha384-EVSTQN3/azprG1Anm3QDgpJLIm9Nao0Yz1ztcQTwFspd3yD65VohhpuuCOmLASjC" crossorigin="anonymous">
</head>
<body>
<div class="container">
<h1>Laravel Stripe Checkout Payment Integration Example - ItSolutionStuff.com</h1>
@if(Session::has('success'))
<div class="alert alert-success">
{{ Session::get('success') }}
@php
Session::forget('success');
@endphp
</div>
@endif
<div class="row">
<div class="col-md-4">
<div class="card" style="width: 18rem;">
<img src="https://dummyimage.com/300x200/000/fff" class="card-img-top" alt="...">
<div class="card-body">
<h5 class="card-title">Silver</h5>
<p class="card-text">Some quick example text to build on the card title and make up the bulk of the card's content.</p>
<a href="{{ route('stripe.checkout', ['price' => 10, 'product' => 'Silver']) }}" class="btn btn-primary">Pay $10</a>
</div>
</div>
</div>
<div class="col-md-4">
<div class="card" style="width: 18rem;">
<img src="https://dummyimage.com/300x200/000/fff" class="card-img-top" alt="...">
<div class="card-body">
<h5 class="card-title">Gold</h5>
<p class="card-text">Some quick example text to build on the card title and make up the bulk of the card's content.</p>
<a href="{{ route('stripe.checkout', ['price' => 100, 'product' => 'Gold']) }}" class="btn btn-primary">Pay $100</a>
</div>
</div>
</div>
<div class="col-md-4">
<div class="card" style="width: 18rem;">
<img src="https://dummyimage.com/300x200/000/fff" class="card-img-top" alt="...">
<div class="card-body">
<h5 class="card-title">Platinum</h5>
<p class="card-text">Some quick example text to build on the card title and make up the bulk of the card's content.</p>
<a href="{{ route('stripe.checkout', ['price' => 1000, 'product' => 'Platinum']) }}" class="btn btn-primary">Pay $1000</a>
</div>
</div>
</div>
</div>
</div>
</body>
</html>
Run Laravel App:
All the required steps have been done, now you have to type the given below command and hit enter to run the Laravel app:
php artisan serve
Now, Go to your web browser, type the given URL, and view the app output:
http://localhost:8000/stripe
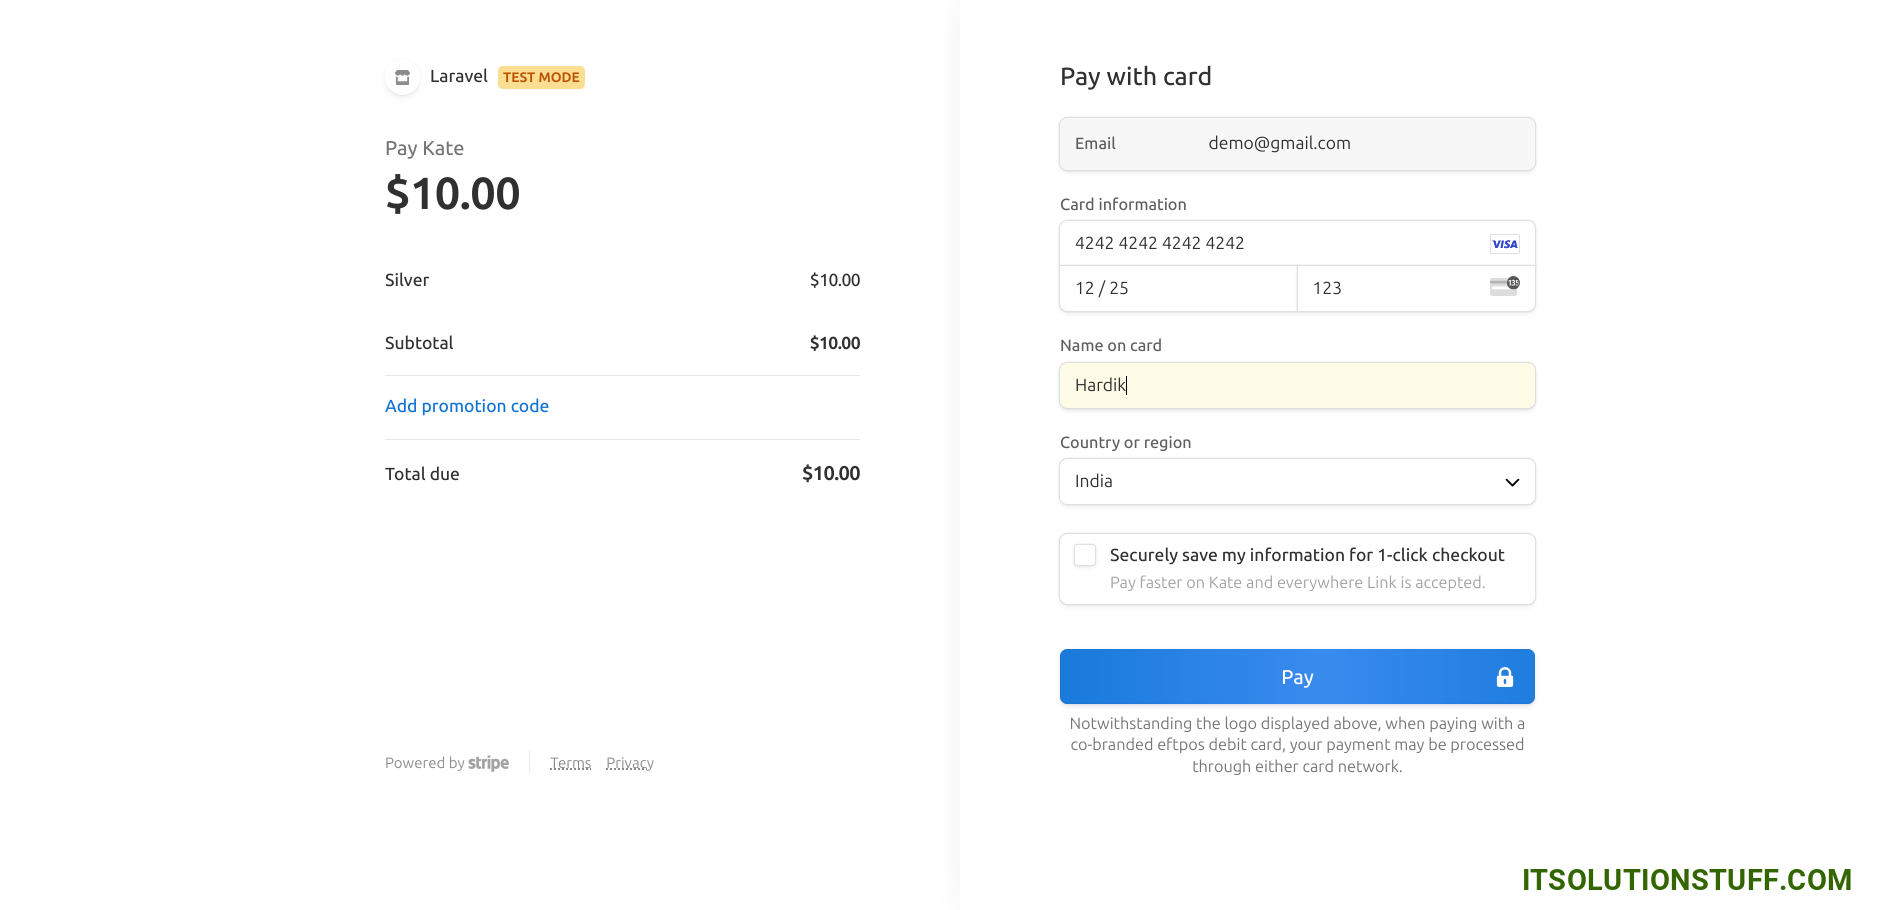
Now you can check with the following card details:
Name: Test
Number: 4242 4242 4242 4242
CSV: 123
Expiration Month: 12
Expiration Year: 2028
I hope it can help you...

