Laravel 5.6 Import Export to Excel and CSV example
In this tutorial, I would like to share with you step by step import excel or csv to store in database and how to export or download excel or csv file from database using maatwebsite package in laravel 5.6 application.
Maatwebsite packages through you can easily get data, also you can group by data, also create more then one sheet etc. so now i show you simple example of items table data, you can download in xls, xlsx and csv formate and also you import data in xls, xlsx and csv formate file.
In this example, you have to just follow few step to implement import and export both function in your project. First see your browser preview will become like this:
Preview:
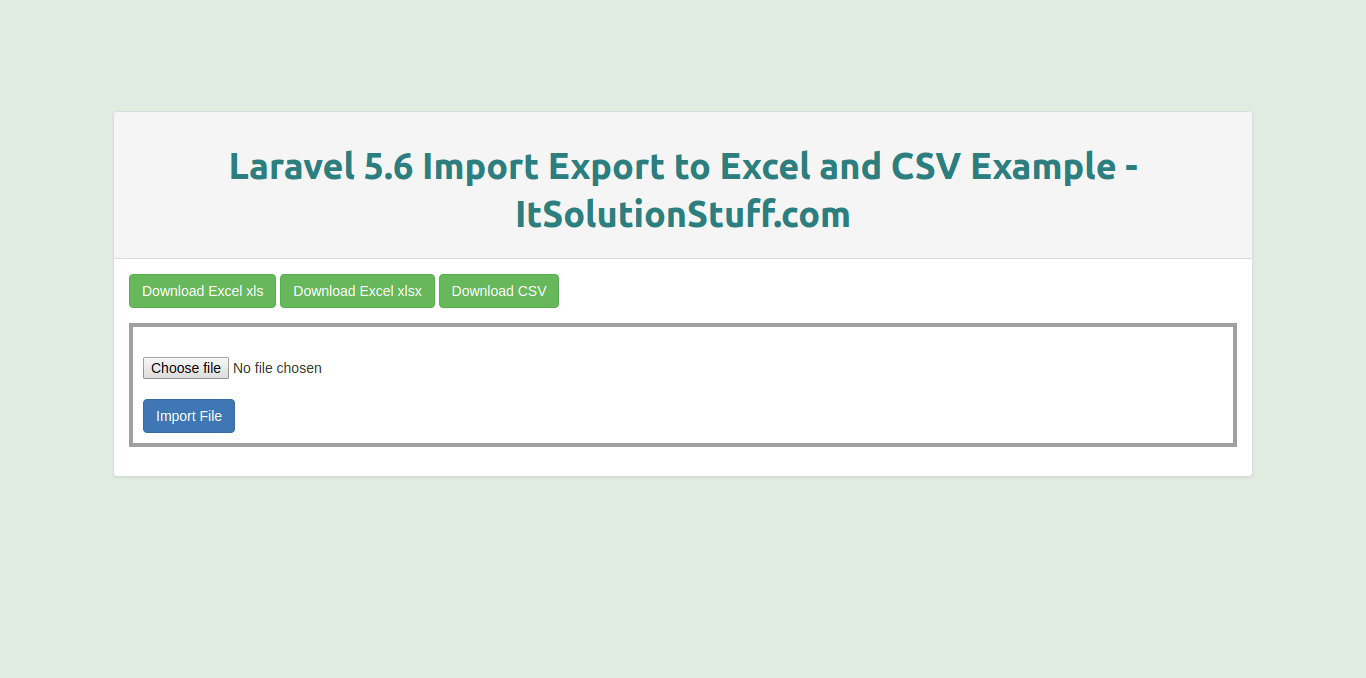
Preview of Import File:
Step 1 : Install Laravel 5.6 Project
first of all, we will install Laravel 5.6 application using bellow command, So open your terminal OR command prompt and run bellow command:
composer create-project --prefer-dist laravel/laravel blog
Step 2: Install Maatwebsite Package
In this step we need to install Maatwebsite package via the Composer package manager, so one your terminal and fire bellow command:
composer require maatwebsite/excel
OR
composer require "maatwebsite/excel":"~2.1.0"
Now open config/app.php file and add service provider and aliase.
config/app.php
'providers' => [
	....
	Maatwebsite\Excel\ExcelServiceProvider::class,
],
'aliases' => [
	....
	'Excel' => Maatwebsite\Excel\Facades\Excel::class,
],
Step 3: Create Item Table and Model
In this step we have to create migration for items table using Laravel 5.6 php artisan command, so first fire bellow command:
php artisan make:migration create_items_table
After this command you will find one file in following path "database/migrations" and you have to put bellow code in your migration file for create items table.
use Illuminate\Support\Facades\Schema;
use Illuminate\Database\Schema\Blueprint;
use Illuminate\Database\Migrations\Migration;


class CreateItemsTable extends Migration
{
    /**
     * Run the migrations.
     *
     * @return void
     */
    public function up()
    {
        Schema::create('items', function (Blueprint $table) {
           $table->increments('id');
           $table->string('title');
           $table->text('description');
           $table->timestamps();
       });
    }


    /**
     * Reverse the migrations.
     *
     * @return void
     */
    public function down()
    {
        Schema::drop("items");
    }
}
After create "items" table you should create Item model for items, so first create file in this path "app/Item.php" and put bellow content in item.php file:
app/Item.php
<?php

namespace App;

use Illuminate\Database\Eloquent\Model;

class Item extends Model
{

    public $fillable = ['title','description'];
}
Step 4: Add Routes
In this step, we need to create route of import export file. so open your "routes/web.php" file and add following route.
routes/web.php
Route::get('importExport', 'MaatwebsiteDemoController@importExport');
Route::get('downloadExcel/{type}', 'MaatwebsiteDemoController@downloadExcel');
Route::post('importExcel', 'MaatwebsiteDemoController@importExcel');
Step 5: Create MaatwebsiteDemoController Controller
In this step, now we should create new controller as MaatwebsiteDemoController in this path "app/Http/Controllers/MaatwebsiteDemoController.php". this controller will manage all impostExport, downloadExcel and importExcel request and return response, so put bellow content in controller file:
app/Http/Controllers/MaatwebsiteDemoController.php
<?php

namespace App\Http\Controllers;

use App\Item;
use DB;
use Excel;
use Illuminate\Http\Request;

class MaatwebsiteDemoController extends Controller
{

    /**
     * Display a listing of the resource.
     *
     * @return \Illuminate\Http\Response
     */
    public function importExport()
    {
        return view('importExport');
    }

    /**
     * Display a listing of the resource.
     *
     * @return \Illuminate\Http\Response
     */
    public function downloadExcel($type)
    {
        $data = Item::get()->toArray();

        return Excel::create('itsolutionstuff_example', function($excel) use ($data) {
            $excel->sheet('mySheet', function($sheet) use ($data)
            {
                $sheet->fromArray($data);
            });
        })->download($type);
    }

    /**
     * Display a listing of the resource.
     *
     * @return \Illuminate\Http\Response
     */
    public function importExcel(Request $request)
    {
        $request->validate([
            'import_file' => 'required'
        ]);

        $path = $request->file('import_file')->getRealPath();
        $data = Excel::load($path)->get();

        if($data->count()){
            foreach ($data as $key => $value) {
                $arr[] = ['title' => $value->title, 'description' => $value->description];
            }

            if(!empty($arr)){
                Item::insert($arr);
            }
        }

        return back()->with('success', 'Insert Record successfully.');
    }
}
Step 6: Create Blade File
In Last step, let's create importExport.blade.php(resources/views/importExport.blade.php) for layout and we will write design code here and put following code:
resources/views/importExport.blade.php
<html lang="en">
<head>
    <title>Laravel 5.6 Import Export to Excel and csv Example - ItSolutionStuff.com</title>
    <link rel="stylesheet" href="https://maxcdn.bootstrapcdn.com/bootstrap/3.3.6/css/bootstrap.min.css" >
</head>
<body>
    <div class="container">
        <div class="panel panel-default">
          <div class="panel-heading">
          <h1>Laravel 5.6 Import Export to Excel and CSV Example - ItSolutionStuff.com</h1>
          </div>
          <div class="panel-body">

            <a href="{{ url('downloadExcel/xls') }}"><button class="btn btn-success">Download Excel xls</button></a>
            <a href="{{ url('downloadExcel/xlsx') }}"><button class="btn btn-success">Download Excel xlsx</button></a>
            <a href="{{ url('downloadExcel/csv') }}"><button class="btn btn-success">Download CSV</button></a>

            <form style="border: 4px solid #a1a1a1;margin-top: 15px;padding: 10px;" action="{{ url('importExcel') }}" class="form-horizontal" method="post" enctype="multipart/form-data">
                @csrf

                @if ($errors->any())
                    <div class="alert alert-danger">
                        <a href="#" class="close" data-dismiss="alert" aria-label="close">×</a>
                        <ul>
                            @foreach ($errors->all() as $error)
                                <li>{{ $error }}</li>
                            @endforeach
                        </ul>
                    </div>
                @endif

                @if (Session::has('success'))
                    <div class="alert alert-success">
                        <a href="#" class="close" data-dismiss="alert" aria-label="close">×</a>
                        <p>{{ Session::get('success') }}</p>
                    </div>
                @endif

                <input type="file" name="import_file" />
                <button class="btn btn-primary">Import File</button>
            </form>

          </div>
        </div>
    </div>
</body>
</html>
Now you can check on your laravel 5.6 application with demo file for testing.
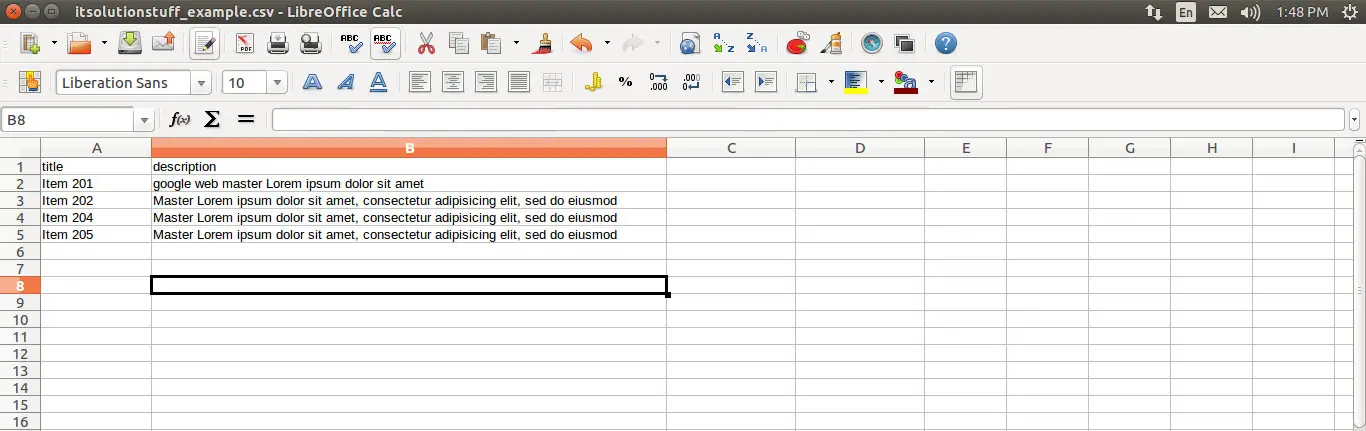
Demo Excel File for Testing :Click Here.
I hope it can help you...

