Laravel 5.6 - Multiple Image Upload Using bootstrap-fileinput
Today, i would like to share with you something amazing and superb way to multiple image uploading using bootstrap-fileinput plugin laravel 5.6 application. you can create image gallery like upload multiple image, zoom image, remove image etc by using bootstrap-fileinput plugin. you can also set front side validation for file.
bootstrap-fileinput is a bootstrap plugin. bootstrap-fileinput provide us to upload multiple images or file using dropzone. bootstrap-fileinput is also use dropzone js for image upload. bootstrap-fileinput is super and amazing plugin.
I also posted many tutorials about image upload or file upload in laravel, you can see bellow are listed, but this one it something awesome.
1) Laravel 5 - Ajax crop image before upload using using croppie plugin
2) Laravel 5 - Image Gallery CRUD example from scratch
3) Ajax Image Upload Example with Validation in PHP Laravel Framework
4) Laravel 5.3 Image Upload with Validation example
5) Laravel 5 - Multiple Images Uploading using dropzone.js example with demo
6) Laravel 5 - Image Upload and Resize Example using Intervention Image Package
7) Laravel 5 File(Image) Upload Example with Validation
As you can see above all links are related to image upload in Laravel application. in this tutorial we will create multiple image using bootstrap-fileinput plugin. So let's follow bellow step. i also created demo, you can check out that too.
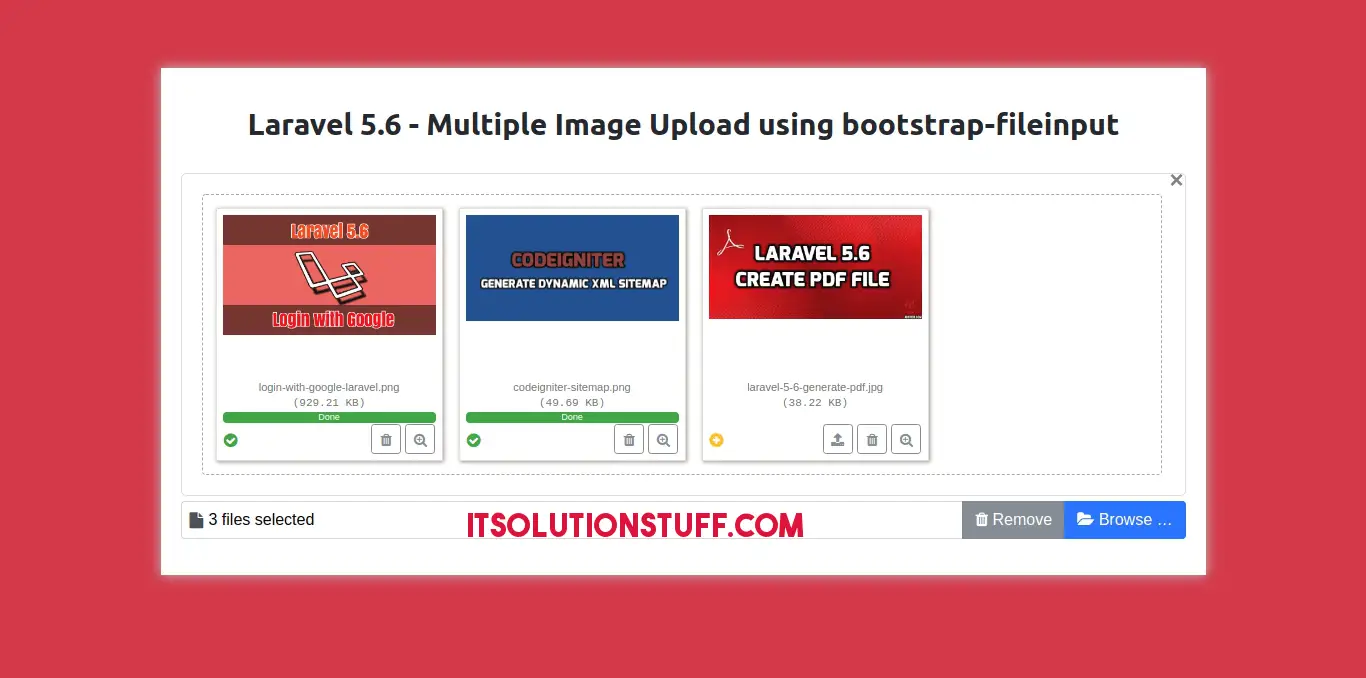
Preview:
Step 1: Create Routes
In this step, we will create web routes. Laravel provide web.php file for write web services route. So, let's add new route on that file.
routes/web.php
Route::get('image-view','ImageController@index');
Route::post('image-view','ImageController@store');
Step 2: Create ImageController File
in next step, now we have create new controller as ImageController and we will write get and post method with image upload login, So let's create a controller:
app/Http/Controllers/ImageController.php
<?php
namespace App\Http\Controllers;
use Illuminate\Http\Request;
class ImageController extends Controller
{
/**
* success response method.
*
* @return \Illuminate\Http\Response
*/
public function index()
{
return view('image-view');
}
/**
* success response method.
*
* @return \Illuminate\Http\Response
*/
public function store(Request $request)
{
$imageName = request()->file->getClientOriginalName();
request()->file->move(public_path('upload'), $imageName);
return response()->json(['uploaded' => '/upload/'.$imageName]);
}
}
Step 2: Create Blade File
in last step, now we have create new image-view.blade.php file here we we will write code for js plugin, so let's create file:
resources/views/image-view.blade.php
<!DOCTYPE html>
<html lang="en">
<head>
<link href="https://maxcdn.bootstrapcdn.com/bootstrap/4.0.0-beta/css/bootstrap.min.css" rel="stylesheet">
<link href="https://cdnjs.cloudflare.com/ajax/libs/bootstrap-fileinput/4.4.7/css/fileinput.css" media="all" rel="stylesheet" type="text/css"/>
<link href="https://cdnjs.cloudflare.com/ajax/libs/font-awesome/4.7.0/css/font-awesome.min.css" media="all" rel="stylesheet" type="text/css"/>
<style type="text/css">
.main-section{
margin:0 auto;
padding: 20px;
margin-top: 100px;
background-color: #fff;
box-shadow: 0px 0px 20px #c1c1c1;
}
.fileinput-remove,
.fileinput-upload{
display: none;
}
</style>
</head>
<body class="bg-danger">
<div class="container">
<div class="row">
<div class="col-lg-8 col-sm-12 col-11 main-section">
<h1 class="text-center text-danger">File Input Example</h1><br>
{!! csrf_field() !!}
<div class="form-group">
<div class="file-loading">
<input id="file-1" type="file" name="file" multiple class="file" data-overwrite-initial="false" data-min-file-count="2">
</div>
</div>
</div>
</div>
</div>
<script src="https://code.jquery.com/jquery-3.2.1.min.js"></script>
<script src="https://cdnjs.cloudflare.com/ajax/libs/bootstrap-fileinput/4.4.7/js/fileinput.js" type="text/javascript"></script>
<script src="https://cdnjs.cloudflare.com/ajax/libs/bootstrap-fileinput/4.4.7/themes/fa/theme.js" type="text/javascript"></script>
<script src="https://cdnjs.cloudflare.com/ajax/libs/popper.js/1.11.0/umd/popper.min.js" type="text/javascript"></script>
<script src="https://maxcdn.bootstrapcdn.com/bootstrap/4.0.0-beta/js/bootstrap.min.js" type="text/javascript"></script>
<script type="text/javascript">
$("#file-1").fileinput({
theme: 'fa',
uploadUrl: "/image-view",
uploadExtraData: function() {
return {
_token: $("input[name='_token']").val(),
};
},
allowedFileExtensions: ['jpg', 'png', 'gif'],
overwriteInitial: false,
maxFileSize:2000,
maxFilesNum: 10,
slugCallback: function (filename) {
return filename.replace('(', '_').replace(']', '_');
}
});
</script>
</body>
</html>
Now at last think,
You must need to create "upload" folder in your public folder.
You can also see demo from bellow button.
I hope it can help you....

