How to Make Custom Middleware in Laravel?
Now, let's see tutorial of laravel middleware example. This article goes in detailed on laravel custom middleware example. We will use how to create custom middleware in laravel. This post will give you simple example of how to use middleware in laravel. Let's see bellow example how to apply middleware in laravel.
Laravel Middleware is used to filter HTTP requests in your web application. One of the basic requirements of any web application is an HTTP requests filter, so we have to make one as well for example make auth middleware. auth middleware always checks if you are going then and then you can access those pages.
In this example, we will create one custom middleware that will allow active users to access pages. we will add is_active column in users table and check which user is active or not. so let's follow the below step by step and make it done for example.
Let's follow below steps:
Step 1: Install Laravel
This step is not required; however, if you have not created the laravel app, then you may go ahead and execute the below command:
composer create-project laravel/laravel example-app
Step 2: Create Middleware
In this step, open terminal and run below command to create custom middleware file, so let's run below command:
php artisan make:middleware IsActive
Now, it's created new IsActive.php file. let's update following code on this file.
app/Http/Middleware/IsActive.php
<?php
namespace App\Http\Middleware;
use Closure;
use Illuminate\Http\Request;
class IsActive
{
/**
* Handle an incoming request.
*
* @param \Illuminate\Http\Request $request
* @param \Closure(\Illuminate\Http\Request): (\Illuminate\Http\Response|\Illuminate\Http\RedirectResponse) $next
* @return \Illuminate\Http\Response|\Illuminate\Http\RedirectResponse
*/
public function handle(Request $request, Closure $next)
{
if (!auth()->user()->is_active) {
return response()->json('Your account is inactive');
}
return $next($request);
}
}
Step 3: Register Middleware
In this file, we need to register middleware on Kernel.php file. we will call is-active of new created middleware. so let's update following file.
app/Http/Kernel.php
<?php
namespace App\Http;
use Illuminate\Foundation\Http\Kernel as HttpKernel;
class Kernel extends HttpKernel
{
....
/**
* The application's route middleware.
*
* These middleware may be assigned to groups or used individually.
*
* @var array
*/
protected $routeMiddleware = [
....
'is-active' => \App\Http\Middleware\IsActive::class,
];
}
Step 4: Use Middleware
In this step, we will create one route and show you how to use middleware in route file. so let's open your route file and update following code:
routes/web.php
<?php
use Illuminate\Support\Facades\Route;
use App\Http\Controllers\RSSFeedController;
/*
|--------------------------------------------------------------------------
| Web Routes
|--------------------------------------------------------------------------
|
| Here is where you can register web routes for your application. These
| routes are loaded by the RouteServiceProvider within a group which
| contains the "web" middleware group. Now create something great!
|
*/
Route::get('/test-user', [App\Http\Controllers\HomeController::class, 'index'])->middleware(['auth', 'is-active']);
Step 5: Create Auth Scaffolding
Here, we will create auth scaffolding so, user can login and check below url. so let's install laravel ui package and generate auth scaffolding.
First you need to install laravel/ui package as like bellow:
composer require laravel/ui
Here, we need to generate auth scaffolding in laravel 9 using laravel ui command. so, let's generate it by bellow command:
php artisan ui bootstrap --auth
Now you need to run npm command, otherwise you can not see better layout of login and register page.
Install NPM:
npm install
Run NPM:
npm run dev
Step 6: Add is_active Column
Here, we will create new migration to add is_active column in users table. so let's create migration and run it.
php artisan make:migration add_is_active_column
Next, simple update below code to migration file.
database/migrations/add_is_active_column.php
<?php
use Illuminate\Database\Migrations\Migration;
use Illuminate\Database\Schema\Blueprint;
use Illuminate\Support\Facades\Schema;
return new class extends Migration
{
/**
* Run the migrations.
*
* @return void
*/
public function up()
{
Schema::table('users', function (Blueprint $table) {
$table->boolean('is_active')->default(0);
});
}
/**
* Reverse the migrations.
*
* @return void
*/
public function down()
{
}
};
Next, we need to run migration using below command:
php artisan migrate
Now, we will add is_active column in fallible array of user model. let's update it.
app/Models/User.php
<?php
namespace App\Models;
use Illuminate\Contracts\Auth\MustVerifyEmail;
use Illuminate\Database\Eloquent\Factories\HasFactory;
use Illuminate\Foundation\Auth\User as Authenticatable;
use Illuminate\Notifications\Notifiable;
use Laravel\Sanctum\HasApiTokens;
class User extends Authenticatable
{
use HasApiTokens, HasFactory, Notifiable;
/**
* The attributes that are mass assignable.
*
* @var array
*/
protected $fillable = [
'name',
'email',
'password',
'is_active'
];
/**
* The attributes that should be hidden for serialization.
*
* @var array
*/
protected $hidden = [
'password',
'remember_token',
];
/**
* The attributes that should be cast.
*
* @var array
*/
protected $casts = [
'email_verified_at' => 'datetime',
];
}
Step 7: Create Seeder
In this step, we will create UserSeeder to generate active and inactive users default. so let's create seeder and create dummy users to check.
php artisan make:seeder UserSeeder
And put bellow code in UserSeeder seeder this way:
database/seeders/UserSeeder.php
<?php
namespace Database\Seeders;
use Illuminate\Database\Console\Seeds\WithoutModelEvents;
use Illuminate\Database\Seeder;
use App\Models\User;
use Illuminate\Support\Facades\Hash;
class UserSeeder extends Seeder
{
/**
* Run the database seeds.
*
* @return void
*/
public function run()
{
User::create([
"name" => "One",
"email" => "one@gmail.com",
"password" => Hash::make("123456"),
"is_active" => 1
]);
User::create([
"name" => "Two",
"email" => "two@gmail.com",
"password" => Hash::make("123456"),
"is_active" => 0
]);
}
}
After this we have to run bellow command for run UserSeeder seeder:
php artisan db:seed --class=UserSeeder
Run Laravel App:
All the required steps have been done, now you have to type the given below command and hit enter to run the Laravel app:
php artisan serve
Now, Go to your web browser, type the given URL and view the app output:
http://localhost:8000/login
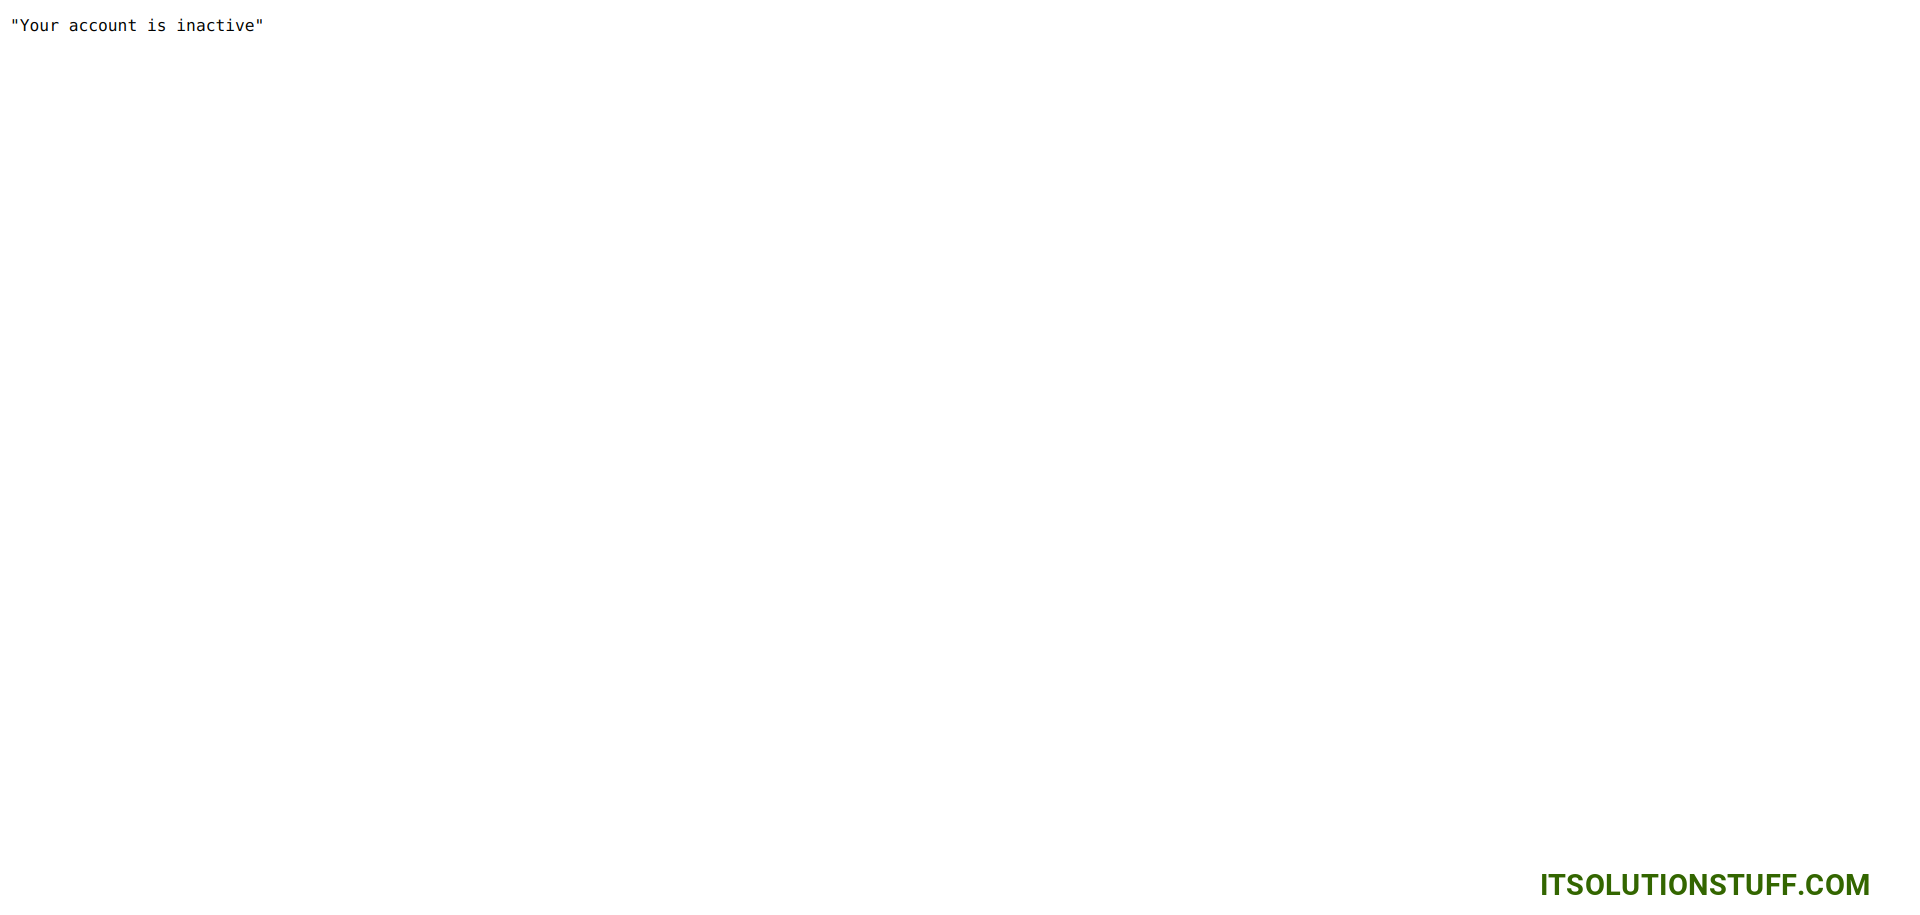
Now you can login with following credentials for InActive User:
Email: two@gmail.com
Password: 123456
After login you have to go on following URL:
http://localhost:8000/test-user
You will find following layout:
I hope it can help you...

